
Designed Menus
Designed Form Menus
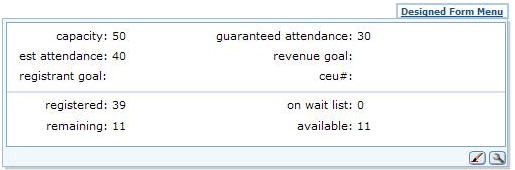
Designed Form Menus display designed Toolkit forms that have been designed with the netFORUM Toolkit and Form Designer. This feature is especially useful as static detail pages in master/detail scenarios. For example, if you are on a profile and would like to show additional detail information about the master record without taking away the real estate of the profile form. Additionally, the designed form menus can also contain shortcut hyperlinks or images without even containing any detail information. They are as flexible as designed forms.
Bottom line: Designed Form Menus are great to show static content or detail information for 1 record only.
Designed List Menus
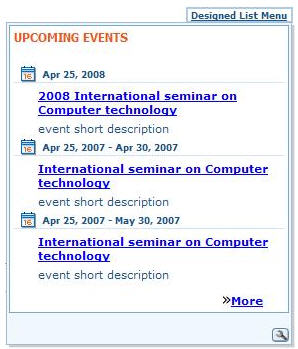
Designed List Menus show iWeb List Controls that have been created with the netFORUM toolkit as Profile Detail components. They take advantage of the new ListControl component in netFORUM 2.0 that can show lists with flexible HTML rendering on the profile forms.
They are especially useful when you would like to show lists of records, which could be either related to a master record (e.g. if used on an event profile to show all of the sessions for that event), or it could be a totally independent list (e.g. a list of events on the events module’s overview page).
Bottom line: Designed List Menus are great to show a list of content with multiple records
Designed List Menus cannot parse values. In other words, you cannot pop up a ListControl and have your {BeginListSQL}{EndListSQL} parse the value of the form that it is on.
Designed Child Form Menu
Designed child form menus are similar to designed list menus except they can parse values. They also display in the same manner as a child form on a profile form, making them familiar to users and consistent with other areas of the system. The child form is less flexible than the list, but also simpler to setup. Lists require some HTML knowledge to format the display. The child form only requires knowledge of SQL as the formatting is done automatically by the child-form rendering engine. For instructions on how to add a designed child form, refer to Designed Child Form Menu.
Instructions
- Choose a type of the menu that you would like to create. It could be either a Designed Form Menu or a Designed List Menu, depending on what kind of information you would like to show.
- Create the menu content first. If you choose to create a Designed Form Menu, create a designed Form first; or if you choose to create a Designed List Menu, create a profile detail component using the ListControl first.
- On your target designed form that should contain the menu, Design the Form and add a new hyperlink control.
- In the hyperlink property field URL / Image Path / Data, specify the properties for your menu.
Properties
- URL[javascript:void(0);] (required)
Specify the URL property for you hyperlink. You have to use javascript:void(0); as the property’s value.
- MENU[form] (required)
Specify which menu type you are using. Available property values are either form or list (see the explanation at the beginning of this document).
- TYPE[iframe] (List Menu ONLY) (optional – default value based on user option)
Specify the HTML element type of your menu. Available property values are either iframe or div. If iframe is used, the menu will render as an IFRAME element and the content will show in a different page contained in the iframe. If div is used, the menu will render as a DIV element and the content will be rendered inside of the DIV element as part of the main page, which can improve performance.
Note: This property is only available for Designed List Menus and will be ignored for Designed Form Menus which always use the value iframe. The default value for this property comes from the user option Render UI menus inline. We strongly recommend not to use this property and leave it based on the user option.
- FORMKEY[00000000-0000-0000-0000-000000000000] (required if MENU=form) OR LISTKEY[00000000-0000-0000-0000-000000000000] (required if MENU=list)
Specify EITHER the key of your designed form (dyn_key) OR the key of your profile detail component (dpd_key) that contains the content of your menu, based on your choice if your menu is a Designed Form Menu or a Designed List Menu.
- KEY[00000000-0000-0000-0000-000000000000] (Form Menu ONLY) (optional)
Specify the key of the record that should show in the menu content form. If omitted and the menu content form used the same façade object as the parent page’s façade object, the same key will be used.
- DIRECTION[RB] (optional – default value=RB)
Specify in which direction the menu should open. Available property values are combinations of R (right), L (left), T (top) and B (bottom). You can specify RB (right-bottom), RT (right-top), LB (left-bottom) or LT (left-top).
- W[0] (optional – default value=0)
Specify a horizontal adjustment (in pixels) for the position where the menu will appear relative to the hyperlink that initiates it. By default, the netFORUM framework calculates the position of the menu based on the position of the initiating hyperlink and the direction of the menu. However, sometimes it might be needed to show the menu a little to the left or a little to the right. Specifying a positive numeric value will display the menu more to the right and specifying a negative numeric value will display the menu more to the left (numeric values are in pixels).
- H[0] (optional – default value=0)
Specify a vertical adjustment (in pixels) for the position where the menu will appear relative to the hyperlink that initiates it. By default, the netFORUM framework calculates the position of the menu based on the position of the initiating hyperlink and the direction of the menu. However, sometimes it might be needed to show the menu a little to the top or a little to the bottom. Specifying a positive numeric value will display the menu more to the bottom and specifying a negative numeric value will display the menu more to the top (numeric values are in pixels).
- DELAY[1000] (optional – default value based on user option)
Specify the delay time that the menu should wait before it disappears (in milliseconds). The value should be a positive numeric value. For example, the value 1000 means 1000 milliseconds which is equal to 1 second. The default value for this property comes from the user option Delay time/speed for the UI menus to disappear. We strongly recommend not to use this property and leave it based on the user option.
IFrame Menu Types
Important note on how to create hyperlinks in the content of IFRAME menu types:
When you create the content of your designed menu, no matter if it is a Designed List Menu or a Designed Form Menu, you have to keep the following in mind:
If your menu displays in an iframe (it can be either based on your choice, based on the user’s selected option or based on the fact that Designed Form Menus always display in iframes), you have to keep in mind that the content of your menu is being displayed on a separate page and not on the main page itself.
Now if you create hyperlinks on your menu content, you have to make the hyperlinks change the URL of the parent page on not the URL of the iframe content itself. To do that, you have to use the following syntax (notice the usage of "parent"):
<a href="javascript:void(0);"
onclick="if (parent != null) parent.location.href = 'SOME_URL'; return false;">
click here…</a>
The command return false; (at the end) is not mandatory but is a good practice to use with hyperlinks that should not navigate away from the current window (in this case the IFRAME - the content of the IFRAME should not change by clicking on the hyperlink). It is basically the same as using the 0 (zero) in the command javascript:void(0); but it does not harm if both are used together as seen in the example above.
Also, if you want to pop-up a modal window from the parent page, you can use the following syntax:
<a href="javascript:void(0);"
onclick="if (parent != null) parent.OpenNewWindow('SOME_URL'); return false;">
click here…</a>
The same applies for using any javascript command that should be executed on the parent page, but use with caution.