Financial Statement Format Builder Form
The Financial Statement Format Builder form displays when you click Add Financial Statement Format or a Financial Statement Format Name in the Format Name column on the Financial Statement Formats for Reports Form.
Use this form to add and update the financial statement formats for financial statement reports.
Note: There are requirements for financial statement formats when running the Statement of Activities and any Statement of Revenues and Expenditures report. To see the requirements, go to Financial Statement Format Requirements.
Statement Format Details
Statement Type: Select a Statement Type for a new Financial Statement Format from the drop-down list. The Statement Type displays for an existing Financial Statement Format. It is not possible to change the Statement Type for a Financial Statement Format after a Statement Format Hierarchy Section has been created for the Financial Statement Format.
The statement types are:
- S/P – Statement of Financial Position
- S/A – Statement of Activities
- B/S – Balance Sheet
- R/E – Statement of Revenues and Expenditures
- C/F – Statement of Cash Flows
Format Name: Enter a unique format name for the Financial Statement Format.
Statement Title: Optionally, enter a statement title for the report header.
Description: Optionally, enter a description for the Financial Statement Format.
Statement Format Hierarchy
Add Section: For a new Financial Statement Format, the Add Section button becomes available when a Statement Type is selected. The Add Section button is already available for an existing Financial Statement Format. It is not possible to change the Statement Type for a Financial Statement Format after a Statement Format Hierarchy Section has been created for the Financial Statement Format.
Delete Section: Click the red x to delete a section from the Statement Format Hierarchy.
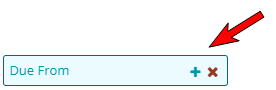
- Add Subsection: Click the green + to add a subsection to a Statement Format Hierarchy section. Up to 2 levels of subsections can be added to each section.
- Delete Subsection: Click the red x to delete a subsection from a Statement Format Hierarchy section or subsection.
Section Details: Click a section or subsection in the Statement Format Hierarchy to display the details for that section or subsection in the Section Details.
- Section Title: Displays the section or subsection title. Click in the box to edit the section or subsection title.
- Section Type: Select a section type.
- Assign Accounts: Use the Assign Accounts section type to assign specific GL accounts to the statement format hierarchy.
- Total: Use the Total section type to produce the sum of previously created Assign Accounts section types.
- Position On Page: Select a position on the page for the statement format.
- Left Justify: Select Left Justify to align financial statement information along the left margin of the financial statement format.
- Center: Select Center to position financial statement information in the center of the financial statement format.
- Account Category: The Statement Type selected determines the available account categories. Select an account category for the financial statement format that best fits the financial statement section.
Statement of Financial Position
Asset
Liability
Liability and Net Asset
- Net Asset
-
Statement of Activities
-
Begin Net Asset
- Changes Net Asset
- Expense
-
Revenue
-
-
Balance Sheet
-
Asset
-
Fund Balance
-
Liability
-
Liability and Fund Balance
-
-
Statement of Revenues and Expenditures
-
Changes Fund Balance
-
Expense
-
Fund Balance
-
Revenue
-
-
Statement of Cash Flow
-
Cash
- Financing
-
Investing
-
Operating
-
- Total Underline: Select an underline style for financial statement totals.
- Single: Select for a single line under the total amount.
- Double: Select for a double line under the total amount.
- None: Select for no line under the total amount.
Assign Accounts: Assign Accounts displays when selecting Assign Accounts under Section Type.
Segment Substitution in Report Output: Use the following for segment substitution when setting up statement formats.
- GL Account Code: Select the general ledger account code to be assigned.
- Segment selected when running report: When running report, select the Print Detail check box for the selected accounts and choose to print either general ledger accounts or any other segment. Then substitute Programs on the Options tab and select the general ledger account code on the Contents tab.
Search Accounts: Enter a sequence of characters to filter the list displayed in the Assign Accounts table. For example, entering CSH will display only accounts types with a type of CSH.
List Records: Select how many items per page to display using the drop-down list. You can view items in the table in increments of 10, 20, 50, or 100.
Assign Accounts Table: The Assign Accounts table lists the GL account codes available for Financial Statement formats.
- Select: Click to select a GL account code in the Financial Statement format. Clicking Select also checks the box in the Display In Report Output column. Click the Select check box located in the title bar of the Assign Accounts table to select all GL account codes in the Assign Accounts table. Clicking also checks all the boxes in the Display In Report Output column.
- Code: Lists the GL account code.
- Title: Lists the GL account title.
- Type: Lists the GL account type.
- Display in Report Output: Click to select a GL account code to display in the report output. Clicking also checks the Select box in the Select column. Click the check box located in the title bar of the Assign Accounts table to select all GL account codes in the Assign Accounts table. Clicking also checks all the boxes in the Select column.
Section Totals: Section Totals displays when selecting Section Totals under Section Type.
Search Section Totals: Enter a sequence of characters to filter the list displayed in the Section Totals table. For example, entering From will display only section totals containing the word From.
Section Totals Table: The Section Totals table lists the statement format sections available for totals.
- Select: Click to select a statement format section. Click the Select check box located in the title bar of the Section Totals table to select all statement format sections in the Section Totals table.
- Section Totals: Lists all of the available statement format section available for totals in the system.
Buttons
Cancel: Click this button to clear the current financial statement format and return to the Financial Statement Formats for Reports Form.
Save & New / Save / Save & Close - Click this button to save the financial statement format. There are three variations of this button's functionality:
- Save & New - Saves the current financial statement format and returns to the empty form.
- Save - Saves the current financial statement format but leaves it on the screen for further edits.
- Save & Close - Saves the current financial statement format and closes the form, returning to the Financial Statement Formats for Reports Form.
Clicking the button performs the save version described by the button label. To use a different save functionality, click the up arrow on the right of the button; a menu appears with the other two options.