Import
Access this feature from the main menu using Operations>General Ledger - Import.
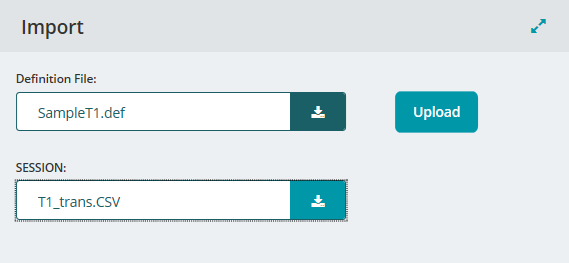
Use this form to select the definition file (*.DEF) and associated data files - fixed width or comma separated variable (*.TXT or *.CSV) to be imported. Definition files map to data files to be imported, while data files contain the actual data being imported. All existing MIP Fund Accounting rules for the import process still apply and it's not limited to what's only available in MIP Cloud, you can import all Accounting information that is available in MIP Fund Accounting.
Once the import process is complete, a notification displays. If there were errors, the Import Error Log is available to view or download. The Download button automatically downloads the file to the browser. For each file that has errors, there will be one Error File saved for each Data Type listed in the Import Error Log.
Note: Files are imported locally through a mapped drive using the \\TS Client\<drive letter> directory structure. For specific instructions on how to import a file, see article 4136 in the Knowledgebase. See MIP Fund Accounting Nonprofit Online help topic in MIP Fund Accounting.
Troubleshooting
- During the import process, if one row in your file contains an error, the import will not fail; instead the system will create an error exception file (.CSV or .TXT). Prior to the import error log displaying, the error exception form opens. You can accept the default name or enter a unique one for the exception file and where it will be saved. After correcting the errors, you can import this file. For more information about using the error exception file, see Error Exception File help topic in MIP Fund Accounting.
To modify one of the master *.DEF or sample *.DEF files provided, copy the file before making modifications. It is very important to rename the files because all files are replaced during an upgrade of the system!
Definition File: Click Select File to navigate the drive and folder for the location of the *.DEF file. The most recently opened file folder displays. Due to security rules on the internet browser which prevents a program from taking information automatically, you will have to manually select and add each file.
Upload: Once you have selected all of the data file types determined in the definition file, this button will be available. Click it to begin the import process which uploads your information into the system. Once clicked, the import process can be quite lengthy for large data files, an activity indicator or spinner may display.
Data File Type: Click Select File to navigate to the drive and folder for the location of the data file type - fixed width or comma separated variable (*.TXT or *.CSV). Each Definition File has unique Data Files that are required. Each Data File will be added individually and the number of Data Files necessary are determined in the Definition File.