Using Centralized Order Entry (COE) to Enter an Order
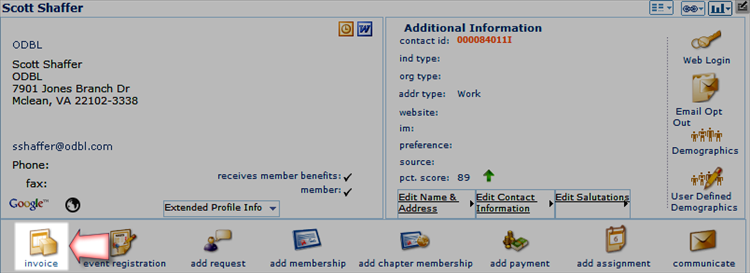
The Centralized Order Entry (COE) form can be accessed from most any place you can purchase an item in iWeb. For example, opening an individual profile page and clicking the Invoice icon will launch the COE form.
|
|
Invoice Icon Highlighted on an Individual Profile Page
|
To use the COE for order entry, complete the following steps:
- Access the COE form from NetForum.
For purposes of this example, the COE will be accessed by clicking the Invoice icon on an individual profile page.
Enter Customer Information
Once the COE form opens, you will notice that some of the information may be prepopulated. The information that is prepopulated is based on where, in NetForum, you accessed the COE. In this case, since the COE was accessed from an individual profile, much of the individual information is prepopulated.

COE Form Accessed From Individual Profile - If the customer information was not prepopulated, you must use the various drop-down menus to enter the appropriate Bill To information, Ship To information, and communication preferences for this order.
- If applicable, enter the source and media codes for this purchase.
If a discount product is associated with the selected source code, the discount will be applied to the products being ordered in the COE form. Source codes can be associated with discounts from the Discount Product Profile, in the discount amounts child form.
You can enter the first few characters of each code in their respective fields (one at a time) and use the search
 icon to locate the desired code.
If you entered the wrong source code, or just wish to remove it from this order, click the delete
 icon next to the source code field.
If you would like to add a new media code for this purchase, click the add
 icon next to the media code field.
Enter the Actions for the Order
The Actions section of the COE pertains to what is being purchased. Here you will decide on the merchandise, donations, etc. that will be bought.
- Mouse over the Select Product drop-down menu to expand the Product Selector.
The Product Selector lists all of the various product types available for purchase.
- Click the hyperlinked name of the product category you wish to purchase.
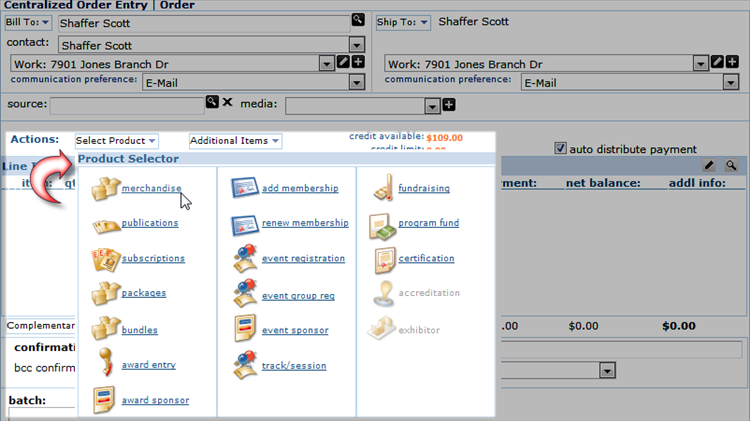 COE Product Selector Expanded
Clicking the name of the product category will launch the Centralized Order Entry - Merchandise | Add Products pop-up window.
- Expand the product drop-down to display a list of the product types for the merchandise category you chose.
The default selection for the product drop-down menu is All which will allow you to search all of the products of the merchandise category you chose.
Enter the search term for the product you are purchasing and click the search icon.
You can also enter the % (percent) sign as a wild card to search all of the products of the type you selected in the product drop-down menu.
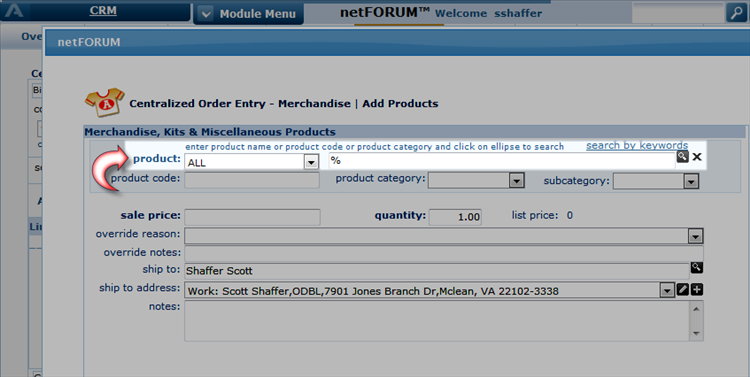
COE Product Search Fields Completed Using the Wildcard Character to Search All Products After you click the search icon, the List - Price pop-up window will display showing the listing of all the products that met your search criteria.
- Scroll through the list of search results and click on the product you wish to purchase.
This will refresh the Centralized Order Entry - Merchandise | Add Products pop-up window and display the details of the selected product.
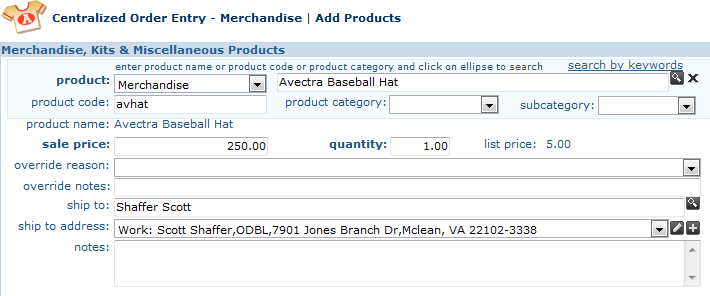
Product Details Displayed for the Selected Product You have the ability to override the sale price that was set for the item. If you decide to override the price, you will be required to use the override reason drop-down menu to select the reason for the price override. In addition, you may wish to enter a short description of precisely why it was overridden in the override notes field. For shippable products, you may also change the ship to customer and the ship to address for that particular product, if you wish to send to product to a customer other than the bill to customer.
- If you would like to add another product to this order, click the Save & Add Another button.
- If this is the last product you will be adding to this order, click the Save & Finish button.
After clicking the Save & Finish button, the Centralized Order Entry | Order form will update to show the products purchased, the total amount, and enable the payment section of the form.
Setting Payment Options
Once you have the products selected, you are ready to set the payment information for the order.
Note: With the UseSubscriberForSubscriptionPricing system option enabled, only price attributes for which the customer is eligible will appear as options. The default setting for this system option is disabled.
To set payment options, use the following steps:
- If you would like to send an order confirmation to the purchaser, select one of the options in the confirmation section of the page.
- Expand the batch drop-down menu and select the batch the will be used to process the payment for this order.
- If there is a purchase order number for this order, enter those details in the po number field.
- Expand the type drop-down menu and select the transaction type for this order.
- The transaction date field will default to the date that corresponds to the batch you selected earlier.
- The payment field deals specifically with the credit card vault and will be discussed in the next section.
- Expand the payment method drop-down menu and choose the method of payment to be used for this order.
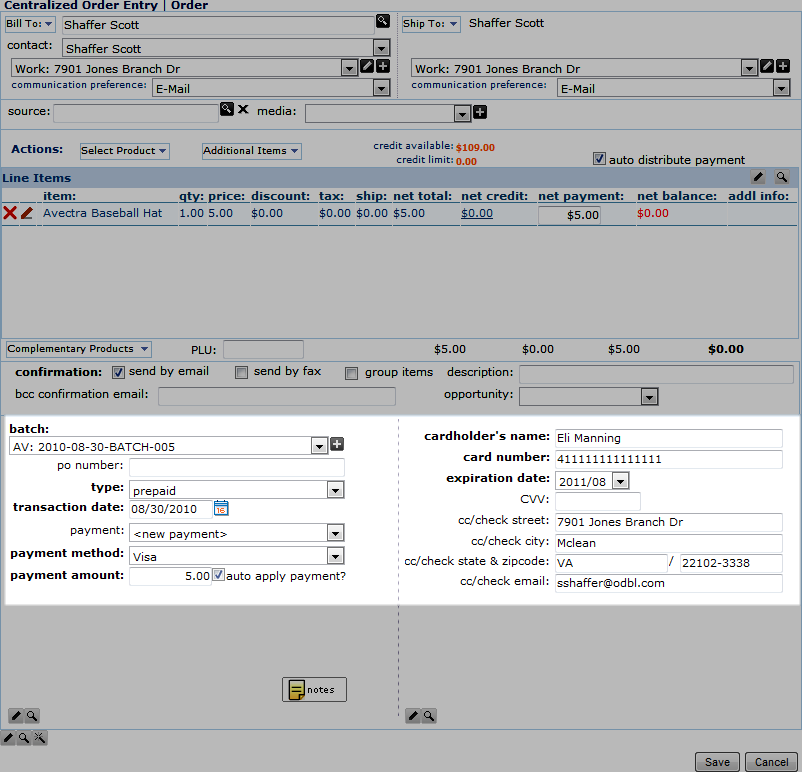
Payment Section of COE Form Highlighted Based on the payment method you choose, the right panel of the payment section of the COE will refresh and display the fields necessary for that payment method.
- Click the Save button to complete the order.
Editing an Order
There are several ways to edit elements of an order:
- Typing - most fields can be edited by simply typing in the changes and overwriting the original value in that field.
- Edit icon - certain fields have an edit
 icon available that will open that field up for editing.
- Add New icon - certain fields have an add
 icon to allow you to add a new value to the database for use on the COE form as well as other forms.