Order
- Installment Billing
- The process of sending invoices for partial payments for a product to a customer over a period of time.
There are three types of Orders:
- Installment Billing
- This is most often used for Membership, Fundraising pledges and Exhibit invoicing.
- Installments are invoiced at the time of each installment
- Fulfillment
- This is typically used for Products and Wait Listed Events.
- Fulfillment Orders are invoiced at the time of fulfillment where the revenue is not recognized until the product is shipped or the individual is added to the event.
- Installment Payment
- One invoice is created for the full amount of the order at the time the order is placed and the A/R is booked up front
- Payment on that total order amount is expected at each installment interval.
Note: The RecognizeRevenueDuringFulfillment system option, determines whether an order or an invoice will be created when a customer purchases a shippable product or wait-listed event.
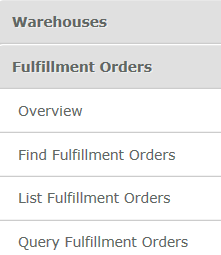
Fulfillment Orders are accessed in the Inventory module by clicking on the Fulfillment Orders tab and then using one of the available means to locate the desired order.
|
|
Fulfillment Orders Group Item in Inventory Module
|
Installment Billing Orders can be accessed from the Installment Billing tab in the Accounting module.

|
|
Installment Billing Group Item in Accounting Module
|
Note: The Generate Installment group item link gives the ability to create Installment Order invoices in bulk.
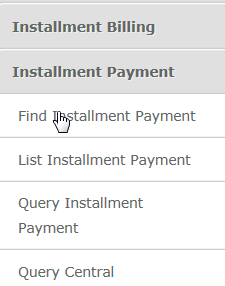
Installment Payment Orders can be accessed by clicking on the module items icon located in the upper-right of the Accounting module. After expanding the Accounting module items, click the Installment Payment option and then choose the method you wish to use to view Installment Payment Orders.
|
| Installment Payment Options in Accounting Module |
Adding Records
Most Orders are added through Centralized Order Entry.
To allow Installment Billing you must select the allow installments check box when adding a Membership Package and an Exhibit Show. You must then select installment as the Payment Type in the type drop-down list when placing your order through Centralized Order Entry.
When you place an order for a Fundraising Pledge through Centralized Order Entry, the Installment Payment Type is automatically added as a Payment Type to type drop-down list.
Creating an Order for a Shippable Product or Wait-Listed Event
If the RecognizeRevenueDuringFulfillment system option is selected, the following scenario is true:
- Orders (and Order Details) are created for any Shippable Products or Wait-Listed Event Registrations.
- Invoices (and Invoice Details) are created for any Non-Shippable Products or Non-Wait-Listed Event Registrations.
If the customer is paying for the purchase using a credit card, the credit card will be authorized for the full amount, but only charged for the invoiced amount. If another Payment Type is used, netFORUM will apply the payment to the amount being invoiced. If the payment amount is greater than the invoice amount, the system will create a credit for the overpayment with a credit type of orderpayment. That orderpayment is linked to that order. If you try to apply the credit to another invoice, you will receive a warning message that the credit is linked to another order.
Finding Records
There are multiple ways to locate a record using the Find page (for detailed methods on how to locate records, see the Find page). The Find functionality is universal throughout NetForum. The results will display in a List page, which is also universal throughout NetForum.
The Order_Installment information is stored in the database by the "columns" (fields) you selected when processing the order in Centralized Order Entry. Only a pre-defined set of columns pertaining to Order_Installment will be available to you on the Find - Invoice page.
- The more refined you make your search criteria, the narrower the result
- A search for all records with a last name starting with a "T" will produce more results than a search of last names starting with "Tay".
- A Multiple Criteria search
- A search for all records with a last name starting with a "T" will produce more results than a search of last names starting with a "T" with a specific organization name.
Find vs. Query
The Find page is setup with a pre-defined set of columns (fields) versus a Query which allows you to select from ANY column in the search Table.
There are three profile pages relating to Order:
- Order - Installment
- Order - Payment
- Order - Fulfillment
To go to an Order - Profile:
- Go to the Accounting module.
- Click (or hover over) the Installment Billing group item.
- Select the Find Installment group item link. The Find_- Order_Installment page displays.
- On the Find - Order_Installment page, enter search criteria to find the Order Profile record and click Go. The List - Order_Installment Billing page displays.
- On the The List - Order_Installment Billing page, click the goto arrow
 to the left of the record you wish to view. The Order - Profile page displays.
In the example below, the search will be on all installments with a term of one year.
|
|
Find - Order_Installment_Billing page
|
Managing Records
Order Profile
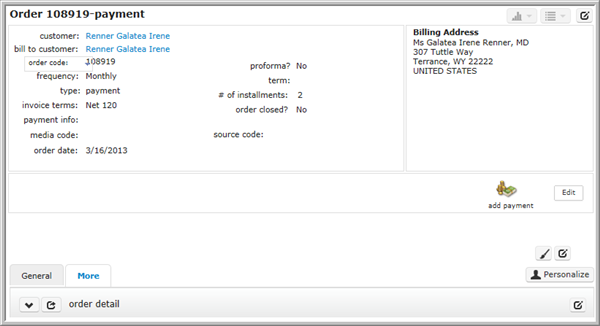
The title of the Order Profile is identified by the Order Number and Type of order (Fulfillment or Installment).
Differing types of order profile pages share the same fields with the exception of the installment information and which icons display in the Actions Bar.
|
| Order Profile page |
The Order Profile includes:
- (Invoice) Frequency (monthly, quarterly, etc)
- (Invoice) Terms (net-30, upon receipt, etc.)
- Number Of Installments
Actions Bar
The Actions Bar on the Order - Installment Profile includes the generate next installment and adjust installment
 icons. On the Order - Fulfillment Profile, the invoice order icon, which is the identical image as the generate next installment icon, replaces these two icons and is used merely to generate the next invoice.
The Actions Bar on the Order - Installment - Payment profile includes the adjust installment, void installment adjustment![]() , and the Add Payment
, and the Add Payment![]() button .
button .
The Add Payment![]() button is now available on all order profile pages. (This option is available on orders that have not yet been fully paid.)
button is now available on all order profile pages. (This option is available on orders that have not yet been fully paid.)
Editing Data
The Edit - Order window for both profile pages gives you the ability to add or edit customer and payment information using the Add/Edit Drop-down feature  , as well as any notes you entered when the order was created. The windows are identical with one significant difference. The auto-pay installments check box displays on the Order - Installment Profile, which gives you the ability to add or change your customer's credit card number and/or Payment Method and arranges for the payment to made automatically. The invoice and order information will still display in the same child forms.
|
| COMPLETED Edit Order window with the Add - Customer Payment Info window |
Voiding an Installment Invoice
When you void an installment invoice, you are voiding the invoice not the order. The voided invoice is marked for deletion and a new schedule is created. When the next installment is generated, there will be two invoices. The canceled one and the current one.
The procedures are the same as canceling any other invoice.
Voiding an Installment Order or Installment Schedule
To void an order or installment schedule, click on the void order or void installment schedule icon that appears on the Order Profile Action Bar as seen below.

|
|
Use the void order or installment schedule icons on the action bar to void an entire order or the installment schedule if the order has not yet been invoiced.
|
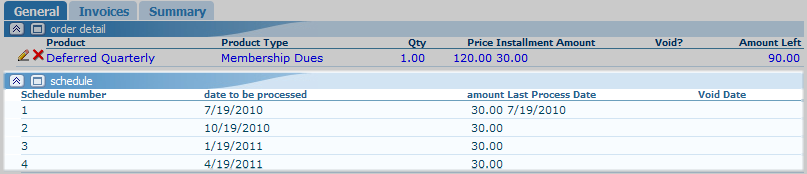
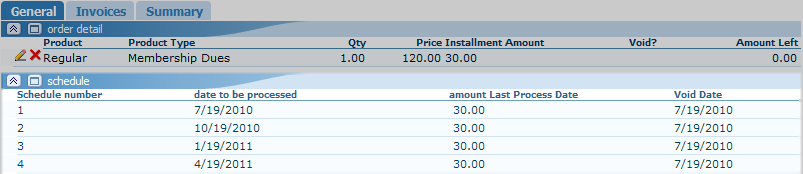
Orders or installment billing can only be voided if invoices have not been generated. Meaning, the merchandise for the order has not been delivered, the event has not been attended, and so forth. Only open orders that have not yet been invoiced may be voided. In the case of a membership that has been set-up for installment billing, only those installments that have not been invoiced may be voided as seen in the example below.
|
| Sample installment billing for membership. Installment one has been invoiced leaving the remaining installments as open orders (and voidable). |
Note that the first installment in the schedule has been invoiced, leaving the remaining installments as open orders. This means that when you click the void installment schedule icon on the Actions Bar, only installments 2, 3, and 4 are able to be voided. (This also means that because one installment has been invoiced, the entire order itself is unable to be voided as well and the void order icon will be dimmed out).
|
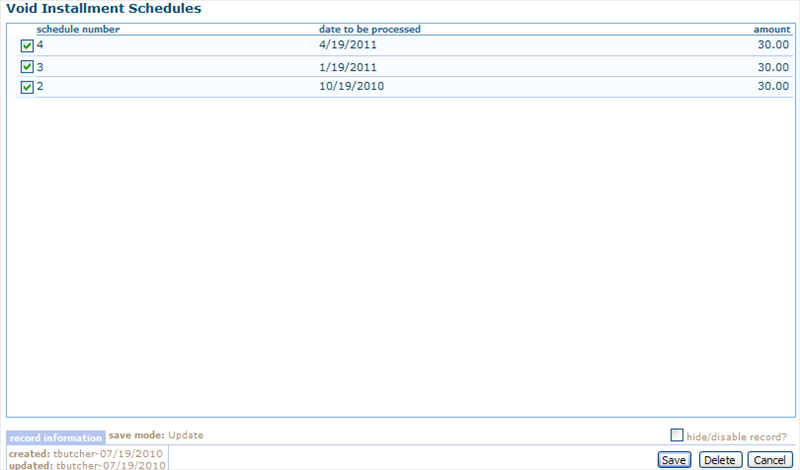
| Installments 2, 3, and 4 are able to be voided since they are still open orders. |
Notice in the image above that, as noted, installments 2, 3, and 4 are still able to be voided in this membership because they are still open orders and have not yet been invoiced. When you select their checkboxes and click the Save button, the schedule childform on the Order/Installment Billing profile will also note that the final 3 installments (in this case) have been voided.
|
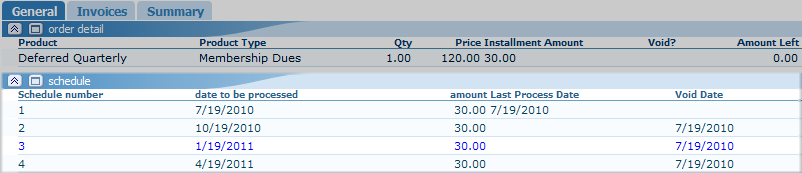
| Installments 2, 3, and 4 are voided on the schedule childform once saved |
In the sample above, the first installment for the order was invoiced immediately. This means that you would also have to void the generated invoice(s) first to then be able to void the order if the membership dates were activated immediately. If, however, you create an order without any installments generated and then void all open installment dates before the membership is activated, the membership will also cancel automatically for you since the entirety of the installment billing was canceled before invoicing as seen in the sample schedule child form seen below on the final example.
|
| All installments have been voided using proforma installment billing |
The individual who purchased this membership will have no active membership dates because it will be as if the schedule never existed. This is also true for event registrations. The registration record will be removed.
The Order - Installment Profile
Generating the Next Installment
This functionality is for generating the next installment and invoice for a specific order. The date of the next installment is typically, but does not have to be, done on the date of the next scheduled installment.
To Generate the Next Installment:
- Go to the Order - Installment Profile.
- Click the generate next installment icon in the Actions Bar. The Generate Next Installment window displays.
- In the Generate Next Installment window, select a batch and transaction date (this will default to the next scheduled installment date).
- Click the create next installment button.
|
| COMPLETED Generate Next Installment window |
- A Windows Internet Explorer warning window displays asking are you sure?. If yes, click OK. The installment will be generated.
|
| Windows Internet Explorer warning window |
The date the next installment was generated will display in the schedule child form, in the Last Process Date column of next record on the schedule.
|
| The next record on the schedule in the schedule child form |
Click the Invoices tab to view the new invoice line item information. The invoice header follows the standard netFORUM convention of using the same number followed by a counter (56772-2), which will typically follow the schedule number.
_Tab.gif)
|
| Order Invoice information |
Adjusting the Installment
The adjust installment icon on the Order - Installment Profile page gives you the ability to adjust the:
-
- Frequency of the Installments - for example, change monthly installment billing to quarterly installment billing.
- Number of Installments
- Scheduled Dates of the Remaining Installments
- Amount of the Remaining Installments
Note: The latter two can be done manually, without adjusting the frequency and the number of installments, by highlighting the value in their respective fields and entering a new value. The amounts must equal the remaining balance or an error will be thrown. This functionality is also available for signed and pending signed pledges.
In the Adjust Installment window, the following will default to the current status of the installment:
-
- order code
- num invoices to date
- last bill date
- balance
The last bill date will default to the last installment that was invoiced, not the next generated if you created that installment prior to the scheduled date.
You are changing a customer's installments from four (4) to five (5) and changing the invoicing frequency from monthly to quarterly.
To Adjust the Installment:
- Go to the Order - Installment Profile.
- Click the adjust installment icon in the Actions Bar. The Adjust Installments window displays.
|
| The Adjust Installment window with current installment information |
- In the top portion of the Adjust Installments window, you can select a new frequency and edit the number of installments.
Note: If you edit the number of installments, the new value represents the number of REMAINING installments, not the total number installments in that order.
- After you select the new values, click the recalculate button.
- The application recalculates the schedule dates, amount, and balance due and displays it in the lower section of the window. The installments that have already been generated or invoiced are deactivated.
|
|
Adjusted values on the Adjust Installment window
|
- If the installment information is accurate, click Save. If you would need to edit individual line items, manually adjust the schedule date and/or amount and click Save.
The adjusted installment information displays in the summary child form on the Order - Installment Profile. Also, the frequency and # of installments fields will automatically flip to the new values in the Profile Information Panel.
The Order - Fulfillment Profile
Invoice Order
This is typically used for large or multiple orders for a single customer where the invoicing will be done in installments. This is often referred to as "converting" an order to an invoice.
This functionality gives you the ability to invoice the full or a partial amount of the remaining quantity.
Note: The Order - Fulfillment Profile is available in the Inventory module.
To Convert an Order to an Invoice:
- On the Order - Fulfillment Profile, click the Invoice Order icon. The Invoice Order window displays.
- In the Invoice Order window, select (or Add
 ) a batch.
- The Invoice Order window displays the product detail information as well as:
- The (original) quantity
- The quantity to invoice (the quantity remaining to invoice)
- The quantity invoiced (the quantity already invoiced in this order)
- In the screen shot below, the original order was invoiced for a quantity of 25 of the 100 products, leaving 75 remaining in the order.
|
|
The Invoice Order window after an initial invoice has been created for a partial amount
|
- Highlight the value in the quantity to invoice field and enter the quantity you want to invoice (this is the ONLY editable field in this window).
|
| COMPLETED Invoice Order window for another partial invoice |
- Only a partial amount (25) again was invoiced from this order instead of the remaining 75, leaving a total quantity of 50 remaining.
- Click Save. The screen will refresh and the invoice information will be processed.
The invoice header follows the standard netFORUM convention of using the same number followed by a counter (56773-1), which will typically follow the schedule number. The information displays on the Invoice Profile and in the invoices child forms on the Individual and Organization Profiles as well as the Order - Fulfillment Profile.
|
|
invoices child form on the Order - Fulfillment Profile
|
Generating Installments
This functionality gives you the ability to create multiple invoices for Installment Orders instead of individually.
This is typically used on your association's installment schedule, for example, quarterly, monthly, or annually, and is a useful tool for invoicing Memberships or Renewals.
In addition to the method mentioned below, you can also navigate to the Add - Installment Billing page from the left navigation panel or the List - Order _ Installment Billing page by clicking the Add Link .gif) in the List Page Action Links in the upper right corner of the page.
in the List Page Action Links in the upper right corner of the page.
- Go to the Accounting module.
- In the Scheduled Processes group item, select the Generate Installments group item link. The Order / Installment Generation page displays.
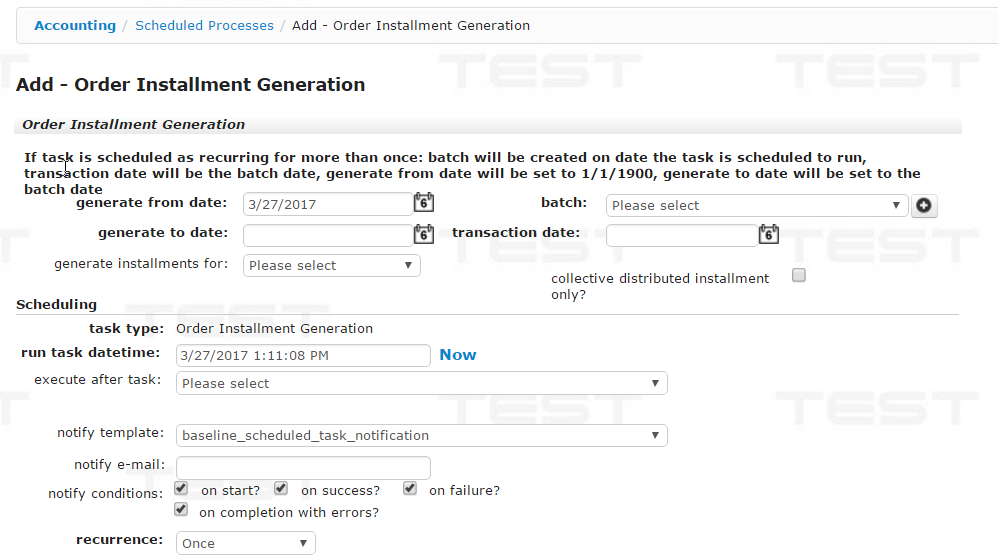
Generate Installments
- Select a date range (generate from date and generate to date) for which the installments should be generated. A list of the installments displays.
- Select the batch.
- When you select a batch, the transaction date field will automatically populate with the date of the batch date.
- In the generate installments for: drop-down select which orders installments will be generated for based upon the auto-pay checkbox when adding a payment: All Orders, Auto Pay Orders Only, or Non Auto Pay Orders Only.
- With the generate installment functionality, you may now schedule when your installments will be generated. To do so, select the schedule at a later time checkbox. You may then choose a start date and start time that the installment billing process will be completed. If you do not choose a future date and time, the installment billing will be generated exactly 3 minutes in the future from when you click the schedule generate installments button.
- notify e-mail: Enter the email address of the staff person to notify when the process is complete.
- correspondence template: You may select a correspondence template to use to notify when the process is complete as well.
- recurrence: To generate the installments as a recurring task, select an option from the drop-down list. The default value is Once.
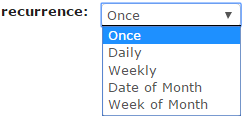
The recurrence has the following options:
- Once: This is the default value. The installments are generated as a single, non-recurring task.
- Daily: Schedule a recurring task to occur every n days to generate installments. Enter the interval (in days) to use for the recurring tasks, and optionally specify an end date and time for the recurring task.
- Weekly: Schedule a recurring task to occur every n weeks on a specific day. Enter the interval (in weeks), specify a day of the week, and optionally specify an end date and time for the recurring task
- Date of Month: Schedule a recurring task to occur on a specific days of specific months. You can use the shift-click and ctrl-click to select multiple days and months. Optionally, specify an end date and time for the recurring task.
- Week of Month: Schedule a recurring task to occur during specific weeks, days and months. You can use the shift-click and ctrl-click to select multiple weeks, days, and months. Optionally, specify an end date and time for the recurring task.
- If you would like to preview the generated report (OPTIONAL), click the preview installments button. The Report Parameters window displays.
- On the Report Parameters window, enter a date range for the invoices (From Date and Through Date). The report will display in a separate window.
- Click the generate installments button. The Installments to be Generated Report is generated listing all of the installments to be generated over the entered period.
Note: If the task is scheduled as recurring (reccurrence is more than Once), the batch is created on the date the task is scheduled to run, the transaction date is the batch date, the generate from date is 1/1/1900, and the generate to date is also the batch date. See step 8 below.
Additional Information
Payment Notes
- If a credit card is linked to an order and the credit card is declined, netFORUM will look at the system option RecognizeRevenueDuringFulfillmentIgnoreFailedCreditCards. If the current setting check box for that system option is selected, netFORUM will invoice the customer without payment. If the current setting check box is not selected, netFORUM will not fulfill the order and it will not be invoiced.
- The shipping charges are invoiced in full when the first item on the invoice is fulfilled.
- Any credits linked to the order will be applied up to the amount of the credit.
- Credit cards that fail multiple times for installments will be marked as Failing or Invalid. After a card is marked with a Failing or Invalid status, no additional transactions will be processed against it. An error will be returned on the payment.
Orders with Credit Cards About to Expire
From the Fulfillment Orders group item in the Inventory module, you can run a query of orders linked to a credit card that is about to expire. In the query, select a condition of Payment Info::Credit Card Expiration Date is less than YYYY/MM where YYYY/MM is a month or two in advance of the current year and month. Also choose Order::Type is either recurring for Recurring Gifts or installment or payment depending on the types of orders you want to check. Add any other filters you may need to ensure you select only active orders. This query will return any orders with a credit card about to expire.
The following reports also show this information:
- Stored Credit Cards Due to Expire - Fundraising Report
- Stored Credit Cards Due to Expire - Membership Report
- Stored Credit Cards Due to Expire Report
Exceptions
Exceptions can be viewed from the Installment Billing Exceptions Profile Report.