Set Group Security
The Set Group Security tool enables an administrator to configure navigational/link security for groups to access Group Item Links within NetForum.
This security model will enable Group Item Links to users in a particular security group. This kind of security can be used to turn on or off an entire module to a group.
How to Add/Remove Security
-
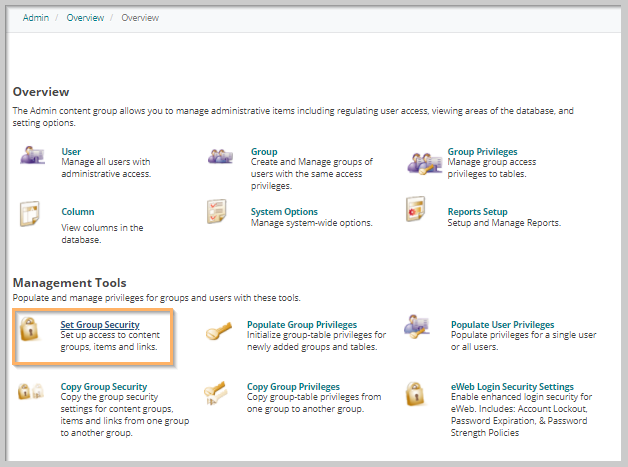
From the Admin overview page, click the Set Group Security icon to launch the Group Security page.
-
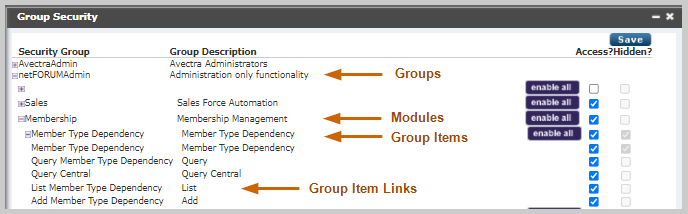
Find the Security Group you want to configure and expand it.
-
Navigate to the module you wish to configure. Check the access checkbox to enable this module.
-
Expand the module to see the Group Items in that module. You may enable that group item by checking the enable checkbox. If you expand the group item, you will see the Group Item Links. You may enable each group item link by checking the access checkbox.
-
When you are finished, press the Save button. If you want to remove a Group Item Link, then uncheck the access checkbox. The hidden checkbox is checked by the system when that Module, Group Item, or Group Item Link has been Hide/Disabled.
Or
You can also navigate it from: Admin module> Group group item > Set Group Security group item link.
The enable all button will check all the access checkboxes within that Module or Group Item.
Please remember to clear cache after making these changes. You do not need to Populate Group Privileges, because that security structure relates to database table/column permissions and not link permissions.
MemberFuse Group Links Security
As with other Security Groups, you can enable or hide Admin module security settings, including MemberFuse Form Links.
-
Following the steps detailed in the section above, open the Group Security window.
-
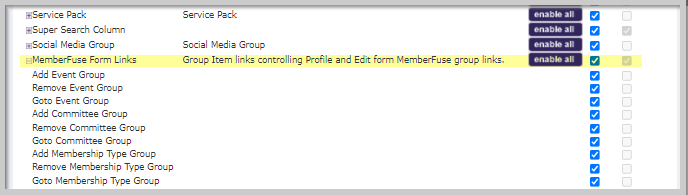
To access MemberFuse form links security options, expand the Admin group.
-
Expand the Toolkit module group.
-
Expand the MemberFuse Form Links group item link.
Hide or enable Add, Remove, and Goto MemberFuse link options in this section by clicking the desired check box under the Access? or Hidden? column.
Adding Group Security from the Group Profile
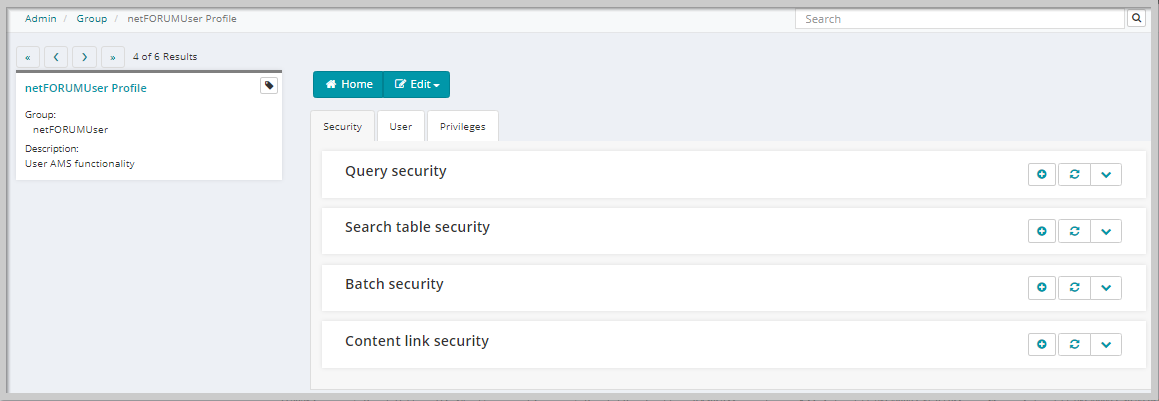
Group security can be managed by using the child forms available on the Security tab located on the Group Profile.
To manage group security from the Group Profile, complete the following steps:
-
Navigate to the desired Group Profile.
-
Click the Security tab to view the available child forms.
-
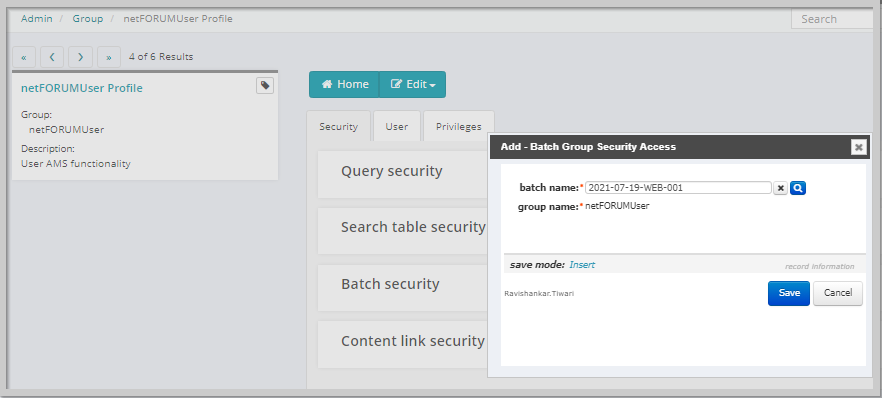
Click the Add icon on the child form that corresponds to the security level you wish to manage.
-
For query, batch, or content link access you will be prompted to enter the first few letters of the object name you wish to grant access to. This will present a list of objects matching the criteria you entered.
-
Click the name of the object to which this group will be granted access.
-
For search table access, you will be required to select the desired search table from a drop-down menu.
-
Click the Save button.
This will open a pop-up window that will allow you to add either query rights, batch rights, search table rights, or content link rights to the selected group.
The group is now added to the selected child form and has access to that feature of the group.
Deleting Group Security from the Group Profile
To delete group security privileges from a group, complete the following steps:
-
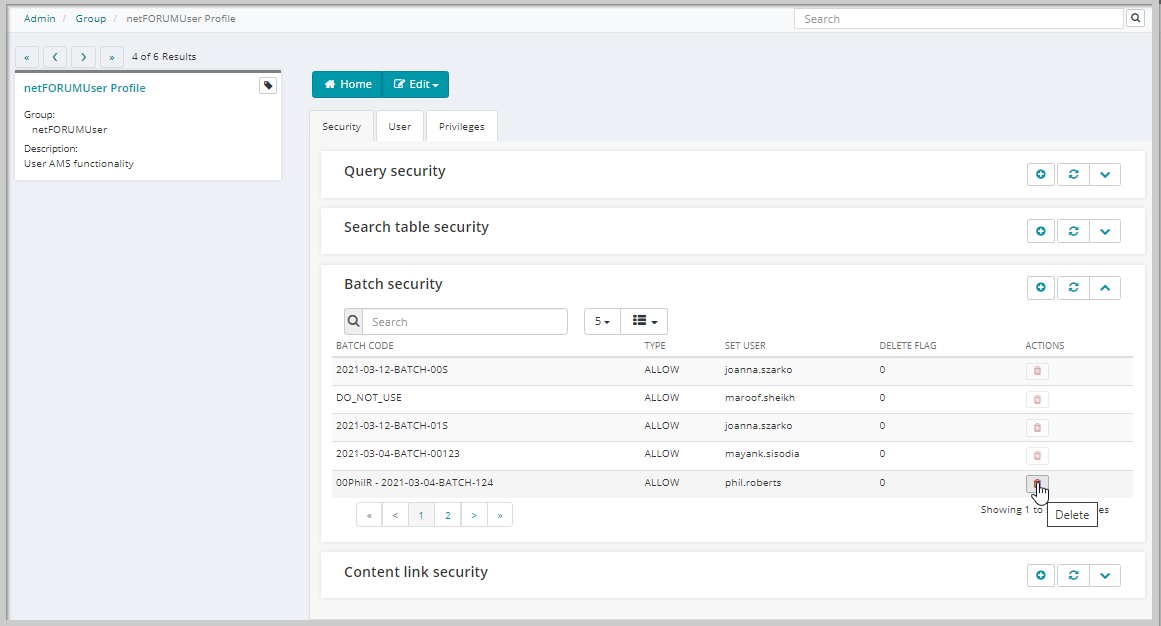
Click the Security tab on the Group Profile to view the Security child forms.
-
Expand the security child form you wish to manage.
-
Click the Delete icon next to the group security rights you wish to delete from the group.
-
Click the OK button.
A confirmation pop-up window will appear asking you to confirm the deletion.
The group security rights will be deleted from the group.