Adding an Individual
Or
Add an Individual record to your database whenever you wish to store an individual's name, address, and contact information. An individual must have a profile in order to be accessed in other NetForum modules.
There are multiple information sections on the Add Individual form:
To create an Individual profile, use the following steps:
- Follow the path above to navigate to the Add Individual form.
- Complete at least the required fields in each section of the Add Individual form. For detailed information about the fields, their meaning, and which fields are required, see the sections below.
- Click the Save button. The new individual profile page loads.
To add additional individuals without returning to the Overview page or Individual group item:
- Click the Insert After Save check box.
- Click Save. The information you entered is added to the database and a new Add Individual page displays (instead of the Profile page for the record you just added).
There are three ways to navigate to the Add Individual form:
- Go to the CRM Module.
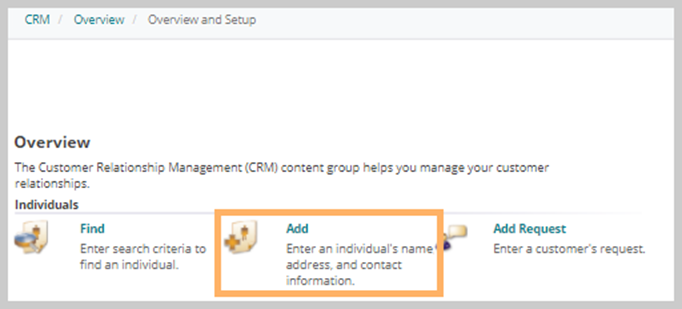
- On the Overview group item, click the Overview and Setup group item link and then click the Add link in the Individuals section.
OR
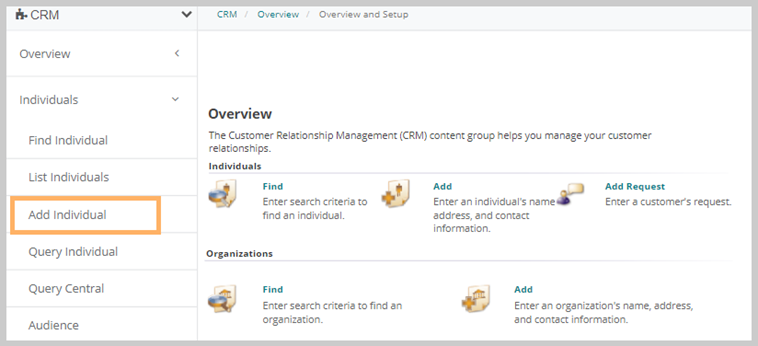
- Go to the CRM Module.
- On the group items bar, click Individuals.
- Select the Add Individual group item link.
OR
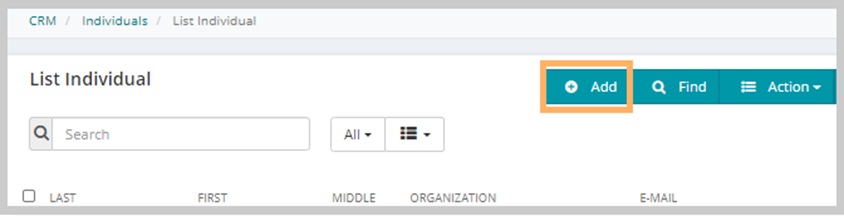
- Certain sections of the Individuals group display the Actions left navigation menu. Click the Add icon to access the Add Individual form.
Personal Information Section
An individual's personal information includes data such as their name, any designations or titles that they may have, Individual Type, and so on.

Only the first and last name fields of the Personal Information section are required. The more detailed information you are able to provide, however, the better for reference in future interactions with that individual. Available fields in the Add Individual: Personal Information section are listed in the table below.
| Field Name | Required? | Description |
|---|---|---|
| Prefix | Optional | Select an honorific title (for example, Ms, Mr, or Dr) from the drop-down. |
| First Name | Required | Enter a First name. |
| Middle Name | Optional | Enter a Middle name, if available. Middle name is optional. |
| Last Name | Required | Enter a Last name. |
| Suffix | Optional | Select a suffix (such as Jr. or Sr.) from the drop-down. |
| Designation | Optional | Enter a designation such as Ph.D. or B.A. |
| Individual Type | Optional | Select the individual type from this drop-down. |
| Social Security Number | Optional | If you have the individual's social security number, enter it in this field. For information on how to store and encrypt a social security number, refer the SocialSecurityNumberFormat and EncryptSensitiveData topics. |
| Source Code | Optional | Click the Search  icon to select a source code. icon to select a source code.
|
Organization Section
The Organization section allows you to associate an individual with an organization in the database.

| Field Name | Required? | Description |
|---|---|---|
| Organization | Optional | Associate the individual to an organization in the database by clicking the Search icon.
|
| Relationship Type | Optional | Select the individual's relationship type from this drop-down. |
| Title | Optional | Enter the individual's title at this Organization. |
E-Mail Section
The E-Mail section allows you to enter an individual’s e-mail-related information.

Fields available in the E-Mail section include the following:
| Field Name | Required? | Description |
|---|---|---|
| Type | Optional | In the Type drop-down field, indicate whether this is a business or personal e-mail address. |
| Optional | Enter the individual's e-mail address in this field. |
Address Information
The Address Information stores primary address settings. Address Information is divided into two sections: Business Address and Home Address. Most of the data fields and drop-down lists are available on both information panels, but Business Address allows you to link to the address and phone number of an organization in the database.
If you inserted an organization name using the Organization field in the Organization section, the organization's address information may automatically populate the Address fields. This depends on the system option for the default linking method.
- If the address linking method is set to Defaulting, the address information defaults but is editable.
- If the address linking method is set to Linking, the address information is populated, and the fields are read-only.
- If the system option is set to None, the address information does not default.
Note: If you select Linking, the individual's contact information automatically updates if there are any changes or updates to the organization's information. If an Organization's address has been set to on hold, any individuals linking to that Organization's address as their primary will also have the Organization's linked address put on hold on their Individual Profile.
Because address and date formats vary based on location, address and date formatting are now synchronized between MemberFuse and NetForum.
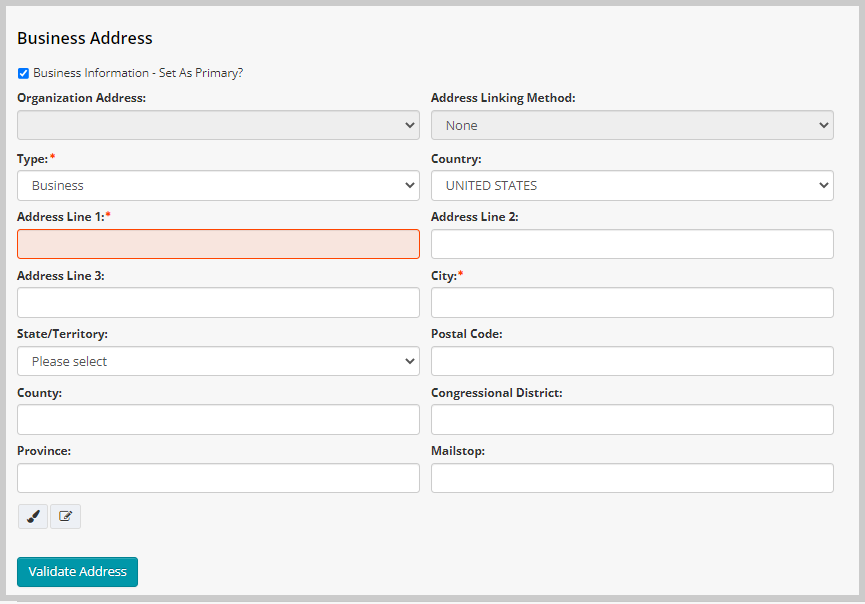
Business Address Section
The Business Address section allows you to enter an individual’s business address-related information.
Below are some available Address data options and features. The address set as primary must have address information entered.
Fields available in the business address section include the following:
| Field Name | Required? | Description |
|---|---|---|
| Business Information - Set As Primary | Optional | Click this check box at the top of the Business Address section to set this as the primary address. Only one address may be primary at a time. |
| Organization Address | Optional | If an organization with multiple addresses is selected, use this field to select the desired address to associate with the individual. |
| Address Linking Method | Optional | Select Linking or Defaulting to automatically relate the organization address to the individual's profile. Choose None to leave the address unlinked. |
| Type | Optional | Select an address type from the drop-down list. Options may include Billing, Home, Other, Shipping, or Work. |
| Country | Required | Select a country from the drop-down list. Address location fields update to reflect the country selected. |
| Address Lines | Required |
Enter the address in these fields. An address must be entered for the address marked as primary. Note: Only the Address Line 1 field is a required field. The Address Line 2 and Address Line 3 are optional fields. |
| City | Required | Enter the city name in this field. |
| State / Territory | Optional | Enter the state/territory name in this field. This field is controlled through the DefaultStateCode system option and displays the default value set in the Current Setting field. If the Current Setting field of the system option is blank, then the State/Territory field will be a Required field. |
| Postal Code | Optional |
Enter the postal code in this field. Note: Once the Address Line 1 field is updated, the Postal Code field becomes a Required field. |
| County | Optional | Enter the county name in this field. |
| Congressional District | Optional | Enter the congressional district in this field. |
| Province | Optional | Enter the province in this field. |
| Mailstop | Optional | Enter the four-digit code after the zip code in a US postal address. |
| Validate Address | Optional | If you have an address validation integration, you can validate the address using the Validate Address button at the bottom of the Business Address section. |
Home Address Section
The Home Address section allows you to enter an individual’s home address-related information.
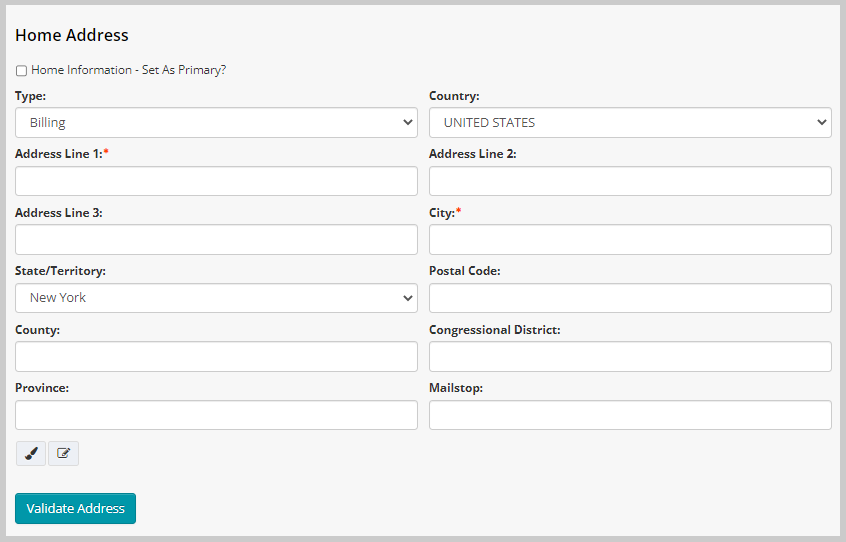
Fields available in the home address section include the following:
| Field Name | Required? | Description |
|---|---|---|
| Home Information - Set As Primary | Optional | Click this check box at the top of the Home Address section to set this as the primary address. Only one address may be primary at a time. |
| Type | Optional | Select an address type from the drop-down list. Options may include Billing, Home, Other, Shipping, or Work. |
| Country | Required | Select a country from the drop-down list. Address location fields update to reflect the country selected. |
| Address Lines | Required |
Enter the address in these fields. An address must be entered for the address marked as primary. Note: Only the Address Line 1 field is a required field. The Address Line 2 and Address Line 3 are optional fields. |
| City | Required | Enter the city name in this field. |
| State / Territory | Optional | Enter the state/territory name in this field. This field is controlled through the DefaultStateCode system option and displays the default value set in the Current Setting field. If the Current Setting field of the system option is blank, then the State/Territory field will be a Required field. |
| Postal Code | Optional |
Enter the postal code in this field. Note: Once the Address Line 1 field is updated, the Postal Code field becomes a Required field. |
| County | Optional | Enter the county name in this field. |
| Congressional District | Optional | Enter the congressional district in this field. |
| Province | Optional | Enter the province in this field. |
| Mailstop | Optional | Enter the four-digit code after the zip code in a US postal address. |
| Validate Address | Optional | If you have an address validation integration, you can validate the address using the Validate Address button at the bottom of the Home Address section. |
Phone Information
The Phone Information saves business and home phone information. You can choose to link the phone of an organization to the phone fields in the individual form. When linked, if the organization's contact number is updated, it is automatically updated on the individual's profile as well.
Business Phone Section
The Business Phone section allows you to enter an individual’s business phone-related information.

Options for saving business phone information include the following:
| Field Name | Required? | Description |
|---|---|---|
| Select From Organization | Optional | If an organization with multiple contact numbers is linked to the individual's account, you may select from the phone numbers listed in the Select From Organization drop-down field. This field list phone numbers saved on the organization's profile. |
| Linking | Optional | Select Linking or Defaulting to associate the selected organization's phone number with the individual's profile. Select None to enter a new number unlinked to the organization profile. |
| Type | Optional | Select the Phone type from the Type drop-down field. |
| Country | Optional | Select the country of origin for the phone number. |
| Number | Optional | In the Number field, enter the business phone number. In the case of linked organization phone numbers, this field will auto-complete with phone information from the organization profile. |
| Extension | Optional | In the Extension field, enter an extension, if one is necessary. |
Home Phone Section
The Home Phone section allows you to enter an individual’s home phone-related information.
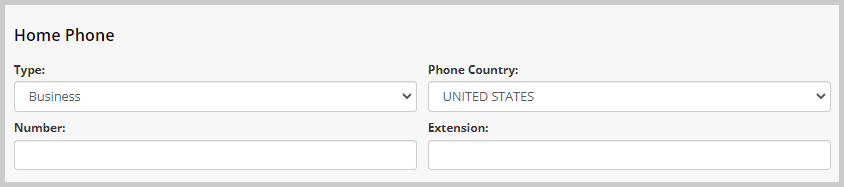
Options for saving home phone information include the following:
| Field Name | Required? | Description |
|---|---|---|
| Type | Optional | Select the Phone type from the Type drop-down field. |
| Phone Country | Optional | Select the country of origin for the home phone number. |
| Number | Optional | In the Number field, enter the home phone number. |
| Extension | Optional | In the Extension field, enter an extension, if one is necessary. |
Fax Information
The Fax Information saves business and home fax information. You can choose to link the Fax number of an organization to the fax fields in the individual form. When linked, if the organization's fax number is updated, it is automatically updated on the individual's profile as well.
Business Fax Section
The Business Fax section allows you to enter an individual’s business fax-related information.
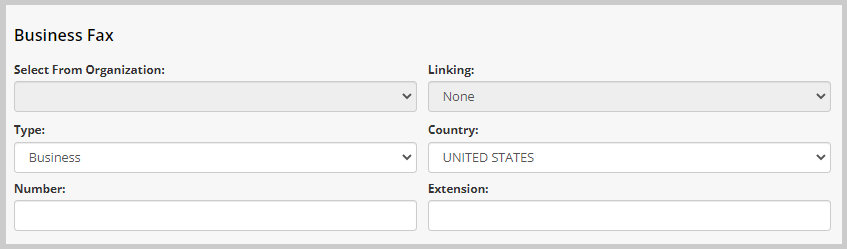
Fields available in the Business Fax section include the following:
| Field Name | Required? | Description |
|---|---|---|
| Select From Organization | Optional | If an organization with multiple fax numbers is linked to the individual's account, you may select from the fax numbers listed in the Select From Organization drop-down field. This field list fax numbers saved on the organization's profile. |
| Linking | Optional | Select Linking or Defaulting to associate the selected organization's fax number with the individual's profile. Select None to enter a new fax number unlinked to the organization profile. |
| Type | Optional | Select the Fax type from the Type drop-down field. |
| Country | Optional | Select the country of origin for the business fax number. |
| Number | Optional | In the Number field, enter the business fax number. In the case of linked organization numbers, this field will auto-complete with fax information from the organization profile. |
| Extension | Optional | In the Extension field, enter an extension, if one is necessary. |
Home Fax Section
The Home Fax section allows you to enter an individual’s home fax-related information.
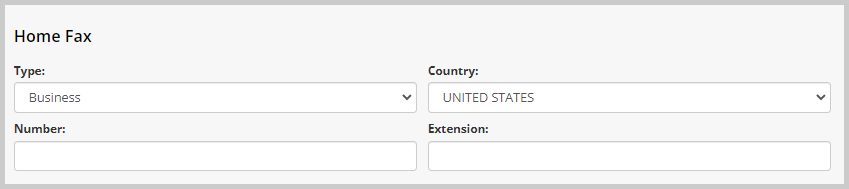
Fields available in the Home Fax section include the following:
| Field Name | Required? | Description |
|---|---|---|
| Type | Optional | Select the Fax type from the Type drop-down field. |
| Country | Optional | Select the country of origin for the home fax number. |
| Number | Optional | In the Number field, enter the home fax number. |
| Extension | Optional | In the Extension field, enter an extension, if one is necessary. |
Access Information Section
The Access Information section allows you to set a web password for an individual and allows you to force the individual to change their password the next time they log in.

Fields available in the Access Information section include the following:
| Field Name | Required? | Description |
|---|---|---|
| Password | Optional | Enter a password. |
| Confirm Password | Optional | Re-enter the password to confirm. |
| Force User To Change Password? | Optional | Click this check box to require the individual to change their password the next time they log in. |
Contact Preferences Section
The Contact Preferences section allows you to set an individual’s contact preferences.
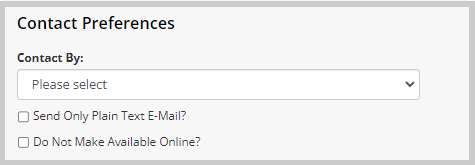
Fields available in the Contact Preferences section include the following:
| Field Name | Required? | Description |
|---|---|---|
| Contact By | Optional | From the drop-down field, select whether the individual prefers to be contacted by E-Mail, Fax, Mail, or Phone. |
| Send Only Plain Text E-Mail? | Optional | To limit e-mails to text only (no images or HTML) click the Send Only Plain Text E-Mail? check box. |
| Do Not Make Available Online? | Optional | This checkbox controls whether or not an Individual (or an Organization) is included in the Member Directory Search Result (eWeb > Member Directory). |
Do Not Contact By Section
If the individual prefers not to be contacted by a particular method, click the checkbox next to that method.
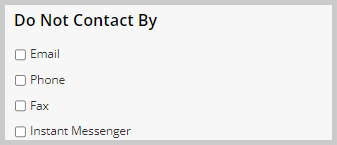
Fields available in the Do Not Contact By section include the following:
| Field Name | Required? | Description |
|---|---|---|
| Optional | Click the Email checkbox if the individual does not want to be contacted through this communication channel. | |
| Phone | Optional | Click the Phone checkbox if the individual does not want to be contacted through this communication channel. |
| Fax | Optional | Click the Fax checkbox if the individual does not want to be contacted through this communication channel. |
| Instant Messenger | Optional | Click the Instant Messenger checkbox if the individual does not want to be contacted through this communication channel. |