Adding an Organization
Add an Organization record to your database whenever you wish to store an organization's name, address, and contact information. An organization must have a profile in order to be accessed in other NetForum modules.
Navigating to the Add—Organization Window
There are three ways to navigate to the Add–Organization form:
-
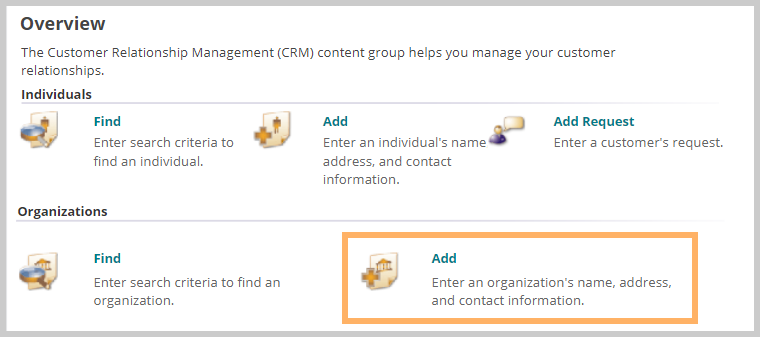
Go to the CRM module.
-
On the Overview page, click the Add link in the Organizations section.
OR
-
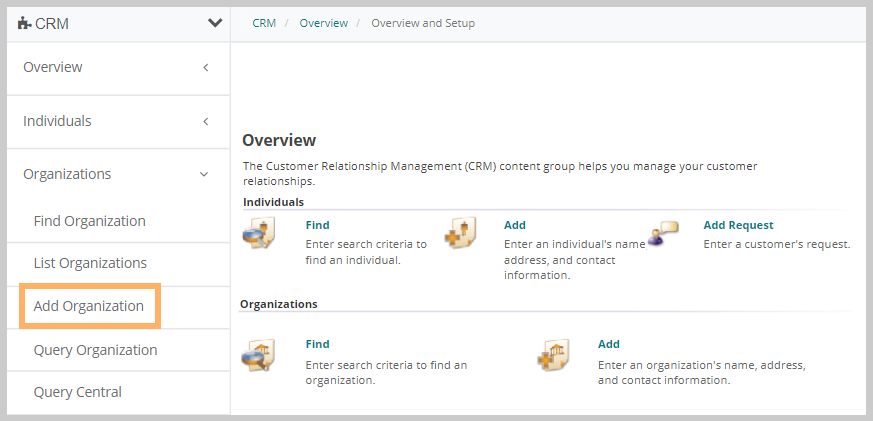
Go to the CRM module.
-
On the group items bar, click Organizations.
-
Select the Add Organization group item link.
OR
-
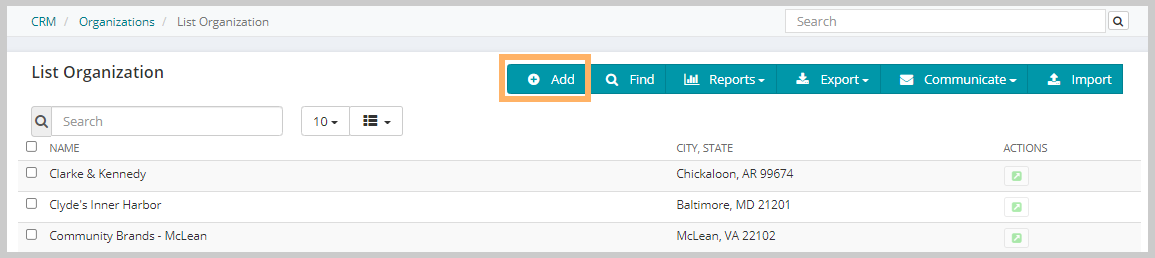
If you are in another section of the Organizations group item, click (or hover over) the Actions left navigation menu.
-
Click the Add button.
Using the Add–Organization Window
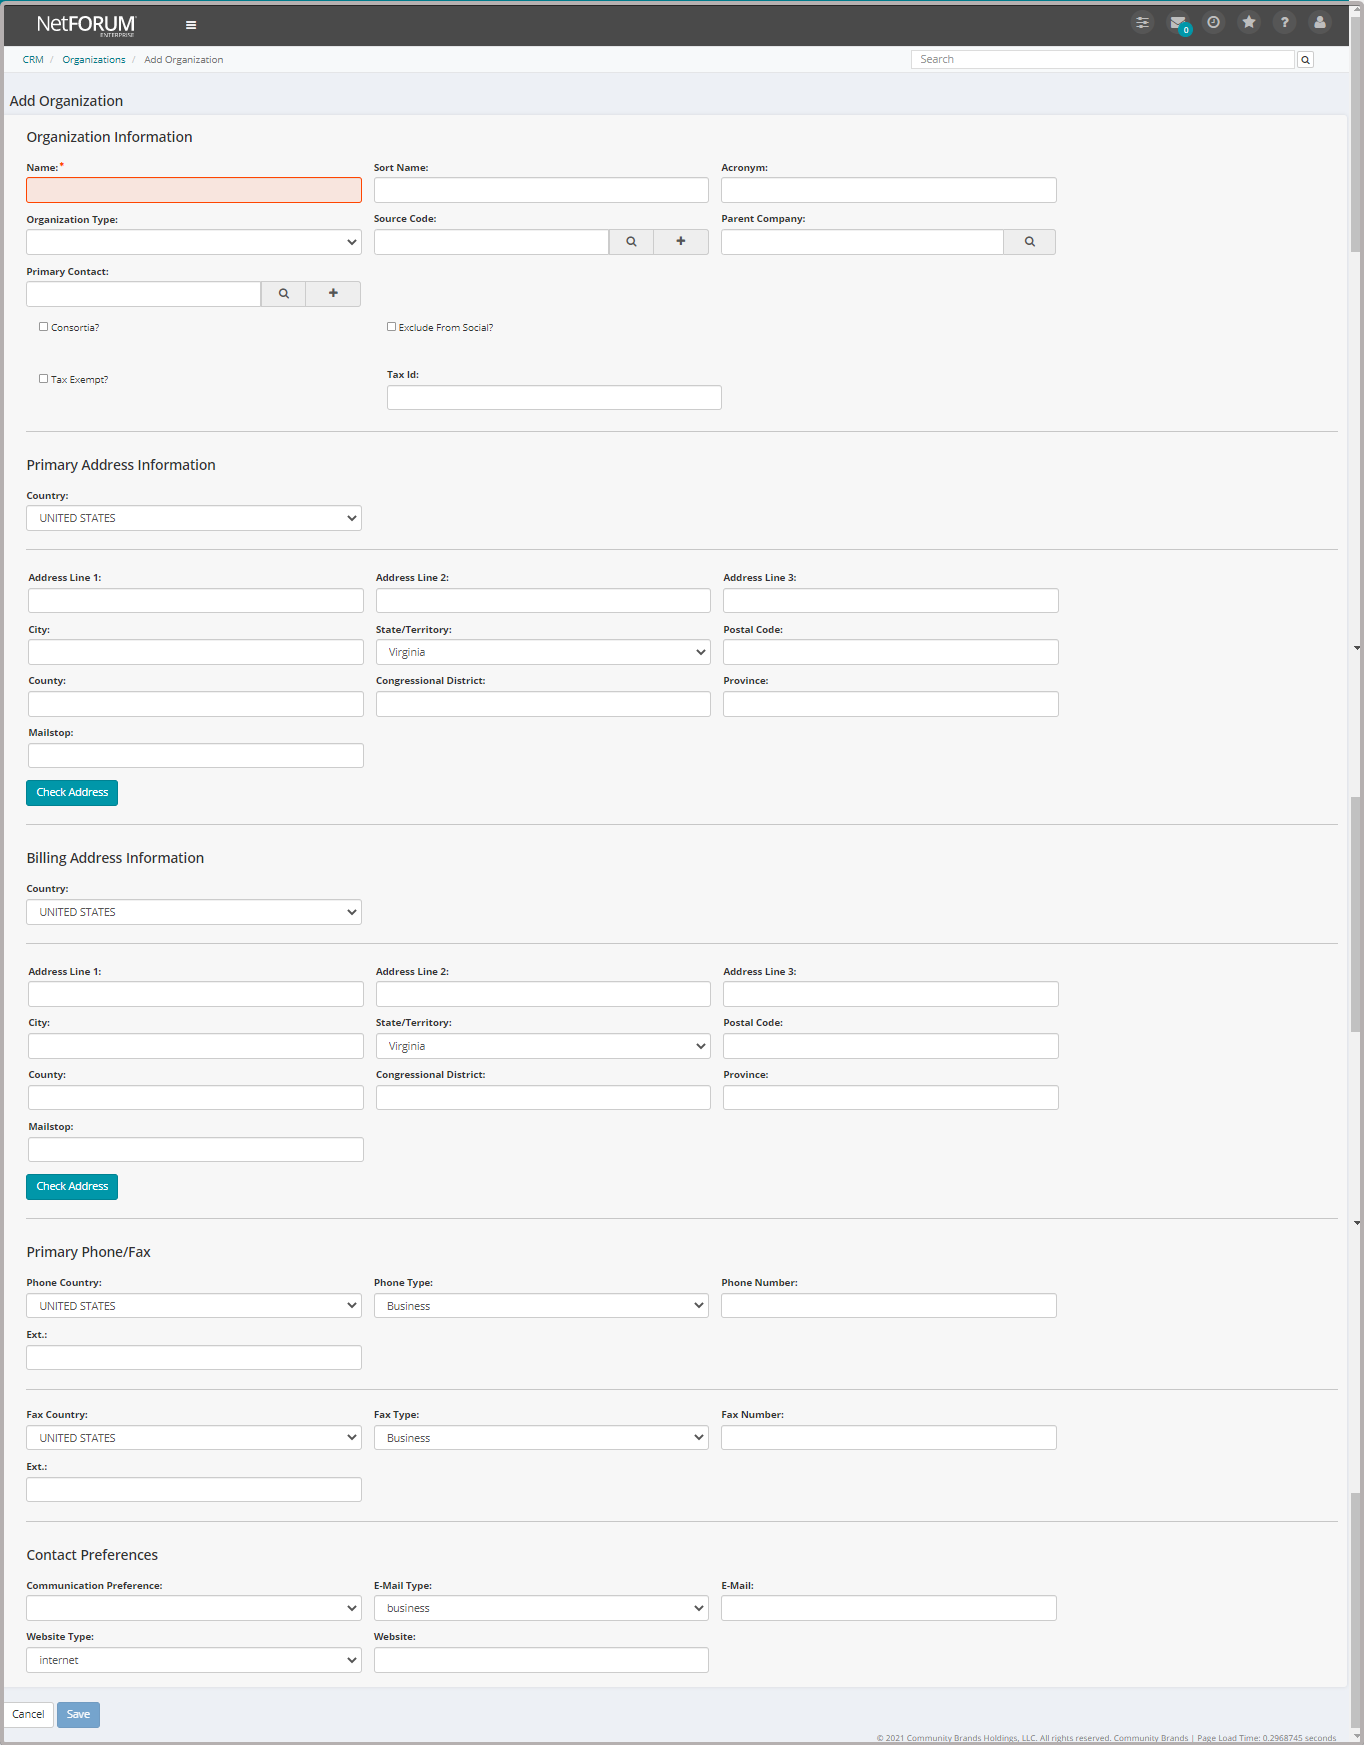
There are three primary information sections on the Add–Organization page:
- Organization Information
- Primary Address Information
- Primary Contact Information
Once the sections of the Add–Organization form detailed below are complete, click the Save button. The new organization profile page loads.
Organization Information Section
Enter the organization name, type, parent company, and more. You can also set a primary contact for the organization in this section.
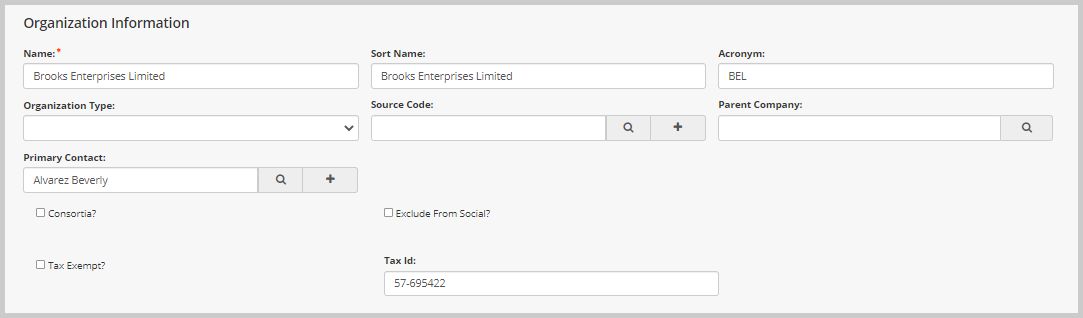
Only the name field of the Organization Information section is required. The more detailed information you are able to provide, however, the better for reference in future interactions with that organization. Available fields in the Add–Organization: Personal Information section are listed in the table below.
| Field Name | Required? | Description |
|---|---|---|
| Name | Required | Enter the organization name. |
| Sort Name | Optional | Enter the desired sort name for the organization. This is the organization's name as it will appear when sorted in lists in the database. Data entered in the name field is auto-copied into the sort name field, but this data can be edited. |
| Acronym | Optional | Enter the desired acronym for the organization. |
| Organization Type | Optional | Select the organization type from this drop-down field. For example, organization types can include associations and corporations. |
| Source Code | Optional | Apply an existing source code to the organization by clicking the  Search icon. Search icon.
|
| Parent Company | Optional | If a parent company to the organization being entered exists in the database, associate it by clicking the Search icon.
|
| Primary Contact | Optional | If a primary contact individual exists in the database, associate it by clicking the Search icon.
|
| Consortia? | Optional | Click this check box to indicate whether this organization is a consortium. |
| Exclude From Social? | Optional | Click this check box to exclude the organization from the social media Web site. |
| Tax Exempt | Optional | Indicate whether the organization is tax exempt by clicking this check box. |
| Tax Id | Optional | If the organization is not tax exempt, enter its tax ID number in this field. |
Primary Address Information Section
The Address Information section stores contact information, including phone numbers and primary address settings. Address Information is divided into two panels: mailing address and billing address. Data fields and drop-down lists are the same in both information panels.

Below are some available Address data options and features (optional or conditional):
| Field Name | Required? | Description |
|---|---|---|
| Country | Optional |
Select a country from the drop-down field. Address location fields will update to reflect the country selected. On most iWeb and eWeb forms where an address is entered, the address inputs and labels are now configured for each country's naming convention and field order through the use of a special Address Sub-form for each country. Once you select a country, the address sub-form for that particular country appears. When a specific country is selected, for example, data values in other drop-down menus will change based upon that country (such as provinces, states, and regions) as well as how and where those fields may be displayed. The intent is to facilitate data entry for you and your customers based on the customer location. |
| Address Line | Optional |
Enter up to three lines of address information. Complete the address lines for mailing and billing addresses. If you enter a street address for a U.S. address, you must also enter a city, state, and zip code. |
| City, State/Territory, & Postal code | Optional | Enter the city and zip code for the addresses. Select a state from the state drop-down list. If you enter an address line (street address) for a U.S. address, these fields are required. For international addresses, they are optional. |
| County | Optional | Enter the county name. |
| Congressional District | Optional | Enter the district name. |
| Province | Optional | Enter a province name. |
| Mailstop | Optional | Enter the four-digit code after the postal/zip code in a US postal address. |
| Check Address | Optional | To check the validity of mailing and billing addresses, click the Check Address button. |
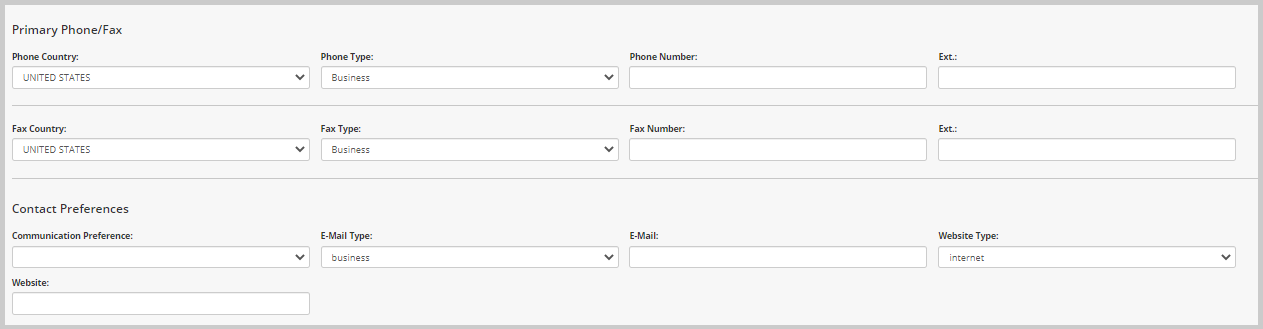
Primary Phone/Fax Information
The Primary Phone/Fax Information section holds phone and fax information, as well as email and Web site information for the organization.
| Field Name | Required? | Description |
|---|---|---|
| Phone and Fax Country | Optional | Select the phone and/or fax country from the drop-down field(s). |
| Phone and Fax Type | Optional | From the drop-down list, indicate the type of phone or fax number entered. Options could include "home" or "work", for example. |
| Phone and Fax Number | Optional | Enter the phone and fax number for the organization. |
| Ext. | Optional | If an extension exists for the phone and/or fax number, enter it in this field. |
| Communication Preference | Optional | Select the organization's communication preference (for example, e-mail, phone, etc) from the drop-down field. |
| E-mail Type | Optional | Select the e-mail address type from the drop-down list next to the e-mail field. |
| Optional | Enter the organization's primary e-mail address. | |
| Website Type | Optional | Select an Internet or Intranet Web site type. |
| Website | Optional | Enter the organization's Web site in this field. Website URL must valid syntax; note that a URL may have capital letters but "http", for example, must be lowercase. |
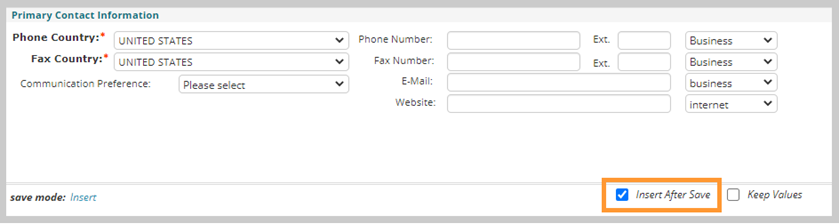
Adding Additional Organizations
After saving your previous record, you can add additional organizations without returning to the Overview page or Organization group item:
Note: This functionality currently works for Classic UI only.
-
Select the Insert after save check box.
-
Click Save. The information you entered is added to the database and a new Add–Organization page displays (instead of the Profile page for the record you just added).