Add Request
OR
A Request is added when an Individual customer asks for something such as membership information or billing information. Requests can also be used to track customer phone calls.
To add a Customer Request, use the following steps:
- Go to .
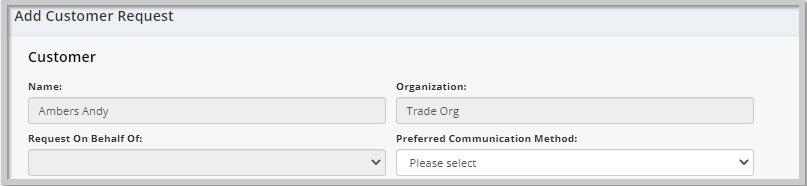
- In the Customer section, fill in the following fields:
- In the Request Activity section, fill in the following fields:
- You can use the Assignments section to assign tasks related to the Customer Request to an individual staff member, organization, or group of individuals. To add an assignment, click the Add button
 , then fill in the following fields:
 - You can use the Documents to add a document to the Customer Request. To add a document, click the Add button then fill in the following fields:
- Click Save. The Customer Request Profile appears.
Or
Go to Modules > CRM > Individuals > Individual Profile > Add Customer Request.
| Field Name | Required? | Description |
|---|---|---|
| Name | N/A | This field automatically populates the customer’s name and cannot be edited. |
| Organization | N/A | This field automatically fills when the customer is already associated with an organization in the database. and cannot be edited. |
| Request On Behalf Of | No | This field automatically fills and cannot be edited. |
| Preferred Communication Method | No | Use the dropdown list to select the customer's preferred communication method. |

| Field Name | Required? | Description |
|---|---|---|
| Origin | Yes | Use the dropdown list to select how the request came to the organization. |
| Activity | Yes | Use the dropdown list to select the related activity. |
| Reason | Yes | The selections available here depend on which activity is selected. |
| Summary | Yes | Enter a summary of the customer request. |
| Detail | No | If desired, use this field to record further detail about the request. |
| Status | Yes | Use the dropdown list to select the current status of the request. |
| Priority | Yes | Normal is auto-selected. You can use the dropdown list to select a different priority. |
| Date | No | Auto-fills with the current date. Use the calendar widget or type to enter a different date. |
| Correspondence Template | No | Use the dropdown list to select a template for the member correspondence. |
| E-Mail Notification - Automatically Send To Customer | No | Automatically selected. Click the checkbox to deselect this option. |
| Fax Notification - Automatically Fax To Customer | No | Click the check box if you wish to automatically send a fax notification to the customer (only if your system has a fax integration). |
| Automatically Assign Request | No | Automatically selected. Click the checkbox to deselect this option. |

| Field Name | Required? | Description |
|---|---|---|
| Assign | No | Automatically selected. Click the checkbox to deselect this option. |
| Route to | No | Use the dropdown list to select an assignee. |
| Role | No | Use the dropdown list to select a role. |
| Priority | No | Use the dropdown list to select the priority level of the request. |
| Special Instructions | No | Enter special instructions, if any. |
| Due Date | No | Use the calendar widget or type to set the due date. |
| No | Automatically selected. Click the checkbox to deselect this option. | |
| Source Code | No | Use the dropdown list to select a source code. |
Note: An activity may have one or more related Assignments which will be automatically displayed in the Assignments section when the activity is selected.

| Field Name | Required? | Description |
|---|---|---|
| Include | No | Automatically selected. Click the checkbox to deselect this option. |
| Document# | No | Use the dropdown menu to select a document number. |
| Summary | No | Automatically fills with the document summary, if any, and cannot be edited. |
| Send Via Email | No | Select the checkbox to indicate the document should be sent via email. |
| Send Via Fax | No | Select the checkbox to indicate the document should be sent via fax. |
| Send Via Regular Mail | No | Select the checkbox to indicate the document should be sent via regular mail. |
| Send Web Link | No | Select the checkbox to indicate the document should be sent via web link. |