Microsoft Outlook 365 Integration Setup
Setup
The Microsoft® Outlook Integration Setup consists of three main stages.
1. Installing the system requirements and prerequisites.
- Microsoft® Office Outlook 365
2. Installing the Outlook Add-In.
3. Using the XML Manifest file generated in step 2 to enable the Add-In onto each user’s Outlook.
This Add-In is available via the SetupOutlookAddIn.msi Windows install file that would be run on the Web server to:
- Install and configure the NFEOutlookAddIn web application that Outlook 365 will use to access NetForum.
- Generate the site-specific NFEOutlook.xml Outlook Add-in Manifest file that is used to install the Add-in to individual users’ Outlook. This is an XML file that specifies settings and capabilities of the add-in. The site-specific settings in this NFEOutlook.xml file are:
- The URI's needed by Outlook to install/access the NFEOutlookAddIn web service.
- The URI needed by the NFEOutlookAddIn to access the NetForum xWeb\Outlook web service.
There are three distinct components to this Add-In:
| Outlook Add-in: |
This exposes the NetForum functionality in the Outlook interface. It is added to your personal Outlook when you install Add-In using the NFEOutlook.xml manifest file. (The XML file contains the relevant URIs for your site.)
This Add-In installation must be done for each user’s Outlook.
|
| NFEOutlookAddIn web application: |
This is the web application that you installed on your web server by running the SetupOutlookAddIn.msi
When you click one of the Add-In options in Outlook, (Add Recipients, Log Email), Outlook calls this NFEOutlookAddIn web application to display the Add-In screens. (for example, the NetFORUM login screen, the Search screen for Add Recipients, the Log email screen.)
|
| xWeb/Outlook web service: |
This is where the logic resides to for the Add-In screens to interact with NetForum, querying/updating data.
|
Installing the System Requirements and Prerequisites
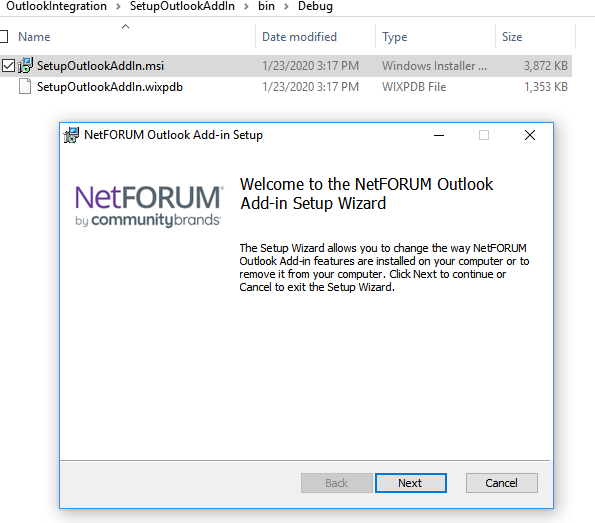
Obtain the NetForum Outlook Installation File:
Community Brands (Customer Support team) will provide you with a copy of an installation file (SetupOutlookAddIn.msi), referenced in the section below. This file runs the setup for the Add-In.
Installing the NFEOutlookAdd-In on Your Web Server
Important! You must be logged in as a System Administrator before running the setup program.
Open a Remote Desktop session (with appropriate admin rights) on the web server that will host your NFEPOutlookAddIn web application.
Copy the provided SetupOutlookAddIn.msi install file to a suitable location on the web server.
To install the Outlook Add-In:
- Double-click the SetupOutlookAddIn.msi setup file link to launch the NetFORUM Outlook Add-in Setup Wizard.
- After entering the location, click Next.
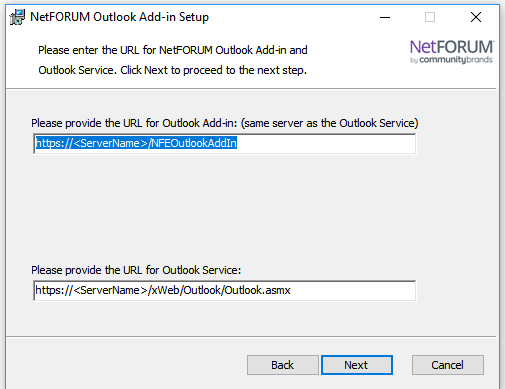
- On the displayed window, you are required to specify the URI's for:
- Outlook Add-In: Enter the desired URL of NFEOutlookAddIn web application (which will be installed by this msi). This is the application that Outlook will communicate with.
- Outlook Service: Enter the URL of the NetForum xWeb\Outlook\Outlook.asmx web service (which already exists in NetForum). The NFEOutlookAddin application will call this service to access NetForum data and functionality.
- Replace the word <ServerName> with the appropriate host name.
- Outlook will not work with “http:” URLs. (The install will not complain, but the Add-In will not work; when you try to use any of the functions, it will give the error “A problem occurred while trying to reach this Add-in”)
- This means that the website hosting your Outlook Add-in and xWeb applications must include an https:// binding.
- After entering the URLs details, click Next. You will be prompted to begin the install process.
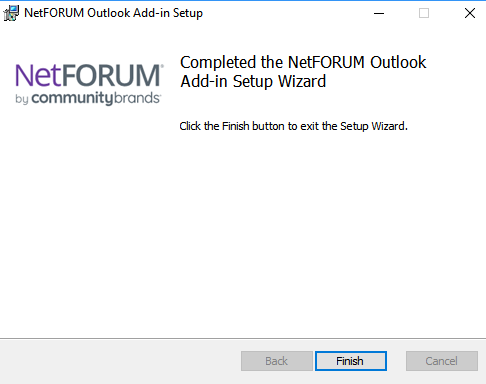
- Click Install button.
- Click Finish button to close the Setup Wizard.
You will be prompted to specify the physical folder location where the NFEOutlookAddIn should be installed on the web server. This would generally be within the same folder where your NetFourm iWeb/eWeb/xWeb sites reside, for example “C:\sites\NFEOutlookAddIn\”.

Note: The URLs must be on the same host (that is, the same website in your IIS manager). Being on the same physical server box is not enough.
Outlook will only accept https: URLs.
The install process should finish quickly. If the progress bar seems stalled at the start, check for a security prompt hidden under other windows.
The install should have:
- Deployed the NFEOutlookAddIn folder to the specified location on your web server.
- Created the NFEOutlookAddin web app in the IIS Manager.
-
In the NFEOutlookAddIn folder, there should be a file called NFEOutlook.xml
- This file is the Outlook Add-in Manifest used to install the add-in onto each user’ Outlook.
- It basically defines what buttons, icons, etc. to show in Outlook.
- It contains numerous instances of that Outlook Add-In URL (https://<server>/NFEOutlookAddIn) which you specified during the install. For the Add-In to work, these must all be correctly pointing to the correct URL.
- Note that changing this file after installing the Add-In to someone’s Outlook does nothing – each user’s Outlook reads this manifest during their install of the Add-In. So, if you need to change the URL, each user will have to uninstall, then re-install the add-in.
- In the physical NFEOutlookAddIn folder, there should be a file called web.config
- Verify that this file contains the line
<add key="ServiceURL" value="https://nfep2017.myNFEServer.com/xWeb/Outlook/Outlook.asmx"/>
where the “value” should be the URL you specified for the Outlook Service in the Install Process.
Required Follow-up Steps to Web Server Add-In Install:
- In IIS Manager, make sure the Outlook Add-In application is available on the correct website.
- Edit NFEOutlookAddIn\GlobalSettings.js
- In IIS Manager, verify that the web site you specified in the Install has an https: binding. If not, add this binding or the Add-In will not function.
- Verify xWeb LDAP settings.
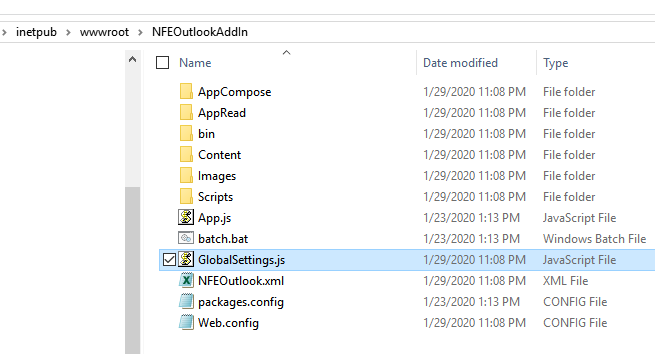
Navigate to the physical NFEOutlookAddIn folder that was created on the web server and, using Notepad or similar, edit GlobalSettings.js.
Locate the line: NFE.ServiceURL = "ServiceURL";//"https://localhost/xWeb/Outlook/Outlook.asmx";
Replace the word ServiceURL with the URL you specified for the Outlook Service in the Install Process. For convenience, you can copy this value from the ServiceURL value in the web.config as described in the previous section.
The Outlook Add-In uses xWeb calls to validate iWeb credentials (i.e. domain credentials). Normal xWeb SOAP calls do not require iWeb credentials; they use NetForum user/xWeb password. So, it is possible that your perfectly functional xWeb site may not be properly configured to authenticate iWeb credentials on the appropriate domain.
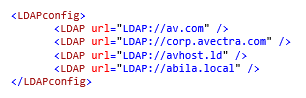
If, when trying to use the Add-In, your login fails with “Invalid Login”, check the LDAP section of the xWeb web.config. If you do not see your iWeb login’s domain here, check the same section in the iWeb web.config and copy over the missing element. Below is a sample of this <LDAPConfig> section; yours will contain different content.