Scheduling Task to Import YM Careers Activities Data
Careers Activities data can be tracked and imported to NetForum by running a schedule task as described below.
Prerequisites
Below necessary task must be completed before running the schedule task for importing the Careers Activities data:
-
Create a schedule task for careers import to prospect.
-
After the task is executed successfully. go to Marketing module->Prospect List-list prospect
-
Choose the prospect list you recently created and click Edit button and select Prospects for Transfer. You can select all or few as per your requirement and click Save.
-
Again, click Edit and then click Transfer prospects. After the transfer gets completed the Individual record will be generated and the career activity for this record can be tracked and imported to NetForum for future references.
To run the Career Activity Import Schedule task:
-
Go to Admin module and expand Task scheduler and then click dashboard.
-
Click the Career Activity Import link.
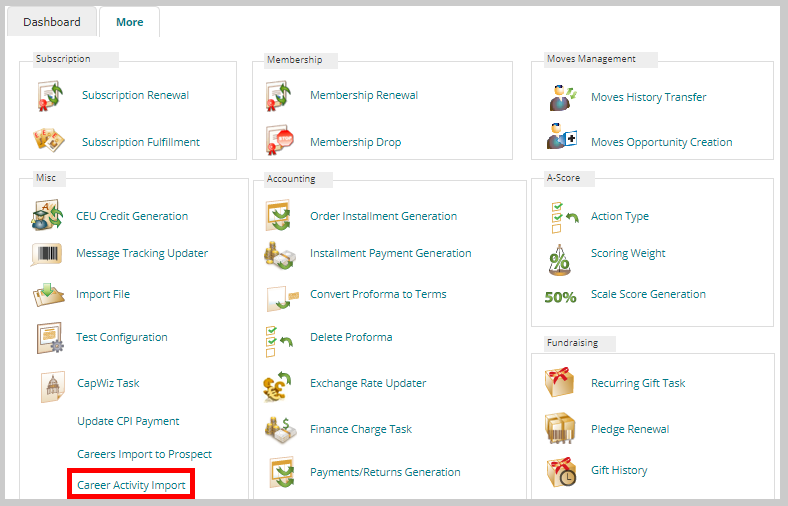
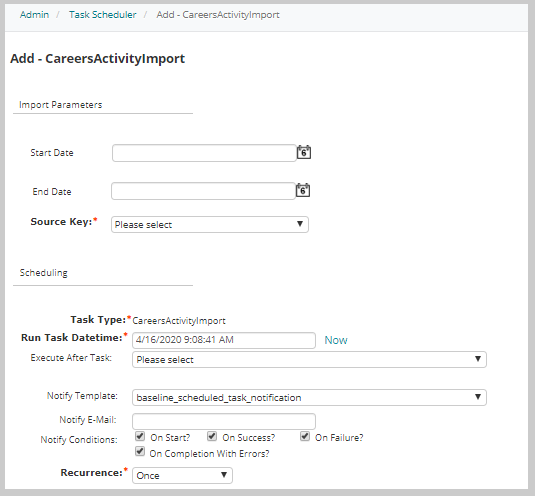
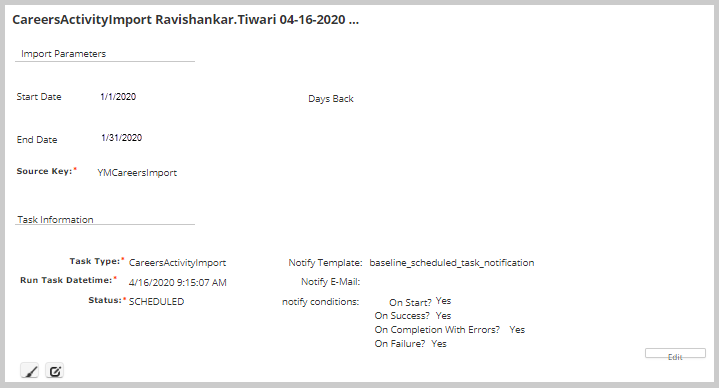
This displays the Add - CareersActivityImport page.
-
In the Import Parameter section, select the Start date and End date from the respective field if you want the task to be non-recurring. If you want the task to be a recurring, skip adding the Start and End Date fields.
Note: Careers Import task process the items into 30 days. If Task is non-recurring, the parameters for Start Date and End Date must meet these conditions or else a validation error will raise and ask the user to correct:
-
If Start Date is empty, then End Date must be empty
-
If Start Date is not empty, End Date may be empty or may have a value
- If Start Date is not empty, and End Date is not empty, then Start Date < End Date.
- If Start Date is not empty and End Date is not empty, then (End Date - Start Date) days must be < 31 days so that there is not more than 30 days between dates. For example, 7/1/20 - 7/31/20 (31-1 = 30) is valid, but 7/1/20 - 8/1/20 (32 - 1 = 31) is NOT valid.
-
-
Set the valid dates and Source Code drop-down option.
-
In the Scheduling section, set the Run Task Datetime field as appropriate or click the Now link if you want to run the scheduled task.
-
Enter the other optional fields as required.
-
Recurrence field is a mandatory field, select an option as required from the drop-down list.
If you select any Recurrence option other than Once (Daily, Weekly, Date of Month, or Week of Month) from the drop-down list, the Start and End Date field will disappear and the Days Back, Every _ Week(s), and Until fields will appear for recurring schedule task.
-
In the Days Back field, set the number of days back you would like the recurring task get the data from the scheduled date. Make sure the value should be in between 1 to 30.
The Days Back field contains value in number of days back from the Run Task Datetime field date that you want the recurring task to fetch the records.
-
Enter the Interval count number in the Every _ Week(s) or Every _ Day(s) field for the recurring task.
-
Select the recurring task end date in the Until field.
Below image shows an example of the recurring schedule task.
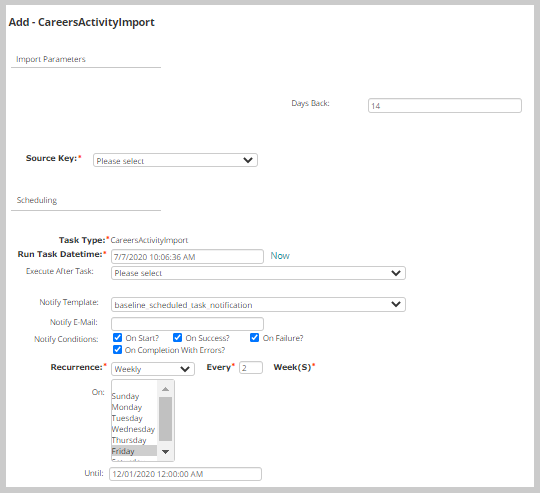
-
Once the all the fields are set to run the schedule task click Save. This will set the schedule task to scheduled state till the mentioned time. Wait until the scheduled task gets completed.
-
User can edit the scheduled task by clicking Edit button from the Scheduled task profile.
- After the scheduled task is completed, go to the History tab on the Schedule task profile. The History section will be loaded with multiple request and response. The response contains multiple records of Careers activities data for the time selected.
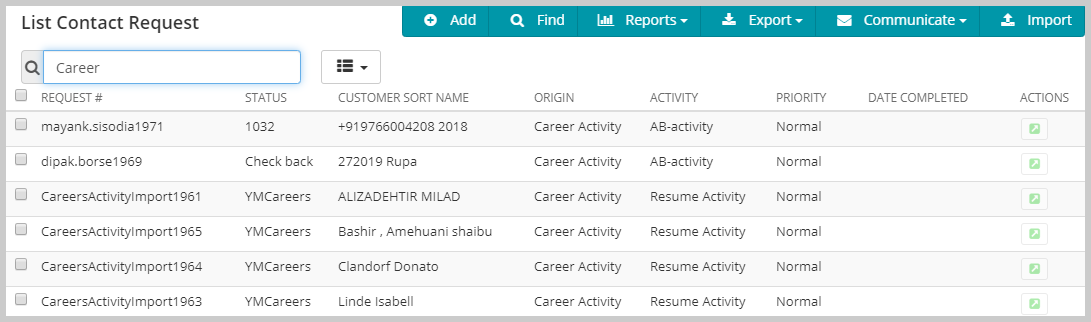
- Go to CRM module and expand Requests group item and then click List Requests.
- Click the Go To icon on the Request, you will observe that the request created are displayed. Open the record and verify the records with the records that listed in the History section of Schedule Task profile.
-
Now click the Name Hyperlink in the Individual Information section. This link will redirect to the Individual profile.
-
On the Individual profile, go to Correspondence tab and expand Requests and activities child form. The recent activities will be listed here. Click the Go to icon on the record to go back to the Customer Request profile.
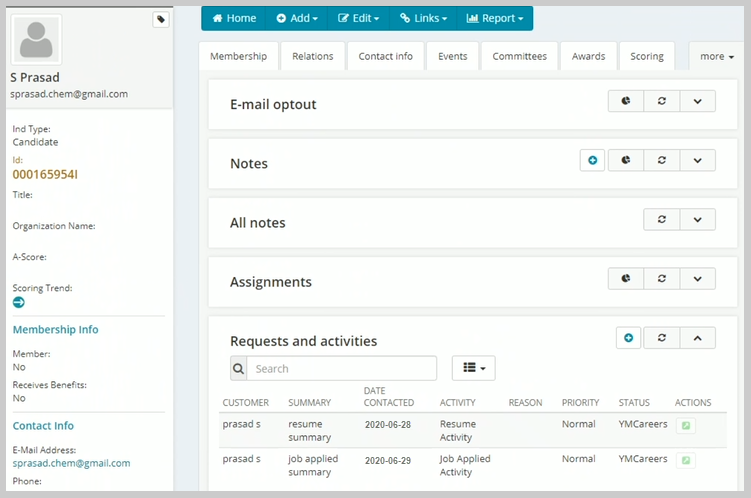

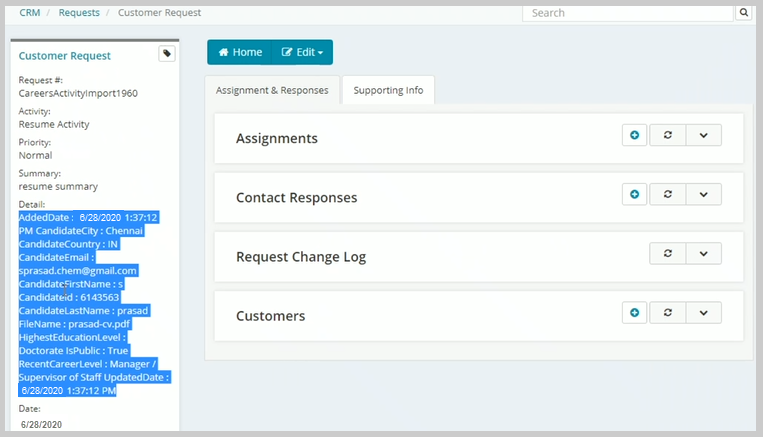
These details will be added in the Request List under CRM.
The Customer request profile is displayed showing two buttons Home and Edit.
The profile card contains fields as below:
Customer Request Information like: Request, Activity, Priority, Summary, Details, Date
Individual Information like: Name, Organization name, Telephone, Fax, Email, Origin, Reason, Status