On the Navigation tab of the Web Site Editor, you can manage the order of the Web page links using the easy drag and drop interface. Web Site navigation links need to be created for each Web Site content page you create in addition to the baseline links that have already been set-up through the Web Site Wizard. See, Creating a Custom Web Site Navigation Link to create a hyperlink for any custom pages you have created.
Changing Link Order on Navigation Bar
Creating a Custom Web Site Navigation Link
Creating Nested Web Site Navigation Links
Changing the Icons for an Expandable List
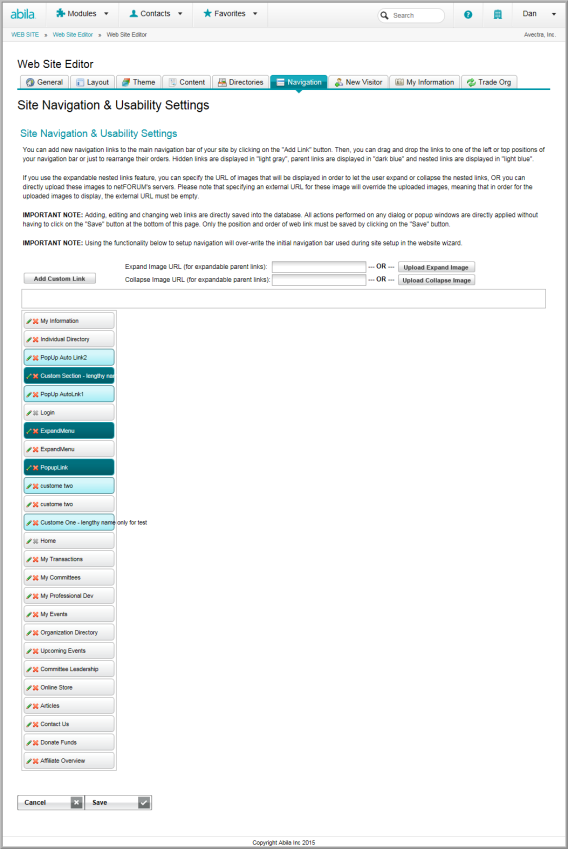
When you first click the Navigation tab, you will see a navigation bar that corresponds to how your Web site is currently set up.
Changing Link Order on Navigation Bar
To change the order of the links on the navigation bar:
-
Go to the Web Site module.
-
On the group items bar, click Web Site Editor.
-
Select the Navigation tab.
Important: Modifying the navigation layout will overwrite the initial navigation bar used during site setup in the Website Wizard.
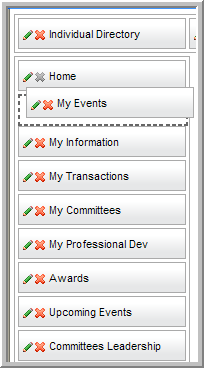
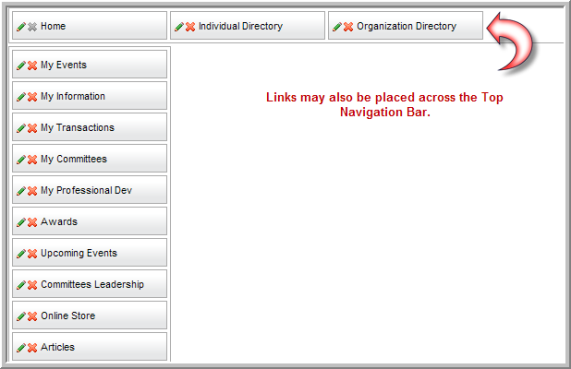
If you want to change the position of a link, simply drag the link to where you would like it to appear. For example, if you would like to move the My Events link so that it appears above My Information, left-click the My Events link and drag it above the My Information link.
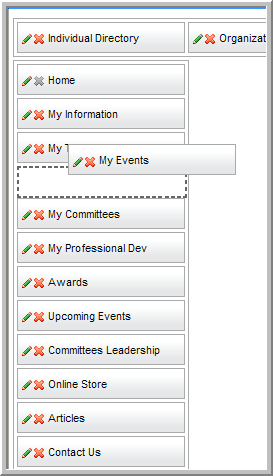
The My Events link slips nicely into place.
If you would like your links to appear across the top of your screen instead of down the left side, drag them to the top position in the navigation bar. When you save and then refresh your site, you will see the top navigation bar now contains those hyperlinks.
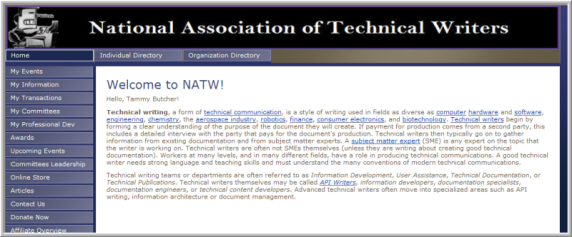
The screen shot below shows how the links above will look on the actual Web site.
On the Navigation tab of the Web Site Editor, you can add custom links to your Web site.
Note: Before you can create the link, you must first add the Web Section and add the Web Page from the Web Site Content directory tree. Web Site navigation links need to be created for each Web Site content page you have created in addition to the baseline content that has already been set-up through the Web Site Wizard.
See Also: Managing the Order of Your Web Site Navigation Links
To create a custom Web Site navigation link:
-
Go to the Web Site module.
-
On the group items bar, click Web Site Editor.
-
Select the Navigation tab. Your custom Web pages will display on the navigation bar(s).
-
At the top of the Web Site Navigation bar, click the Add Custom Link button.
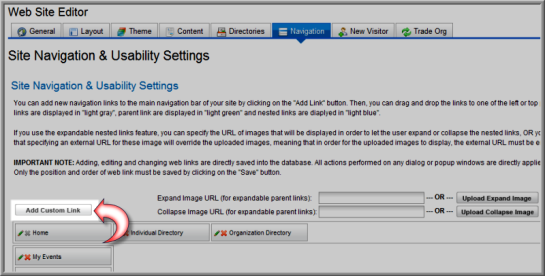
-
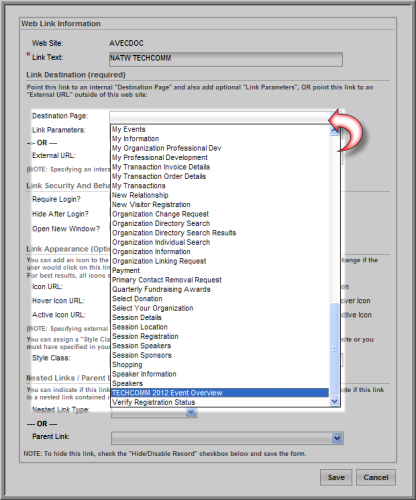
Enter the name of the link in the Link Text field.
![]()
-
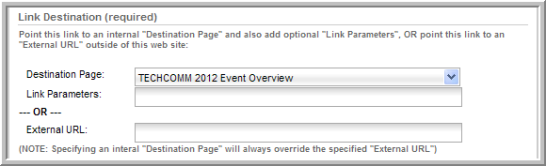
Select an internal Destination Page for this link (This is one of the Web pages created using the Web Site Content tab. See, Adding Web Site Content).
Note: You can add an external URL as the destination, however, if you select both an internal Destination Page and an External URL, the internal page will override the External URL.
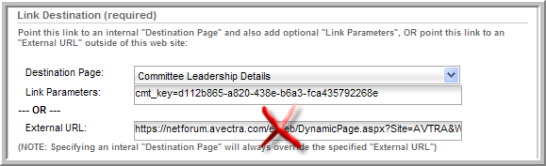
Important: When you need to link to an internal page with parameters with one of your custom links, do not use an External URL link as seen in the image below. A better practice is to use the Destination Page drop-down with the parameters specified in the Link Parameters text box. To find the link parameters to place in the text box, use your browser and extract both items (Destination Page and the Parameters) from what you would normally place in the external link from the eWeb URL. Notice that parameters are always extracted from the URL and use the specific key needed for what you are looking for. For example, as seen in the image below, to link to a specific committee page, extract the cmt_key; for an event use evt_key; for a session, use both ses_key and the evt_key and so forth. Always use the eWeb URL to extract the parameter keys.
- If appropriate, add link security, or specify that
you want a new window to open when the link is clicked:
To require a user to log-in before accessing this link and the corresponding content, select the Require Login check box.
To hide the link after the user logs-in, select the Hide After Login checkbox. (For example, you can hide the login link after the user has logged in.)
To open a new window when the user clicks on the link, select the Open New Window check box. If this checkbox is not selected, the content will appear in the same window.

-
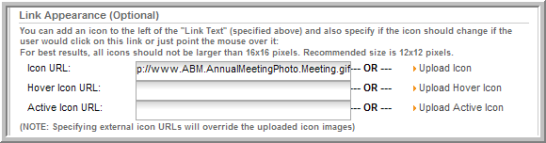
To add an icon to the link:
-
To use an icon for the link, enter a URL for the icon in the Icon URL field. You must host the icon yourself. The recommended size is 12x12 pixels.
-
To add an icon that will display when the user’s mouse hovers over the link, enter the URL for the icon in the Hover Icon URL field.
-
To add an icon that will display after the user clicks on the link, enter the URL for the icon in the Active Icon URL field.
-
You may also upload icons. An external URL icon will override any uploaded icon images.
-
- You can assign a Style Class to this link which either you must have added to the header of this Web site or you must have specified in your own style sheet file (which you must have attached to this Web site):

-
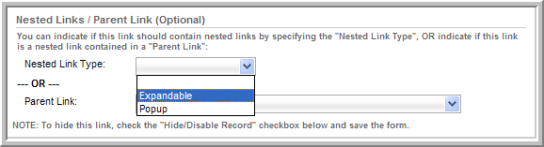
If this is the parent link of a nested menu, select whether this link is an Expandable menu or a Popup menu by selecting the link type from the Nested Link Type drop-down list. Do not set this unless your link contains a child link.
Note: :If you select Expandable, the user will be able to expand and collapse the list of child links. If you select Popup, when the user hovers their mouse pointer over the parent link, a popup menu will display the child links.
See Also: Creating Nested Web Site Navigation Links
If you accidentally delete a link, you will have to recreate the link. You will not be able to recover the link either through the Web Site Wizard or through netFORUM support.
The link will appear in the order it appears on your Navigation tab. You may click and drag links to re-order them.
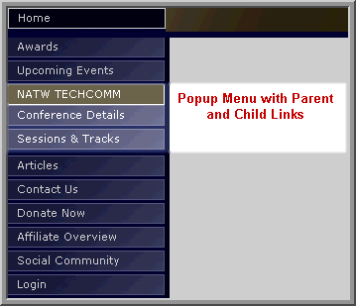
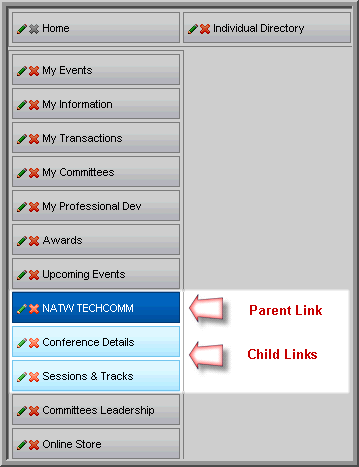
On the Navigation tab of the Web Site Editor, you can create nested links for the Web site navigation bar and set them up as either an Expandable List or a Popup Menu. (Nested links have a parent link with one or more child links under it.) Samples of each are seen below. Note that with an expandable list an icon must be clicked to see the child menu options while with a pop-up they are expanded automatically when the parent menu option is moused-over.
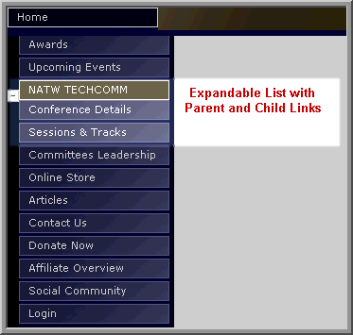
It is very important that you do not create circular references when creating parent and child links. For example, if you create a link and call it Home with a child link titled Page One; Page One cannot then become a parent link of your Home as well. This is a circular reference and will cause an error!
To create a Parent Link:
-
Go to the Web Site module.
-
On the group items bar, click Web Site Editor.
-
Select the Navigation tab.
-
In the Site Navigation area, click the Add Custom Link button.
![]()
-
In the Web Link Information window, enter the name of the parent link in the Link Text field.
-
Select the Web page you want to link to from the Destination Page drop-down list. (This is a page that you created previously, from the Content tab. See Adding Web Site Content for more information.)
-
To make this a nested link, in the Nested Link/Parent Link section at the bottom of the window, select the type of menu (Expandable or Popup) from the Nested Link Type drop-down list. Do not set this unless your link contains a child link.
-
Click Save.
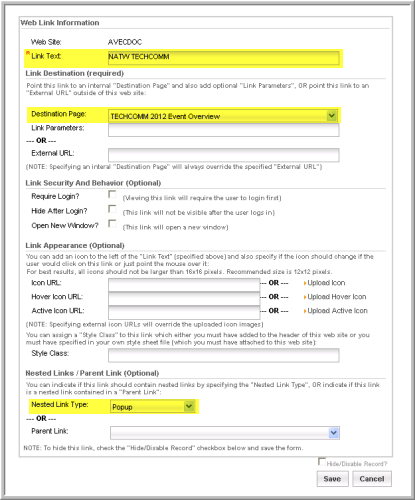
Note: If you want to use the Link Text as a heading only, and not link to an actual Web page, enter the Link Text and select the Nested Link Type, but leave the Destination Page field blank. Click Save.
To create a Child Link:
-
Enter the name of the child link in the Link Text field.
-
Select the Web page you want to link to from the Destination Page drop-down list. (This is a page that you created previously, from the Content tab. See Adding Web Site Content for more information.)
-
At the bottom of the window, in the Nested Link/Parent Link section, select the parent link from the Parent Link drop-down list. There is no need to set this unless your link is a child link.
-
Click Save
.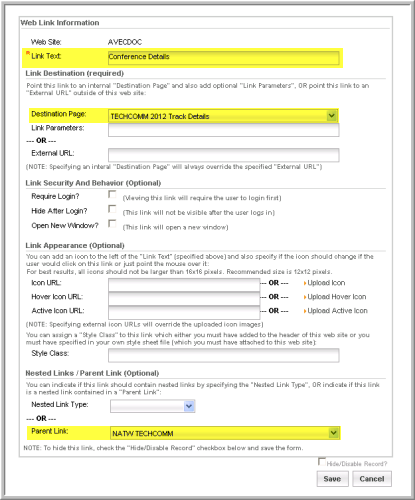
Notice that after a nested list is created, the parent link appears dark blue and the child links appear light blue on the Navigation tab.
On the Navigation tab of the Web Site Editor, you can substitute the icons that are used to indicate a collapsed or expanded list (i.e., parent link with one or more child links under it) on eWeb. See also, Creating Nested Web Site Navigation Links)
Expanded List Sample
Collapsed List Sample
![]()
With an expandable list, normally the user clicks on a plus (+) sign to expand the list of child links and clicks on a minus (–) sign to collapse the list.
![]()
![]()
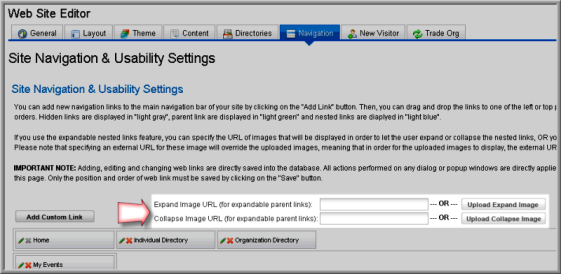
If you want to use a different icon, for example, an open folder icon for the expanded list image and a closed folder for the collapsed list image, you can add file paths to the graphics or upload the graphics to the server from the Navigation section of the Navigation tab.
![]()
![]()
Note: Standard image rules apply in that you may not go over a 12x12 pixel image size and you may only use GIF, JPG, BMP or PNG formats. Keep in mind that you may need to use a transparent GIF if your Web site uses color in the navigation bar.
To change the icons for expandable, nested links:
-
Go the Web Site module.
-
On the group items bar, click Web Site Editor.
-
Select the Navigation tab.
-
To add an expanded list icon, enter a file path for the icon into the Expand Image URL field. Or, you can click the Upload Expand Image link and upload the icon to the server using the Image Upload window.
-
To change the collapsed list icon, enter a file path for the icon into the Collapse Image URL field. Or, you can click the Upload Collapse Image link and upload the icon to the server using the Image Upload window.
-
Click Save. These icons will now serve as the expand and collapse icons on your eWeb site.