
Uploading the Web Site Header Image and Entering Home Page Content
The next steps for creating your web site are deciding on a web site header image and entering the home page content.
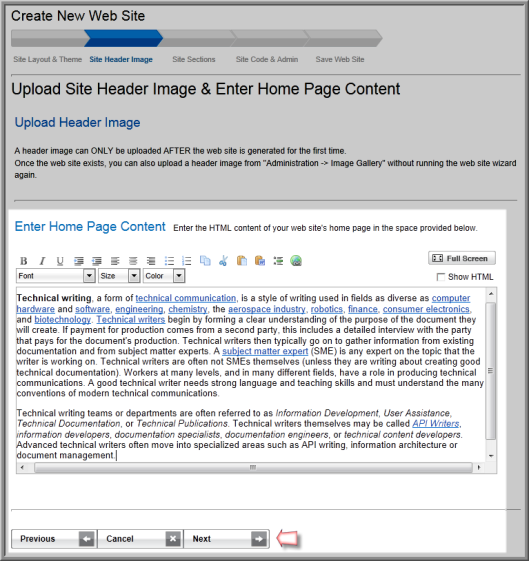
Uploading the Web Site Header Image
The header image for your eWeb site is not uploaded in the Web Site Wizard. Instead, you must completely create your site and then use the Web Site Editor to upload your site header image.
Please visit the Site Header Image section of the Using Advanced HTML, Javascript, and CSS with Your Web Site help topic for complete instructions on uploading a site header image.
You can also remove a Web Site header image if necessary.
Finally, you are also able to manipulate your Website Header Image through the Image Gallery in the Administration Module. The same functions of Save, Upload, and Delete are available just as in the Web Site Editor if you just want to update your image. However, you must have the appropriate rights to use this feature.
Entering Home Page Content
To add content for the Home page:
-
Go to the Upload Site Header Image & Enter Home Page Content page of the Web Site Wizard.
-
Type the text for your Web site home page in the Home Page Content text box. (You can use the formatting tool bar to format the text.) Or, select the Source
 button and copy and paste the HTML content from another
source.
button and copy and paste the HTML content from another
source. - Mac users will need to Enable the Mac HTML Editor to use the formatting tool bar and HTML editing options.
- You can use Microsoft Word to create your content and then paste it into the Home Page Content text box once complete. See Creating a Correspondence or Messaging Template Using Microsoft Word.
-
Click Next to go to the next step in the wizard. When you reach the end of the wizard, the text will automatically be uploaded to the Home page of your Web site.

Tip: To go back a page in the Web Site Wizard, click the Previous button. To stop working altogether in the Web Site Wizard without saving your work, click the Cancel button.