Open topic with navigation
Setting Up Late Fees
When an invoice/order is paid late or behind in payment, organizations
often desire a means to assess late fees. As a result, the Late Fees product has been created
for netFORUM. Using late fees, you may enact business processes
to assess late fees on membership dues renewals, merchandise, events/session,
exhibits/booths, or any product type that have outstanding invoices/orders
where this may be applicable.
Note: Late fees
may not be applied if the original invoice batch is closed.
You may choose to assess them by defining your own term limits such
as 30-days late, 60-days late, year-end assessments and so forth. Finally,
you may assess one person at a time or use a batch process to determine
all invoices/orders that are 30 days late for example.
Late Fee Set-Up
Before you may assess late fees, you must first determine how your organization
will use late fees and then use the Administration module for set-up. Late fees may be a flat rate or based on a percentage of the amount
due.
To set-up a late fee, complete the following
steps:
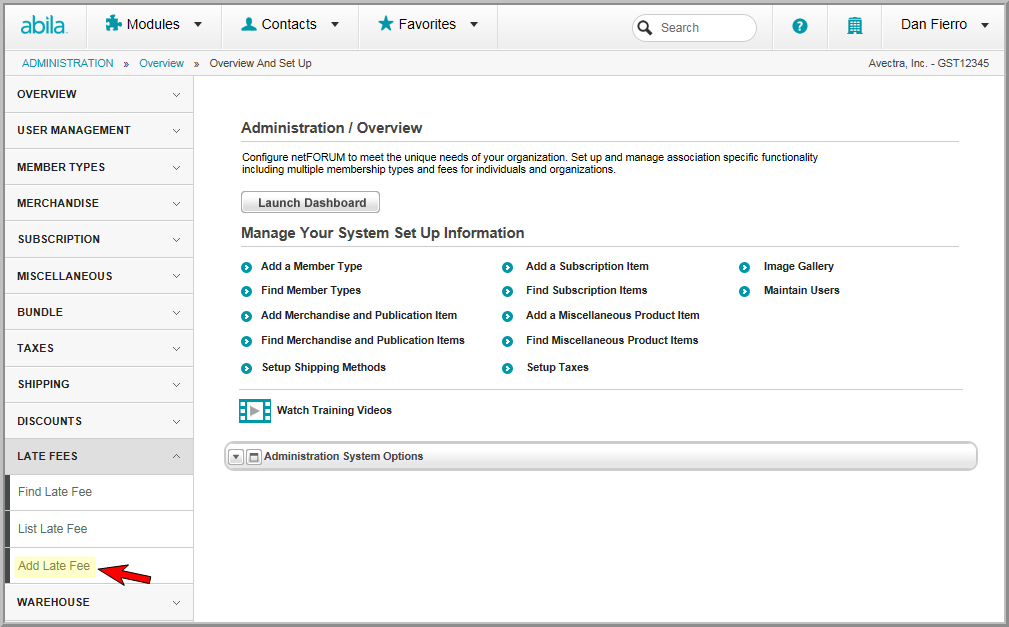
- Click the Administration
hyperlink on the Module
Menu to launch the Administration
module.
- Click the Late
Fees group item to display the list of available actions.
- Click the Add Late
Fee link to open the Late
Fee Product Information page.
- Enter the code that will be used to identify the
late fee in the netFORUM system in the Product Code field.
- Enter a numeric value in the List Order field. This number
will signify the position in a list of late fees, this new fee will
be listed.
- Expand the Merchant Account drop-down and choose
the merchant account this late fee is to be associated with.
- Enter the name for the late fee in the Product Name field.
- Enter a short description of the late fee in the
Description field.
- Click the Available
for Members Only check box if this field only applies to members.
- Click the inactive check box if the late fee is
no longer actively being used.
- Enter the dates this late fee is to be available
in the Item Available From
fields.
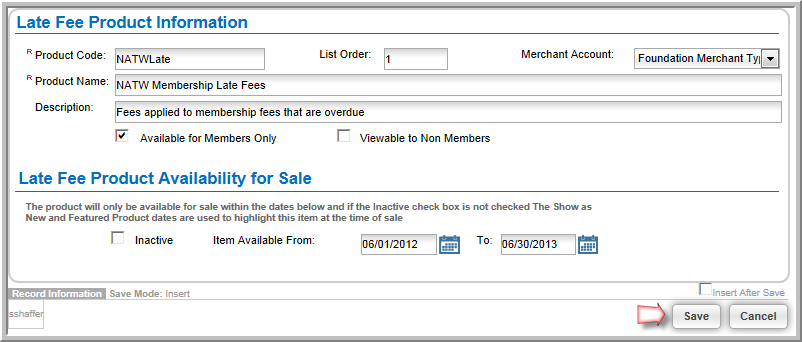
- Click the Save
button.
After saving the new late fee, you will
be taken to the late fee profile. Here you may begin entering fee
amounts. As mentioned, you may enter a flat rate or a percentage
based fee - which is based on the amount due of the invoice.
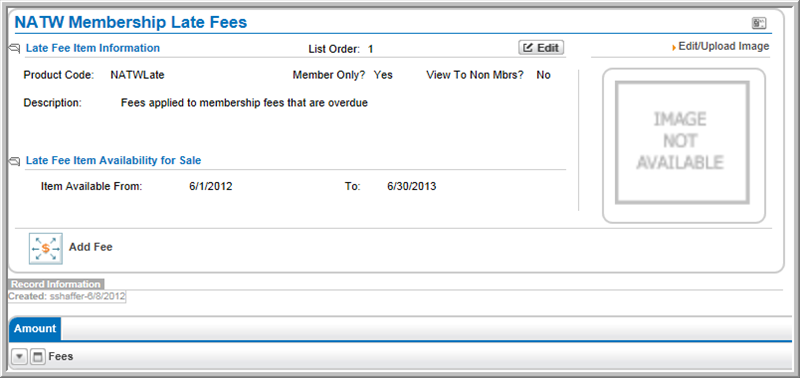
Adding Fees to a Late Fee
In the sample late fee, three different fees will be used, a 30- day,
60-day, and 90-day late fee assessment.
To add a fee to a Late Fee profile, complete
the following steps:
- Click the Add Fee
icon on the action bar or the Add
 button on the Fees
child form located on the Amount
tab.
button on the Fees
child form located on the Amount
tab.
- Code: Enter
a descriptive code for the Late Fee.
- Price Name:
Enter a descriptive name for the Late Fee. This will appear
in drop-down menus and on the invoice so it should accurately reflect
what fee is being assessed.
- Charge Code: Expand the Charge Code drop-down menu and select
the charge code this fee will be applied to.
- Member Cost/Non-Member
Cost: You may choose to assess different fees based on
member or non-member. This is a flat rate.
- Percentage:
You may also assess by percentage. If you choose to assess
by percentage instead of flat fee, the percentage is based on the
Balance Due of the product/line
item in the order/invoice. Note that balance due may reflect
a line item for membership, product, etc. and include tax and shipping
for that line item.
- Start Date/End
Date: Enter the start date and end dates when the fee
is available for use.
Tip:
If
you choose to enter both a flat fee and a percentage rate
during late fee set-up, the percentage will be the fee used
when you run the batch process to assess multiple late fees.
Only the flat fee will be assessed when processing one
late fee at a time through the iWeb shopping cart.
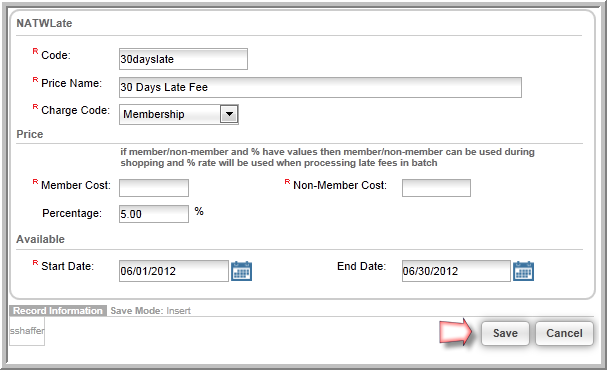
- Click the Save
button. Once saved, your fee will appear in the Fees
child form under the Amount
tab. In the example below, three fees have been added.
