
Mass Replace
The Mass Replace functionality allows you to replace a single value into a selected column across many records.

Example: Updating the records of individuals related to an organization that have a name or phone number change. Or replacing the Mister prefix with Mr.
Please note that the Mass Replace button will appear in the List Page Action Links only if it has been enabled in the Toolkit for that particular Group Item. The button will not appear if you perform a basic List; you must run a Find or Query to get a specific set of records. If you run a List and then you can use the Select Mode checkbox on the List Page to select the specific records you wish to mass replace. Once you choose the Select Mode checkbox, the Mass Replace icon becomes visible.
Enabling mass Replace
To configure security for Mass Replace button you can set the LinkKey in system option MassReplaceLinkKey.
By default, Mass Replace is available on list pages for the following group items:
- Individuals
- Organizations
- Assignments
- Gifts
- Chapters
- Memberships
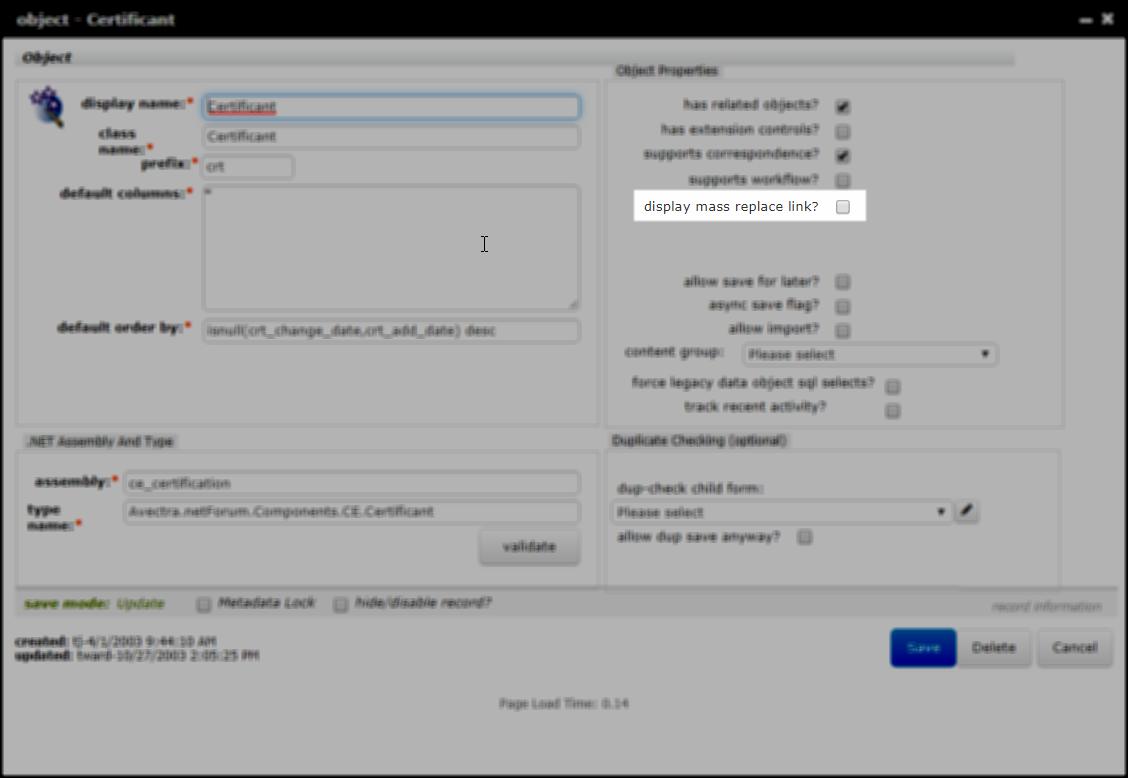
To enable the Mass Replace feature on additional list pages, edit the Object Profile for which you want to enable Mass Replace, and select the display mass replace link? check box.
Note: Editing the Object Profile requires access to the Toolkit module.
Using Mass Replace
Administrators can configure Mass Replace so that only specified fields can be updated rather than every field as in the past. This adds more control to this powerful yet potentially dangerous (if not used carefully) feature of netFORUM.
Important! The Mass Replace feature is a powerful tool and should be executed by users who are thoroughly familiar with its functionality and consequences.
To Use Mass Replace (using an Individual List as an example):
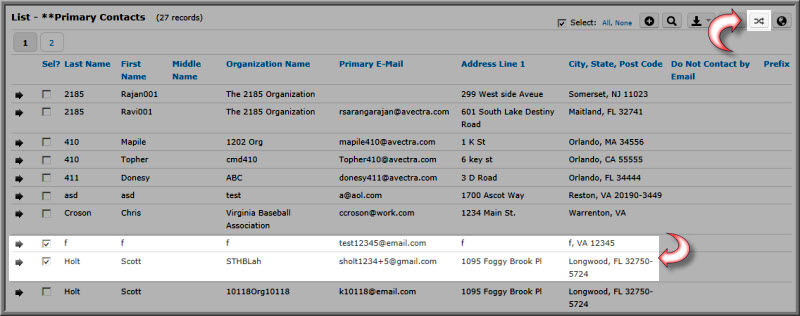
- Go to . If you simply List Individuals, you must check the Select Mode checkbox to see the Mass Replace
 icon.
icon. - Select the records you want to manipulate, and then select the Mass Replace icon.
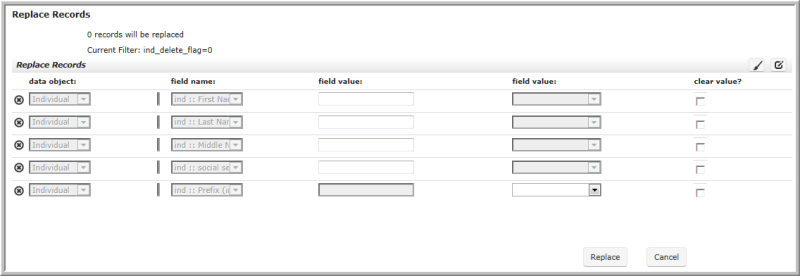
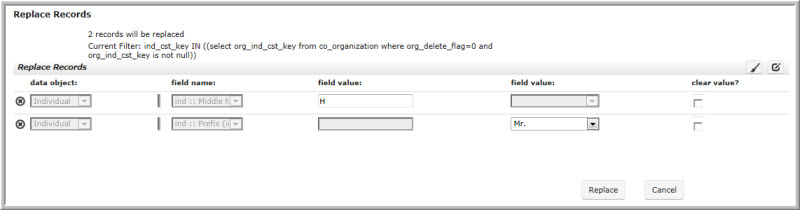
The Replace Records page opens
 Select the Mass Replace icon once you have selected the records you want to manipulate.
 - On the Replace Records page, notice that only certain fields are initially available for replacement. In the case of individuals, first name, last name, middle name, social security, and prefix. You may add more through Toolkit, which is discussed in Mass Replace-Toolkit.
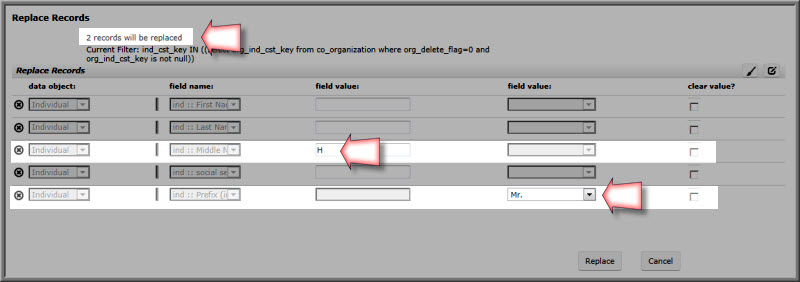
- In the field value field, enter the new value of the field you want to replace for all fields of the selected row you identified in the previous step. For example, each of the 2 records selected, will have a new middle initial of H and a new prefix of Mr.
 Replace Fields with an Actual Value drop-down list
 - Because empty or null values are not allowed, the final step before clicking Replace is to remove those line items you will not be replacing. Use the Delete
 next to each row to remove it if you are not replacing a field. The only rows that should remain are those you are replacing values for such as seen below in the case of the middle name and prefix.
 Delete Rows where you are not Replacing Fields
 - Click Replace.
- A message displays: You have selected [#] Records To Replace. Are you sure? Select Yes and it will continue to execute the mass replace.
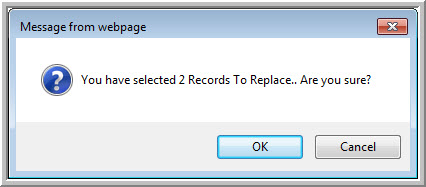 Mass Replace Warning
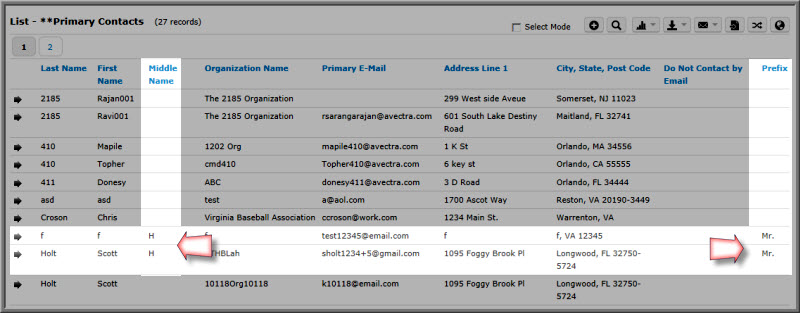
 - The individual search results display again. Review the list to see that the column you selected was replaced. In the example used, you will notice that the 2 records selected now have a middle name initial and a prefix of Mr.
Configuring available replace fields
The fields available for replacing are configured on the Toolkit Form associated with the Mass Replace link.
To configure which fields are available, do the following:
- Launch mass replace for the area in which you want to add or adjust the mass replace fields. This is done in the standard netFORUM UI as an end user would do, not in the Toolkit.
- From the URL querystring, copy the value of the FormKey parameter. The URL will look similar to the one below. In this example, the FormKey is b772881d-d704-40f3-92b6-09b13a50fcc9:
- In the Toolkit, go to the Form that has the FormKey you copied in the previous step. The easiest way to do this is by pasting the FormKey you copied in the previous step into the Super Search field.
- When you are on the Form, go to the Controls tab and manage the replace fields from the manage mass replace fields child form.
https://<<netFORUM_url>>/iWeb/forms/md/MD_SearchReplace.aspx?FormKey=b772881d-d704-40f3-92b6-09b13a50fcc9&ObjectKeyFrom=f41b6e06-299b-4022-be6f-0641ba87de59
If no fields are enabled for the Form, then all fields will be available for replacing.
Only writable fields in writable data objects will be available.
Extending Mass Replace to Other Areas
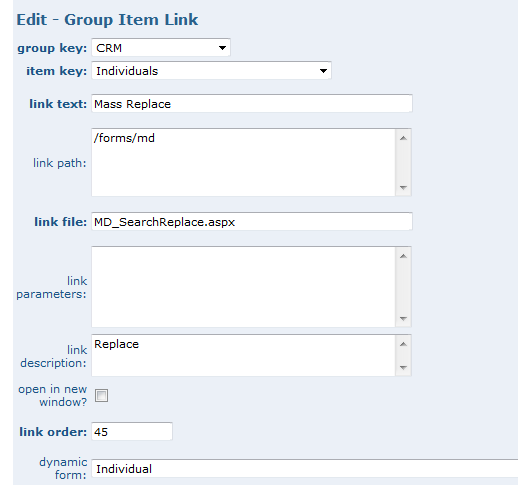
Mass Replace group item link for Individual
If you have Toolkit access, you can add a Mass Replace Group Item Link to other Group Items within other Modules. You will need to specify a FormKey that belongs to the main Object for which you want to run Search and Replace.
Some baseline Static Facade Objects are not compatible with the Mass Replace functionality, e.g. Membership. In this case a new Custom Dynamic Object and Form can be created. In this case, two links would need to be added; one for the Mass Replace and one for a Mass Replace Query. The reason for the special query is that the Mass Replace and the Query providing the data must share the same form. Be aware that taking this approach bypasses the Baseline Object and its functionality.
You can also add more fields to replace from the baseline fields included in Mass Replace from the Dynamic Content Form Profile under the Content child forms.