This tutorial demonstrates the login procedure for an on-premises MIP API service. The procedure for a hosted installation is a little different and is covered here.
Most MIP Advance API methods require authentication; in other words, you must sign in with valid credentials to use the service. Because the REST service is stateless, however, signing in does not automatically authorize the requests you submit afterwards. Authentication for the MIP Advance API service is token-based: when you sign in successfully, you are issued a token that you must then include as a header in your subsequent API calls. In this tutorial we show you how to obtain this token from an on-premises MIP API service. A later tutorial will demonstrate how to include the token in your other API calls.
Please be aware that the sample code is simplified for clarity, and should be used for learning purposes only.
In an on-premises API service, logging in is accomplished by a direct API call. To see how it works, type the code below into your text editor, making the following substitutions:
| [[REST_URL]] | The URL of your locally installed REST API server, for example http://localhost:9002. | |
| [[YOUR_ID]] | Your login ID for MIP Fund Accounting. | |
| [[YOUR_PASSWORD]] | Your password for MIP Fund Accounting. | |
| [[YOUR_ORG]] | The MIP Fund Accounting database you will be using. For these exercises, your training database (NTO) is recommended. |
<html>
<head>
   <script src="https://ajax.googleapis.com/ajax/libs/jquery/2.2.2/jquery.min.js"></script>
   <script>
      $.ajax({
         method: "POST",
         url:"[[REST_URL]]/api/security/login",
         data:{
            login: "[[YOUR_ID]]",
            password: "[[YOUR_PASSWORD]]",
            org: "[[YOUR_ORG]]"
	 },
         success: function(data, status){
            alert("Success! Your new token is:\n" + data.token);
         },
         error: function(data, status) {
            alert("Error: " + status);
         }
      });
   </script>
</head>
</html>
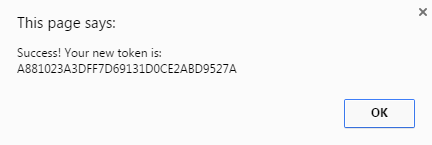
Save the code as loginsample.html, and open the file with your web browser. You should see an alert box
similar to the following:
If the alert box indicates an error instead, check that the credentials you substituted for the placeholders above are typed correctly and enclosed in quotes. If no alert box appears after several seconds, use F12 to check the browser console for errors.
If the data you are pulling is from the wrong database, it is because the login uses the most recent organization where the user has logged in. To change databases, you must first change your organization using the "Change the current organization context" endpoint (see the API Reference Guide for more details). Note that you must enter your authentication token in the header of the call each time you change your organization.
As in the previous tutorial, the jQuery ajax() method accepts a JSON object argument containing all of the information required for the HTTP request. The "method," "url," "success," and "error" members of this object serve the same purposes as in the earlier example. Because the API Login method uses the "POST" verb, however, the JSON object includes an additional member: "data," which contains another JSON object specifying the parameters (in this case, login credentials) required by the API method.
The JSON object returned in the response to a successful Login request contains the authentication token as well as copious information about the user. Most of this information can be ignored for our purposes; the authentication token appears under the member name "token," as referenced in line 14 of the sample code above.