Organization Module Setup Budget Tab
To open the Budget tab, click Budget on the tab bar at the top of the Organization Settings form with Module Setup selected on the left.
Budget Versions
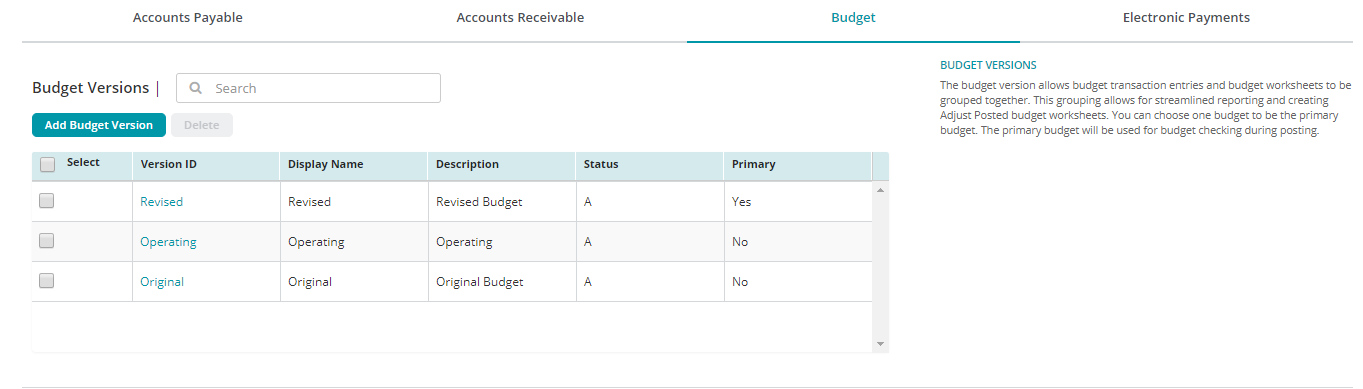
Use this form to set up multiple Budget Versions. A budget version allows budget transaction entries and budget worksheets to be grouped together. This grouping allows for streamlined reporting and creating Adjust Posted budget worksheets. You can select one budget to be the primary budget. The primary budget will be used for budget checking during posting.
Budget Versions Table
Add Budget Version: Click the Add Budget Version button to add a new budget version. See the Organization Module Budget Add Budget Version page for more information.
Select: Click the Select check box to select a budget version and activate the Delete button. Click the Select check box located in the title bar of the table to select all budget versions in the table.
Version ID: Click on the Version ID to edit details about the budget version. The Version ID cannot be edited, but you can change the Status, Description, Display Name, and change the Primary Version.
Display Name: The display name for the budget version. The display name appears in reports.
Description: A short description of the budget version.
Status: The status of the budget version. Can be one of the following: A (Active), I (Inactive), D (Discontinued), or L (Locked).
Primary: Indicates which budget version is set as the primary budget version. The primary budget will be used for budget checking during posting.
Reset Grid: The Reset Grid button will reset the specific table to its default order. See the Tips and Shortcuts page for more information on reorganizing grids.
Primary Budget Details
Use this section to add additional information to the budget version set as primary.
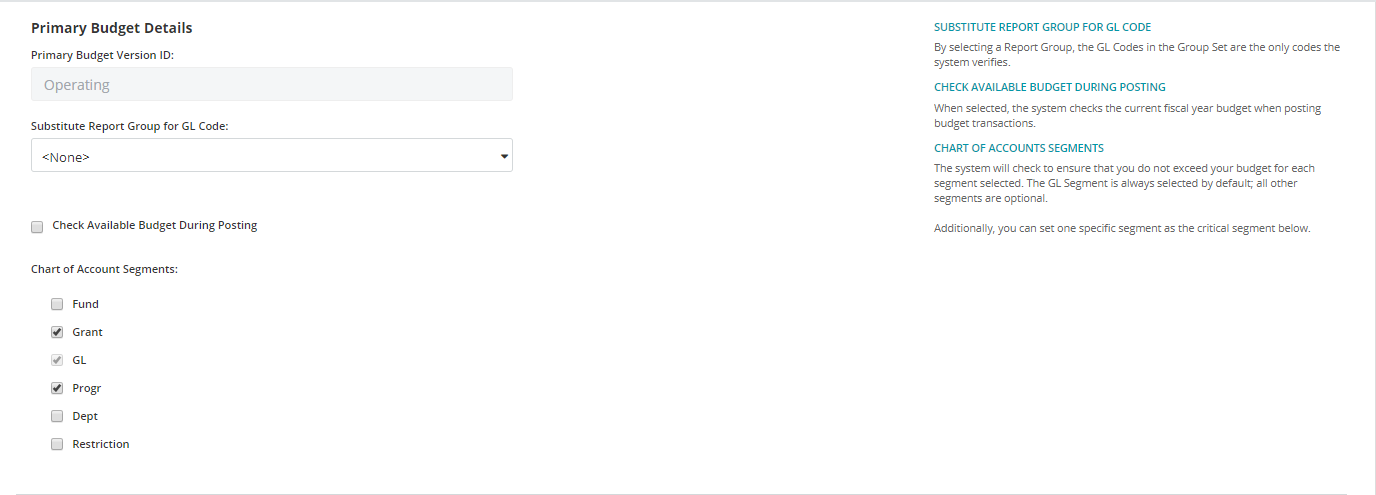
Primary Budget Version ID: Displays the Version ID of the budget version set as primary. This field is not editable.
Substitute Report Group for GL Code: Select a report group for the GL code. By selecting a report group, the GL codes in the group set are the only codes the system verifies.
Check Available Budget During Posting: When selected, the system checks the current fiscal year budget when posting budget transactions.
Chart of Account Segments: The system will check to ensure that you do not exceed your budget for each segment selected. The GL segment is always selected by default; all other segments are optional. Additionally, you can set one specific segment as the critical segment.
Critical Segments
Setting up critical segment dates is not required. This is useful when specific grants or programs use a different budget period.
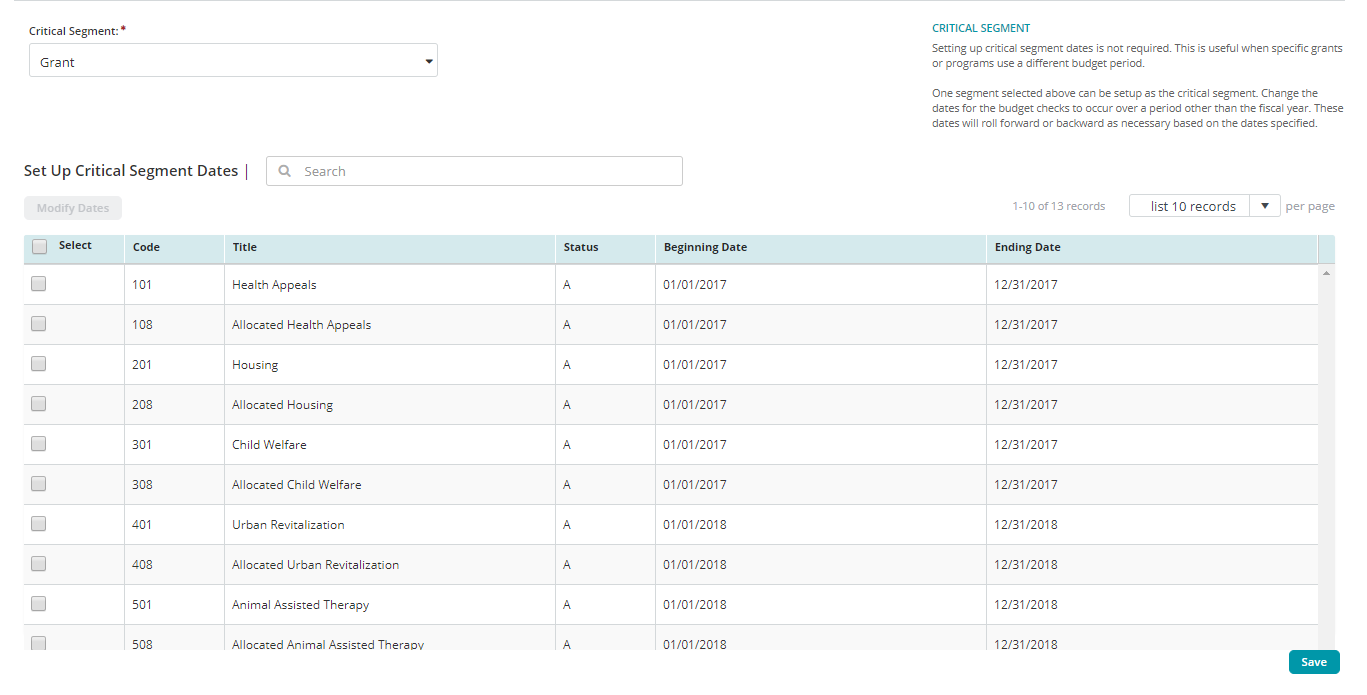
Critical Segment: Select the segment you want to set as critical from the drop-down menu. The Set Up Critical Segment Date table will display the codes for the selected segment.
Set Up Critical Segment Dates Table
Select: Click the Select check box to select a segment and activate the Modify Dates button. Click the Select check box located in the title bar of the table to select all segments in the table.
Code: The account code assigned to the segment.
Title: The title of the account code.
Status: The status of the account code.
Beginning Date, Ending Date: The beginning and ending dates for each account code within the segment to apply system checks. By default, the system displays the current fiscal year dates.
Reset Grid: The Reset Grid button will reset the specific table to its default order. See the Tips and Shortcuts page for more information on reorganizing grids.