Return
- Return
- When an item that has already been shipped is returned for a stated reason.
Scenario A customer places an order for a T-Shirt. Upon its arrival, the shirt is the wrong size, and the customer will not be able to have it. The customer informs you of the situation and asks for a return with the money credited to their account.
If the item was paid for using a Prepaid payment type or has a remaining balance, a credit is automatically created and added to the customer's account.
If the item has a Terms or Proforma payment type where no payment had been made, a return payment is generated.
The standard Group Item Links (Find, List, Run Query, Query Central) are available in the Return group item with the exception of the Add functionality. The Add functionality is not included because when the product is returned after a payment is made, a Credit is created automatically and added to the individual's or organization's profile. At that point, you can either leave the money as a credit or go through the refund process.
Return vs. Cancel
Though the Return and Cancel functions are used interchangeably, the difference lies solely on whether the product has been fulfilled and shipped.
- If the product has been shipped the item (or transaction) is RETURNED.
- If the product has not been shipped, the order is CANCELED.
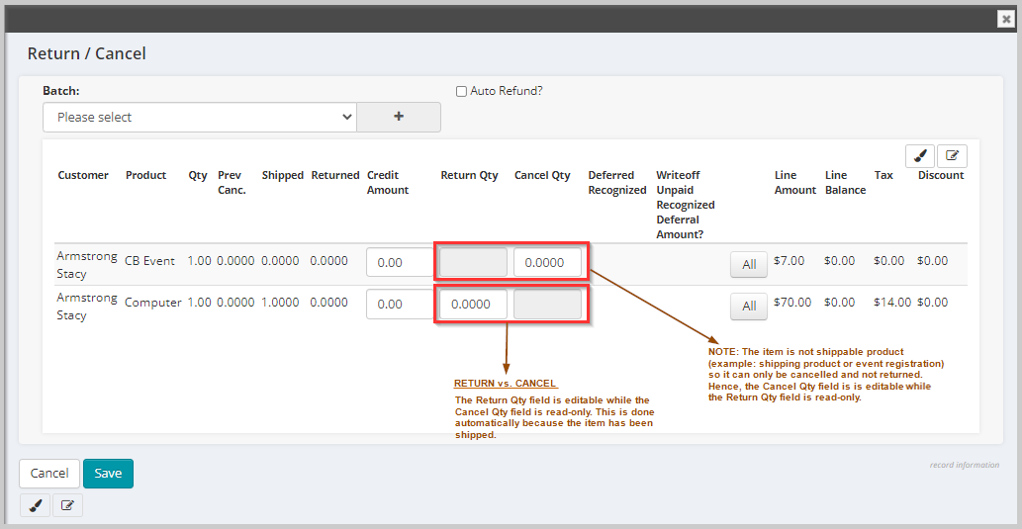
The processes regarding the money transactions are the same. The only difference is which field is available to you.
Adding Records
The standard Add functionality is not available in its typical form in this group item because Return records are created from the Invoice Profile.
Returning an Item from the Invoice Profile
Returns are executed from the Invoice Profile.
To Return an Item on an Invoice:
- On the Invoice Profile page, click the Add profile menu and then click the Return/Cancel link. The Return/Cancel page displays for that invoice with the following information:
|
|
- On the Return/Cancel page, select a Batch for the return.
- In the Cancel Qty or Return Qty field, enter the number of that product you want to return or cancel (see above for criteria).
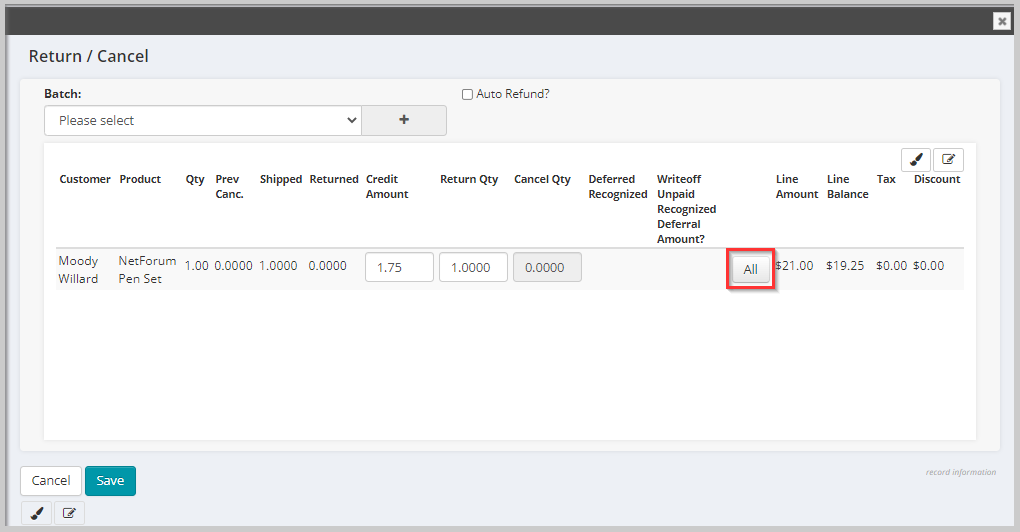
- If you click the All button and their is a remaining balance for that line item, the Credit Amount and Cancel Qty or Return Quantity fields will populate with the full amounts.
- If you click the All button and no payments have been made against a terms or proforma invoice, the Cancel Qty or Return Qty fields will populate with the full amounts but the credit amount field will remain at 0.00 (See Note).
- Select the Auto Refund? check box to automatically refund the payment to a credit card. If you do not select this check box, a credit will be created. This checkbox will not be available if the purchase was not made with a credit card.
- Click Save.
The Auto Refund? checkbox may be controlled by user group (in the Admin module) so that only specific staff may refund payments to credit cards if he/she is part of that user group. Those not part of the user group will not see the check box on the Return form. This provides those organizations that want more security on refunds the ability to add it using this functionality.
The credit displays on the:
- Individual or Organization Profile page, Credits child form.
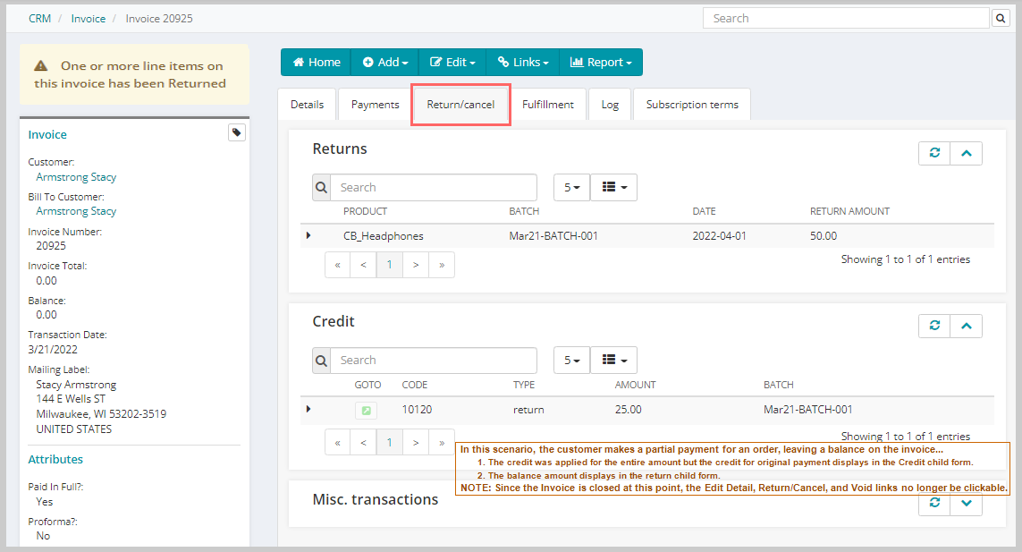
- Invoice Profile, Return and/or Credits child form (see screen shot below).
- If there was a balance on the invoice prior to running the return process, the amount will display in the Returns child form.
- If the invoice was prepaid without a balance, the return information displays in the Credits child form.
- Credit Profile page.
Scenarios...
-
- Your customer makes a partial payment for an order, leaving a balance on the invoice, then decides to return the products because they are damaged or not satisfied.
- Your customer sends you a check for a payment that is below the full amount of the invoice, then decides to return the products.
In these cases, the returns would display in BOTH child forms since there was a balance on the invoice when the return was completed.
Creating a Partial Credit (for a Non-Deferred Invoice)
When returning/canceling an invoice that contains a non-deferred product, you can edit the credit amount and give less than the full amount of credit. This functionality was previously available only for deferred products.
To Give a Partial Credit:
- Go to the Invoice Profile.
- On the Invoice Profile page, click the Return/Cancel link on the Add profile menu.
- On the Return form, enter the return or cancel quantity. The credit amount will default to the amount paid.
- Edit the amount to change the credit amount. You will not be able to credit more than was paid for the line item.
Finding Records
There are multiple ways to locate a record using the Find page (for detailed methods on how to locate records, see the Find page). The Find functionality is universal throughout NetForum. The results will display in a List page, which is also universal throughout NetForum.
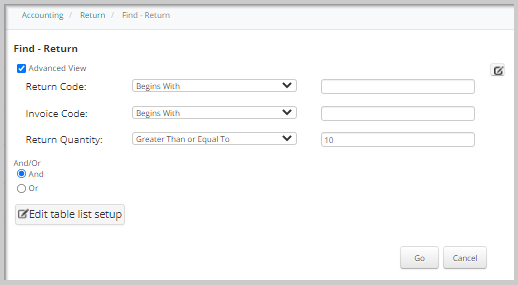
The only data available to locate a Return record on the Find - Return page is Return Code, Invoice Code, and Return Quantity because all of the other pertinent information was entered during the Add Invoice process.
Find vs. Query
The Find page is setup with a pre-defined set of columns (fields) versus a Query which allows you to select from ANY column in the search Table.
The Return Profile can ONLY be accessed from the List - Returns page.
To go to a Return Profile:
- Go to the Accounting module.
- Click the Return group item.
- Click the Find Return group item link. The Find - Return page displays.
- On the Find - Return page, enter search criteria to find the Return Profile record and click Go. The List Return page displays.
- On the List Return page, click the Go To
 icon on the record you wish to view. The Return Profile page displays.
In the example below, the search (Advanced View) will be on all return records with return quantities of 10 or more.
Managing Records
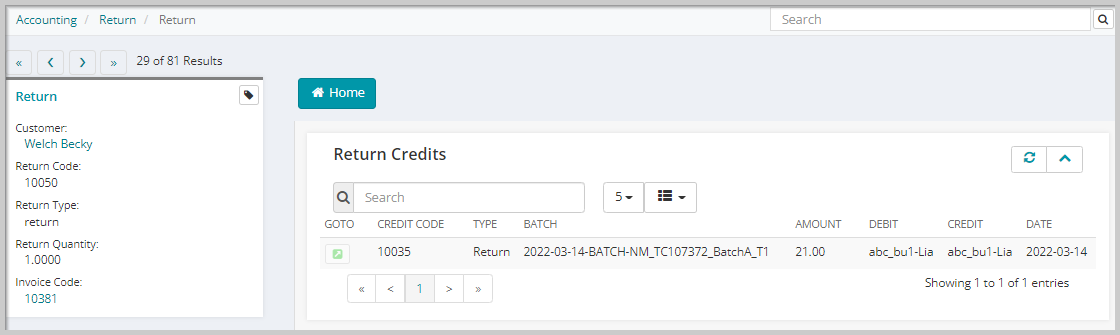
The Return Profile contains no functionality and thus, is for informational purposes only. Like most profile pages, click the Customer link to navigate to their Individual or Organization profile pages. You can also click the Invoice Code link to return to the original invoice of the transaction or the Go To icon on the Return Credits child form to view the Credit Profile.