
Creating a Data Import Template
To create a Data Import Template:
- Hover over the Administration module icon to expand the Administration fly-out menu.
- Click the Overview link to expand the Overview fly-out menu.
- Click the Data Import link to launch the Data Import Wizard.
- Follow the steps outlined above for uploading a new spreadsheet.
- Follow the steps for selecting the Excel Worksheet(s) and selecting the Header Row and First Data Row.
- Expand the Saved Templates drop-down menu.
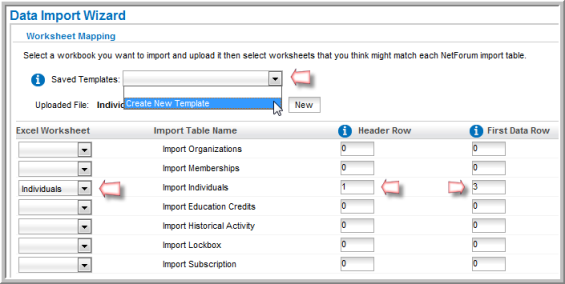
- Click the Create New Template option. This will display the Description field.
- Enter the name for your new template in the Description field. This is the name that will display in the Saved Templates drop-down menu.
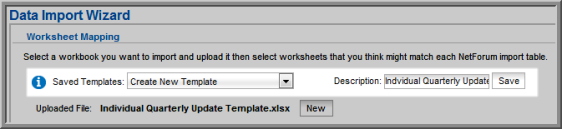
- Click the Save button located next to the Description field.
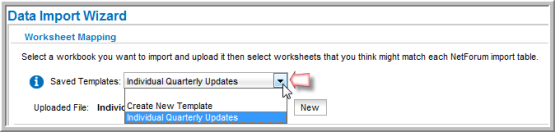
- Expand the Saved Templates drop-down menu. Your newly created template is now available to be used.
- Click the Next button located at the bottom of the page.
- Map any columns that were not automatically mapped, or change any columns you desire.
- Click the Next button. This will open the Import Process page.
- Click the Finish button. Your template and all of the associated mappings you set up are now saved for later use.