
Adding Contact Information and Generating the Web Site
Tip:
Only
entities that do not have an eWeb site created will be able to
access the
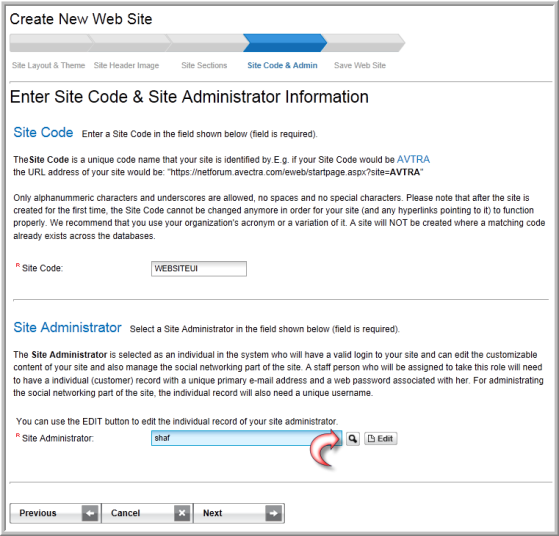
The Enter Site Code & Site Administrator Information page is the fourth step in the Web Site Wizard. This page specifies your Site Code and allows you to choose a Site Administrator for your eWeb site.
Tip: The Site Code is a unique identifier for your Web site and is part of your URL. It is automatically populated for you during implementation and should not be changed.
To add your Web Site Administrator:
-
Go to the Enter Site Code & Site Administrator Information page of the Web Site Wizard. This is the fourth page in the wizard.
-
Scroll to the Site Administrator Information section of the General tab.
-
Enter the first few letters of the individual's last name whom you would like to take over the Web Site Administrator duties in the Site Administrator field.
-
Click the Search
 icon. This will
return a list of individuals who match your search criteria.
icon. This will
return a list of individuals who match your search criteria.
Each entity is required to designate a Site Administrator. Your Site Administrator is selected from a customer record within CRM and should be a licensed Staff member.
-
Click the hyperlinked name of the individual (from the search results page) that you would like to assign as the Web Site Administrator.

After selecting the individual from the list of search results, the Site Administrator field will populate with his/her name.
The Site Administrator is required to have an Admin Username. This user name must be unique to the Social Networking part of the eWeb site. If the person selected does not have a valid Admin Username, the following warning will be displayed after selecting the administrator.
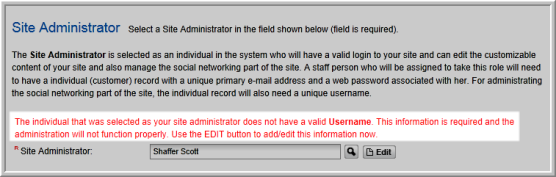
To add an Admin Username to this individual:
-
Click the Edit button next to the Site Administrator field.
This will open the Web Site Administrator pop-up window.
-
Enter the Admin Username for the new administrator in the Admin Username field.
-
Only enter an Admin New Password if you wish to change the new administrator's current password.

-
Click the Save button.
The Enter Site Code & Administrator Information field will update, and the username warning seen above will no longer be displayed.
Tip: The Site Administrator is also the Social Networking Administrator for MemberFuse.
-
Click the Next button to proceed to the next step.
Tip: To go back a page in the Web Site Wizard, click the Previous button. To stop working altogether in the Web Site Wizard without saving your work, click the Cancel button.