Adding a Deceased Flag to an Individual's Record
Adding a Primary Organization for a Contact
Adding a Note to a List of Individuals or Organizations
Adding an Individual's Contact Information to Outlook Contacts
Edit an individual's contact information, membership information, contact preferences, login settings, and social media handles using the Edit Action Icon drop-down menu. You may also upload an image to associate with the individual's profile.
Hover over the Edit Action Icon![]() at the top of the individual profile to:
at the top of the individual profile to:
![]()
The Edit Name and Address option allows you to update all individual information that can be entered when creating a new individual profile. Click Save to preserve changes.
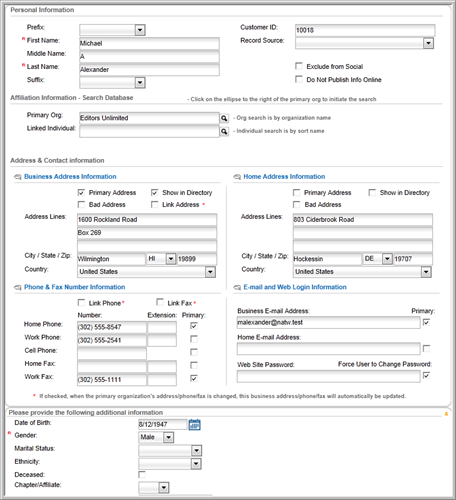
In the Edit Name and Address form, you can:


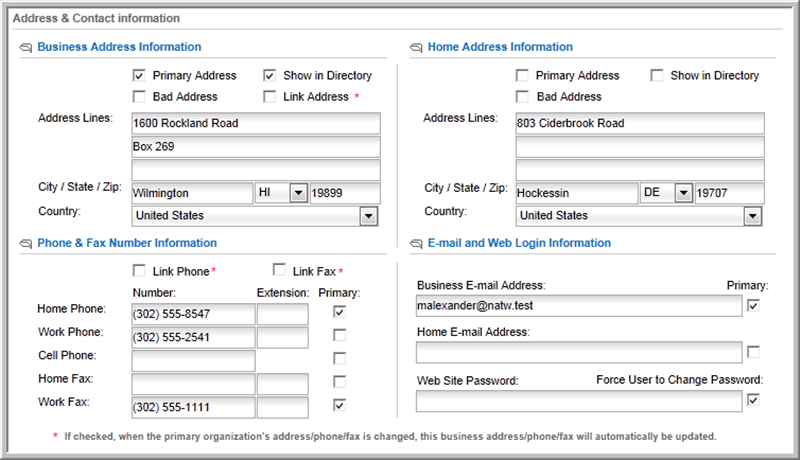

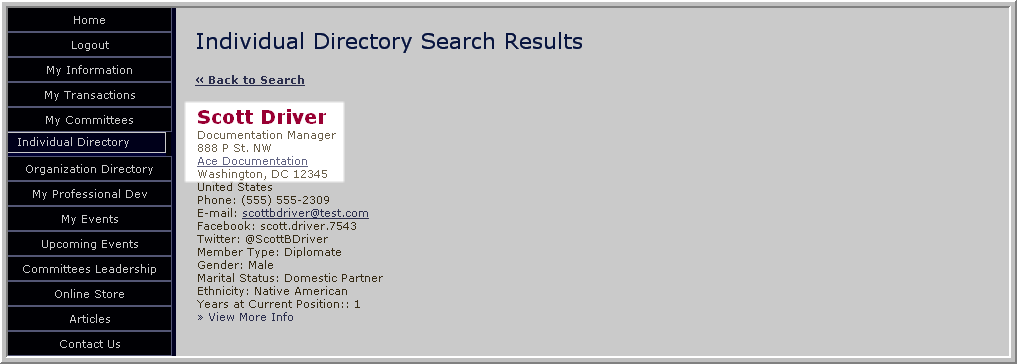
Use the Edit Individual Information form to indicate which address—business or home—to display on the eWeb individual directory entry. The Show in Directory check box next to the Business Information and Home Information sections allows you to specify whether to display the business or home address under the individual's eWeb profile entry. Click the Show in Directory check box above the address that you wish to display on eWeb.
Tip: The Show in Directory check box must be selected for either the Business or the Home address. If Show in Directory is not selected for either address, no address will appear on the eWeb directory listing. The Do Not Publish Info Online check box must not be checked for individual profile information to appear in the eWeb directory.
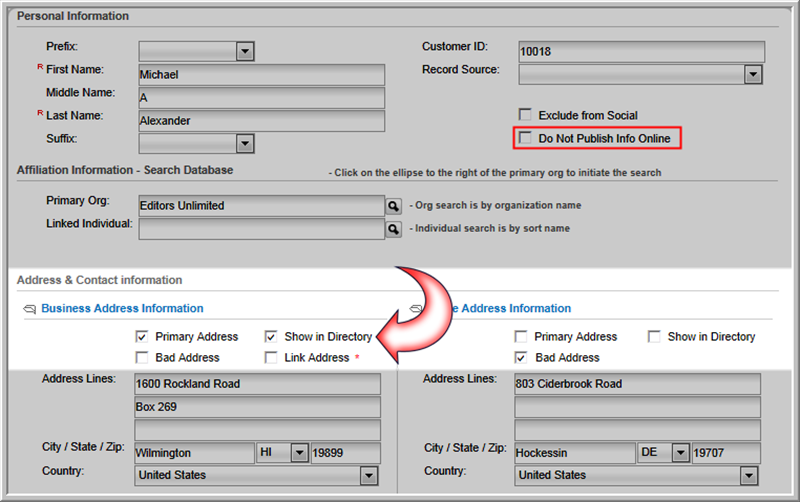
In the example above, the Business Information address is selected to Show in Directory. When the individual's profile is viewed on the eWeb site, the address selected via the Show in Directory check box is displayed under the individual profile entry.
If the address is out of date, click the Bad Address check box to indicate that it is no longer valid. This flag serves as a visual aid in identifying incorrect addresses, and does not remove individuals or organizations from mailing lists or change any other functionality.
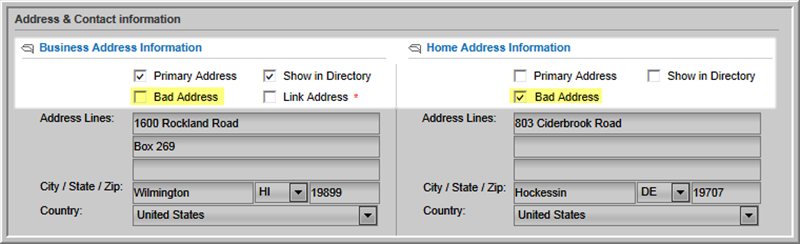
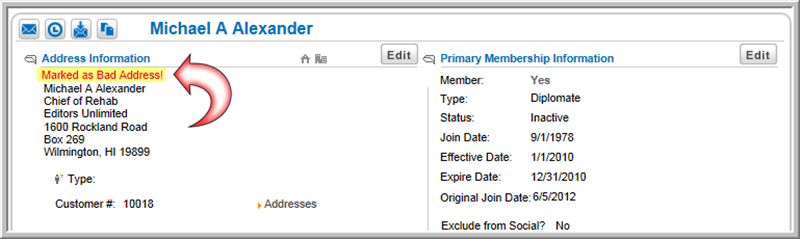
When the Bad Address check box is selected for an address that is also set as Primary, a Marked as Bad Address! warning message appears on the individual profile page and on queries.
For the Bad Address status to appear in query results, the "Bad Address" check box must be checked when selecting query data elements.
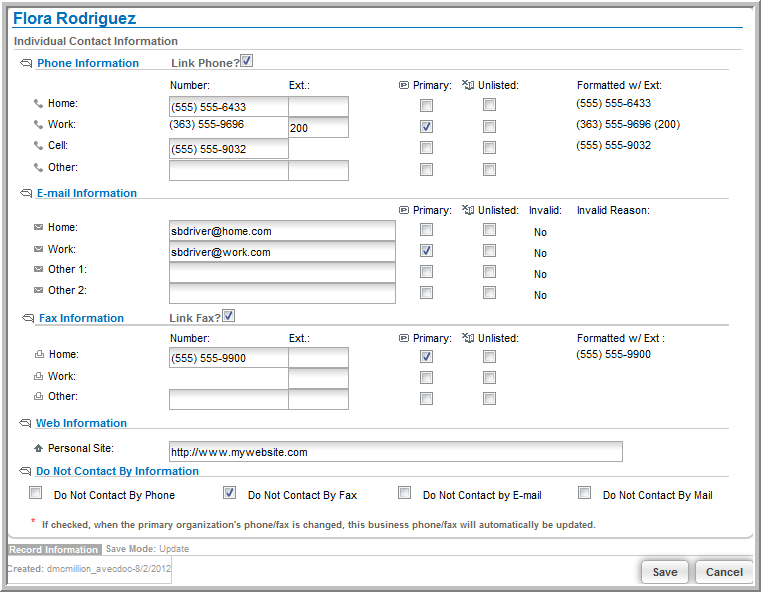
The Edit Phone and E-Mail action icon option enables you to:
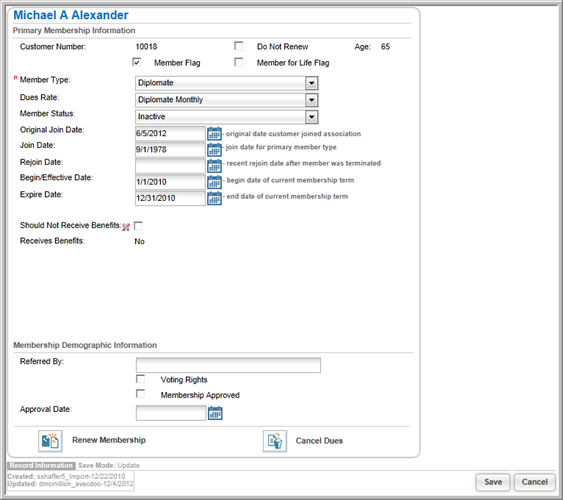
The Edit Membership Info action icon option opens the Primary Membership Information window. Edit an individual's membership information, renew a membership, or cancel a membership. You may also add membership demographic and benefits information.
There are several links on the Individual Profile that allow you to make changes to profile information. These include the Addresses link and the E-mail Opt Out link, as well as the Login Options and the Upload/Edit Image links.
Click the Addresses link in the Address Information section of the Individual Profile to add additional addresses.

Set any of the four addresses as the primary address for an individual’s record by selecting the Primary check box located next to that address: Business Address, Home Address, Billing Address, or Other Address.
The address set as Primary is the default address used in the Shopping interface for billing and shipping.
Select E-mail Opt Out from the
edit ![]() actions drop-down menu to unsubscribe the individual
from a type of e-mail communication.
actions drop-down menu to unsubscribe the individual
from a type of e-mail communication.
You can unsubscribe an individual from the Welcome E-mail, Notice E-mail, Committee Notices, Marketing Information, and Membership Renewals.

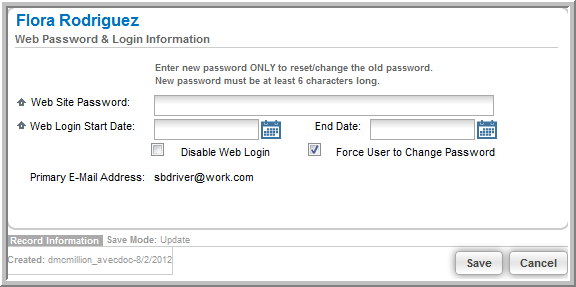
Select Edit Login from the edit
![]() actions drop-down menu to edit login options for
the individual. Update the Web site password, add password start
and end dates, select whether to force the user to change the eWeb password,
or disable web login.
actions drop-down menu to edit login options for
the individual. Update the Web site password, add password start
and end dates, select whether to force the user to change the eWeb password,
or disable web login.
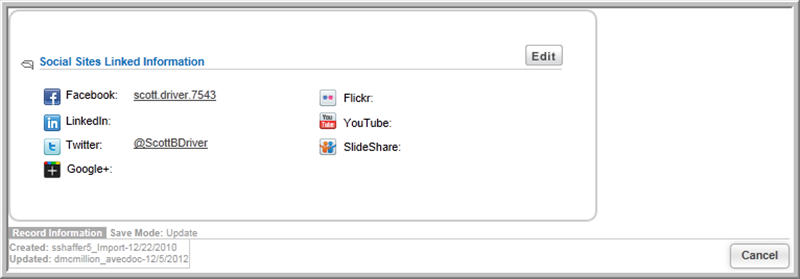
Select Edit Social Handles from
the edit ![]() actions drop-down menu to enter or edit
social handles for an individual. Enter handles for:
actions drop-down menu to enter or edit
social handles for an individual. Enter handles for:
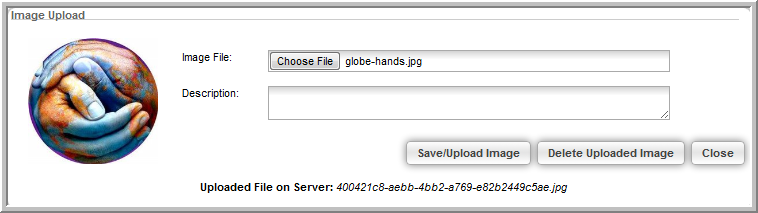
Select Upload/Edit Image from
the edit ![]() actions drop-down menu to upload an image
(e.g., digital photo) for an individual.
actions drop-down menu to upload an image
(e.g., digital photo) for an individual.
Once uploaded, the image will be displayed on the individual's eWeb profile.