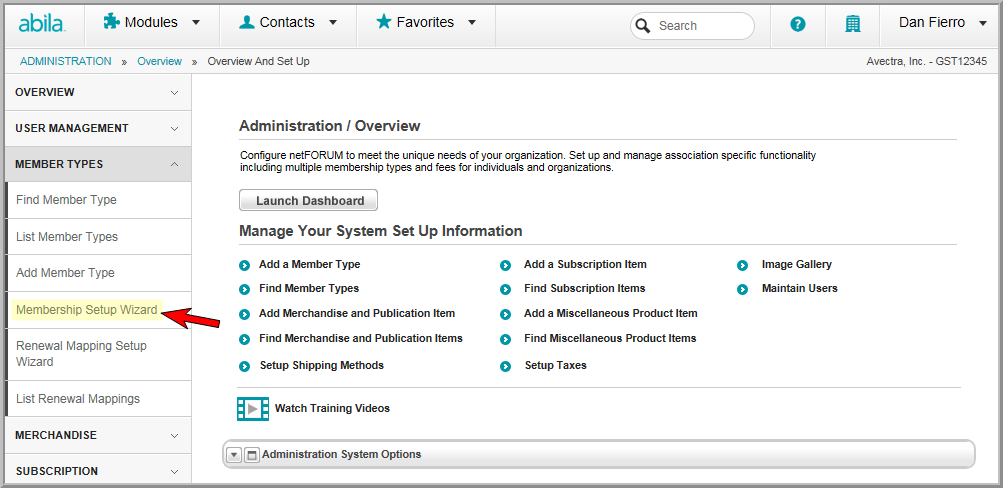
Similar to the Event Setup Wizard, the Membership Setup Wizard facilitates setting up new Member Types. Note that you may still add Member Types manually if desired through Administration > Member Types > Add; the Membership Setup Wizard is simply a quick way to get started while guiding you through the data needed for quick membership set-up.
To use the Membership Setup Wizard and add a new Member Type:
Step one of the Membership Setup Wizard has three main sections: General Information, Membership Details, and Key Notes. Each section is explained and seen below.
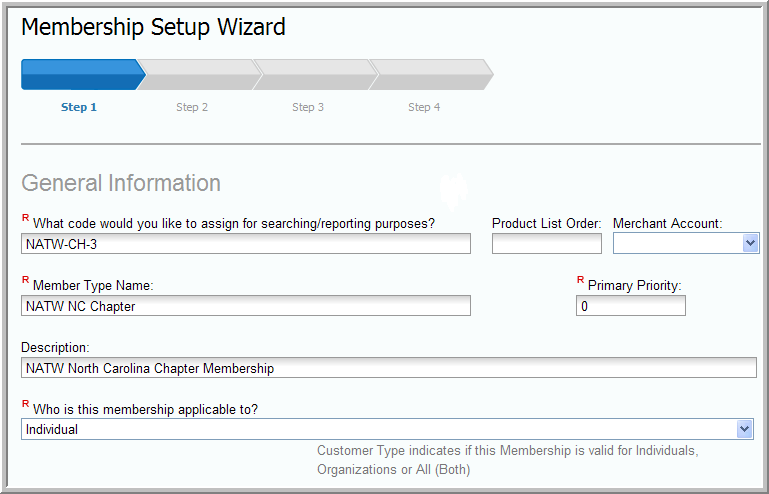
The General Information section of Step 1 is used to specify your Member Type name and code and also designate who the membership is applicable to (organizations, individuals, or both). Required fields include:


The Membership Details section of Step 1 is used to detail how the member type will renew and be paid. It is here, for example, that you will specify if your member type is calendar or anniversary based, and if it allows benefits flow-down. The Percent Paid and Length of Membership Term drop-down fields are required in this section as well as the Month to Start Term drop-down should you specify that your member type is a calendar-based membership. You can also specify the membership to start immediately to start the term of the membership immediately and run through the following term.
Note: Selecting Auto Drop allows for terminating a non-renewed membership after the grace period expires. Select the Auto Drop Termination Reason and Auto Drop Member Status from the drop down lists.
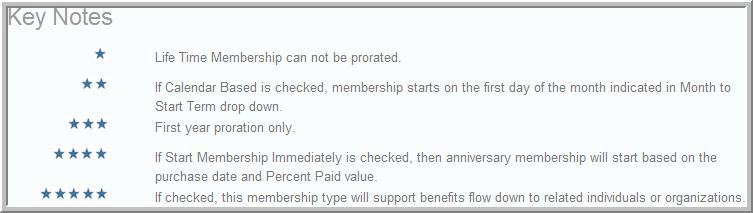
The Key Notes section of Step 1 is located at the bottom of the page and is only used for informational purposes and as a legend for fields found throughout the rest of the step. Once you have completed Step 1, you may click Cancel to exit the wizard, Save Now to save your current member type as is and come back to it, or Next to continue with the wizard on Step 2.
![]()
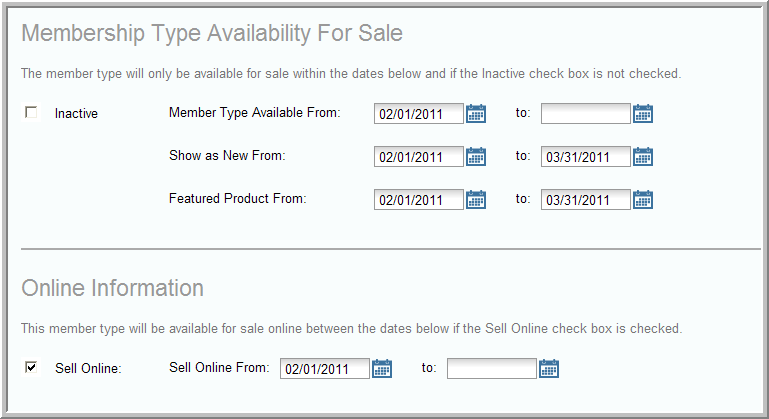
Step 2 of the Membership Setup Wizard contains two sections that are concerned with making your member type available and online by providing Show as New, Show Online From, and so forth type date fields. Both sections are displayed below.
Once you have completed Step 2 and set-up display options for your membership, you may click Cancel to exit the wizard, Save Now to save your current member type as is, or Next to continue with the wizard on Step 3. Additionally, a Previous button is now available to go back a step.
![]()
Step 3 allows you to set-up your membership Dues Rates. Note that there are several required fields on this step including:
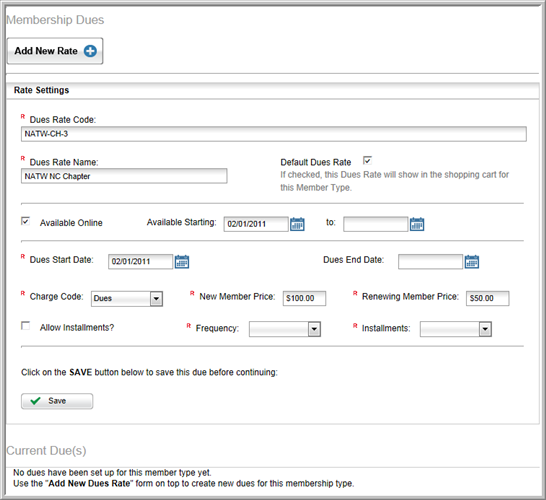
Once you have completed Step 3 and set-up dues rates for your membership, you may click Cancel to exit the wizard, Save Now to save your current member type as is, or Next to continue with the wizard on Step 3. Additionally, a Previous button is available to go back a step.
Note, however, that you must click the Save button before any of the above to save the Dues Rate of the current membership. If you do not click the Save button your Dues Rate will not save. You may also click the Add New Rate button to add additional Dues Rates. Each Dues Rate that is added must then be saved by clicking the Save button. The Save Now button saves your step in the Membership Wizard separate from saving the Dues Rates and will only save them if they have previously been saved using the Save button. This is an important distinction to note.
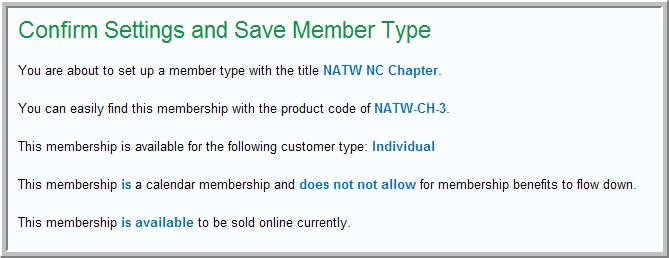
Step 4 of the Membership Setup Wizard is your final confirmation screen. It displays the values you decided upon when creating your member type through the various wizard steps. Click the Save button to save and create your member type.
You will receive a final confirmation message when saved and a Done button. Clicking the
Done button will then take you
to your Member Type Profile
where you may continue editing as you normally would by adding more options
to your member type such as education credits, dependencies, and so forth. If you would like to enter the Membership
Setup Wizard again, you may always do so by clicking the Setup Wizard  button again in the upper right corner of the Member
Type Profile which is highlighted in the image below.
button again in the upper right corner of the Member
Type Profile which is highlighted in the image below.

Note, if you prefer, you may still add Member Types manually by using the Administration > Member Types > Add method .