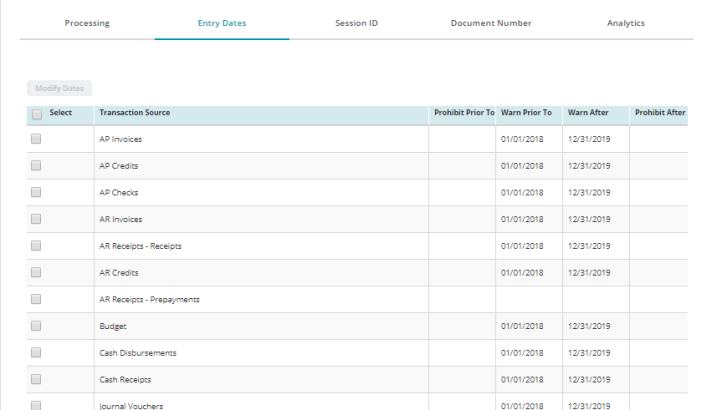
Organization Preferences Entry Dates Tab
To open the Entry Dates tab, click Entry Dates on the tab bar at the top of the Organization Settings form with Preferences selected on the left.

Modify Dates Select a transaction source from the table and click to open the Modify Entry Dates Form.
Select: Click the Select check box to select a transaction source and activate Modify Dates. Click the Select check box located in the title bar of the table to select all transaction sources in the table.
Transaction Source: Lists the available transaction sources.
Prohibit Prior To: During transaction entry, entering an Effective Date that is prior to the date in this column displays an error message and does not allow the transaction to be entered.
Warn Prior To: During transaction entry, entering an Effective Date that is prior to the date in this column gives a warning - you can enter the transaction, but you cannot save.
Warn After: During transaction entry, entering an Effective Date that is after the date in this column gives a warning - you can enter the transaction, but you cannot save.
Prohibit After: During transaction entry, entering an Effective Date that is after the date in this column displays an error message and does not allow the transaction to be entered.
Note: By default, the Prohibit/Warn Prior To date is the first day of the fiscal year that was specified when the organization was created. Consequently, users are warned if they try to enter a transaction for the previous fiscal year. However, you can modify these default dates.
Reset Grid: The Reset Grid button will reset the specific table to its default order. See the Tips and Shortcuts page for more information on reorganizing grids.