Accounting
The Accounting Module enables you to effectively set up and manage all of your accounting operations. It gives you access to all accounting transactions and gives you the ability to create accounting batches.
The following Group Items are available within the Accounting module:
Primary Profile Pages
The primary Profile Pages in the Accounting Module include:
Setting Up the Accounting Drop-Down Lists
NetForum uses drop-down lists for easy data entry. Some drop-down lists have baseline information that may need to be changed to make the list more organization-specific. For example, organizations have different types of activities.
BOLD text is a likely indicator that the field is REQUIRED data. Other data fields, check boxes, and drop-down lists may be CONDITIONAL. That is, they may be affected by others, or are not required but available if you need them.
You can add, edit, or delete data from the Accounting Setup pages just as you would from any NetForum child form. However, once a data element is used on a profile page or form, it can be disabled or hidden but not deleted.
If you are new to NetForum and would like more information on how to setup the Accounting Module, please refer to the following page: Accounting Setup
Accounting Setup
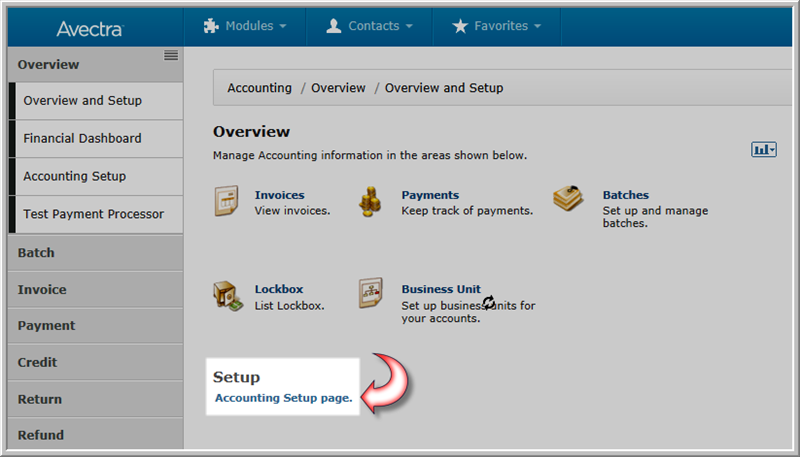
Click the Accounting Setup page link on the Accounting Overview page to open the Accounting Setup Page. The Accounting Overview page opens by default when the Accounting module is opened.

|
| Accounting Overview Page with the Accounting Setup Page Link Highlighted |
Note: The Accounting Setup Page can also be accessed by expanding the Overview group item in the left menu bar and clicking the Accounting Setup link.
Accounting Workflow
The setup of Accounting must be done in a certain order, otherwise, you might encounter some required fields on a page that are blank, and you won't be able to fill them in. Following the workflow below saves you those headaches.
- Set up the values for the drop-down lists to be used for your accounting procedures.
- Add your Business Unit.
- Add your G/L Accounts.
- Add the Default G/L Accounts for the Business Unit.
- Add the Fiscal Years.
- Add the Currencies to be used by your association.
- Add the Payment Methods to be used by your association.
- Add the Invoice Terms to be used by your association.
- Set up the Batches needed for your association.
- Add the Default G/L Accounts for each Product Type.
- Add the Multi-Company Accounts.
- Add your Accounting Projects.
Advanced Tasks
Lookup Tables
- Credit Reasons - example, Overpayment
- GL Account Type
- Source Code
- Media Code - the format, for example, Mail, Fax, E-Mail
- Collection Status - example, NSF Check
- Invoice Messages - may be used in custom Invoice Reports
- Credit Card Gateway - used only when you have multiple Payflow Pro accounts.
- Price Override Reason - Reason codes a user enters when overriding a base price for a product. Ability to override prices is based the AllowPriceOverrideSystem Option. If this option is set to true then you can determine whether you want to require a price override reason by setting the system option PriceOverrideReasonRequired to Yes.


