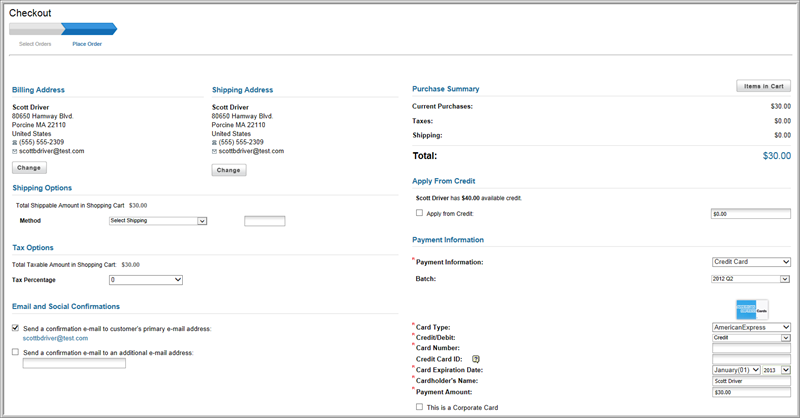
The checkout process on both iweb and eweb has been condensed to one page.
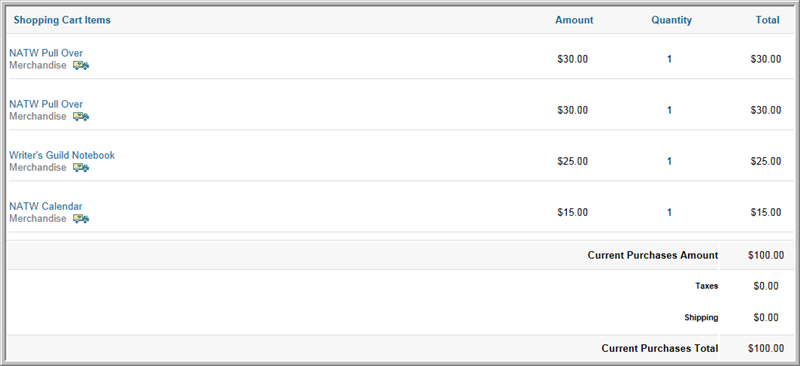
All of the functionality that was previously spread across several pages in the Shopping Wizard have now been made available on a single page. Clicking the Change button under the Billing Address and Shipping Address sections will allow you to change the specified address(es). Clicking the Items in Cart button will display the items that are currently in the Shopping Cart.
For more information, view the following help topics:
Related Topic Search: shopping
When only one customer result is returned in a super search, you will now be taken directly to the profile itself instead of a list display.

For more information, view the following help topic:
Related Topic Search: search, find
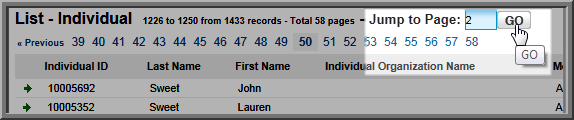
A Jump to Page field has been added when a List returns more than 20 pages in its result. For large List returns, this facilitates going to a specific page rather than using the Next and Previous controls to page through numerous pages. This is true on iWeb and on eWeb for results returned in an online directory search.
For more information, view the following help topic:
Related Topic Search: list pages
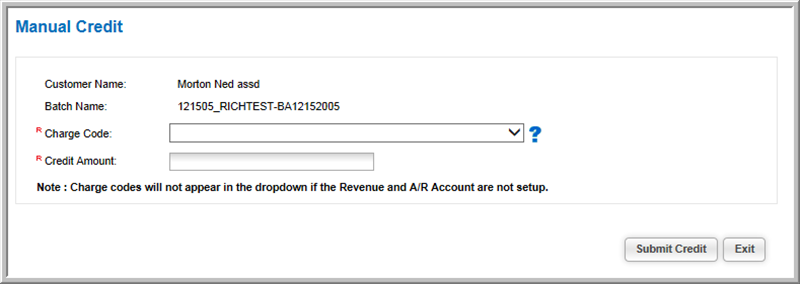
Users can now create a credit for an individual or organization, without
going through the process of cancelling an invoice. The Add
Manual Credit option is now available in the Actions![]() drop-down menu on Individual and Organization profile
pages. Credits created using Add
Manual Credit will debit Revenue and credit Liability in the General
Ledger. Use this feature whenever you would like to create a credit
not associated with an invoice. By selecting the charge code, you
are selecting the Revenue account to be debited.
drop-down menu on Individual and Organization profile
pages. Credits created using Add
Manual Credit will debit Revenue and credit Liability in the General
Ledger. Use this feature whenever you would like to create a credit
not associated with an invoice. By selecting the charge code, you
are selecting the Revenue account to be debited.
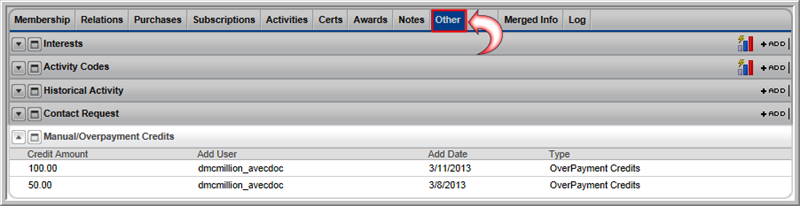
A history of overpayment credits and manually created credits is also now listed under the Other child form tab, in the Manual/Overpayment Credits child form.
View the following help topics for complete updates on how to create a manual credit:
Related Topic Search: processing refunds, creating a credit
![]()
View the following help topic for complete updates:
Related Topic Search: payflow, authorize, moneris, merchant account
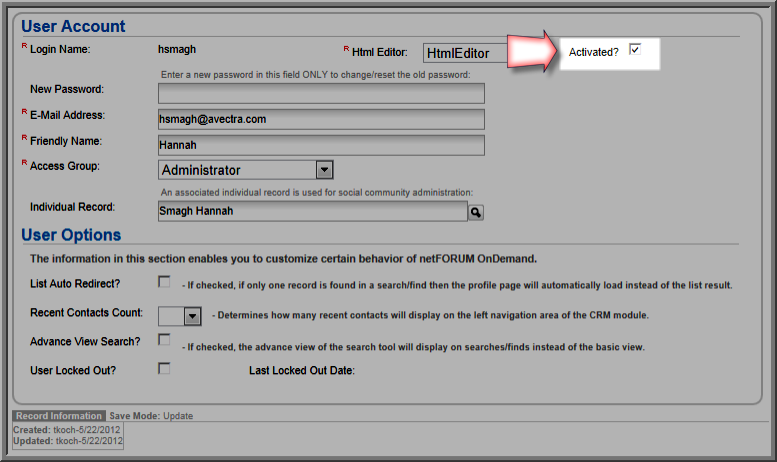
You now have the ability to activate and deactivate user accounts. For example, should an individual leave your organization, you may edit and deactivate their account. Further, when a new individual joins your organization, when you create their new user account, you must activate it as well. As a result of this functionality, you are not able to delete an account. You must simply deactivate it when it is no longer needed. This functionality ensures data integrity management with regard to licensed users.
For more information, view the following topics:
Related Topic Search: user options, access
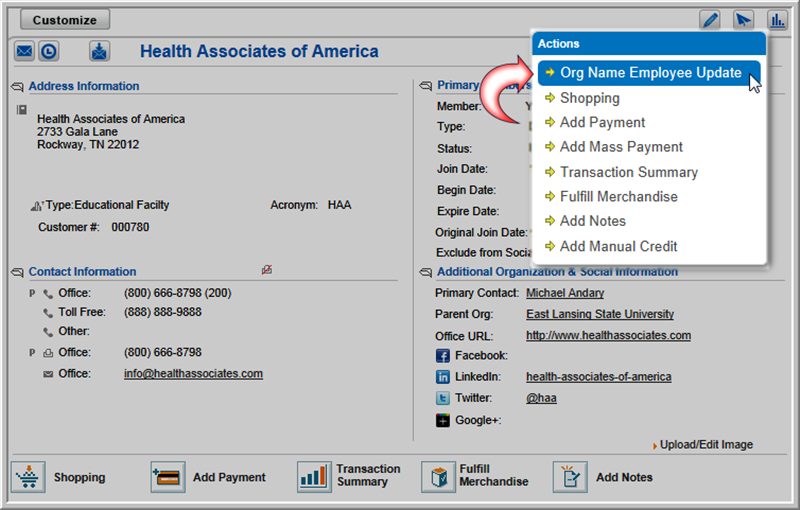
When an organization name is changed, Individual Profile mailing labels associated with the organization are not automatically updated with the changed organization name. You must schedule the name change for associated individuals using the Org Name Employee Update option in the Actions menu on the Organization Profile. The update is then run as a Scheduled Process, and all linked instances of the organization name are updated, including mailing labels.
For more information, view the following topics:
Related Topic Search: mailing labels, scheduling processes, org name employee update
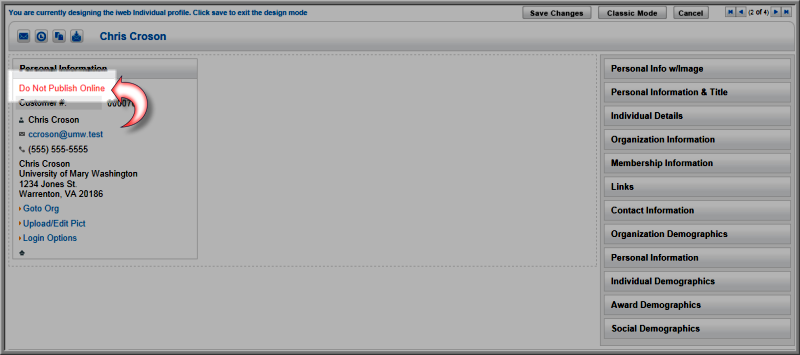
When custom profile blocks are used for both individual and organization profiles, the Do Not Publish Online check box is now displayed when enabled.
For more information, view the following topics:
Related Topic Search: demographic category
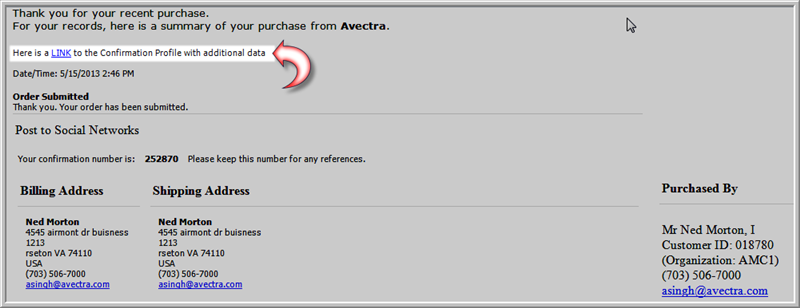
The EwebTransactionStaffNotificationAddressDetails system option will send the designated staff person an e-mail informing them that a purchase has been made using the eWeb Online Store.
This e-mail contains a hyperlink to the Confirmation Profile in iWeb. The Confirmation Profile will display information about the purchase as well as a hyperlink to the Purchase Details/Demographics report that displays demographics collected during that purchase. This provides full details of the purchase without leaving the confirmation.
For more information, please view the following online help topic:
Related Topic Search: shopping, system options
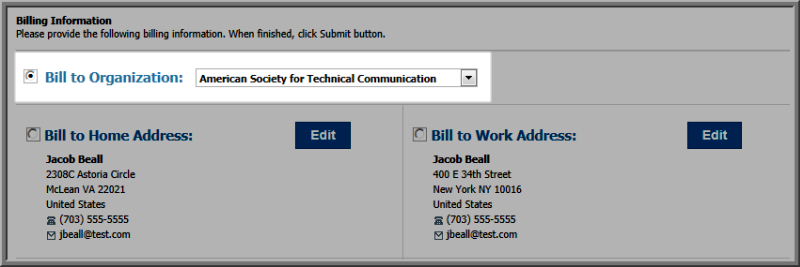
By default, the primary contact and linked individuals of an organization are able to bill to that organization during checkout on eWeb. This ability may now be disabled using the EWebDoNotAllowBillToOrg system option under Web Site system options. For more information on how to use system options, view Understanding System Options and Web Site System Options.
If this system option is disabled, the ability to bill to the organization is removed by both the primary contact and linked individuals. The Bill to Organization radial button and drop-down field on eWeb, seen below, is removed entirely in checkout. This system option is only for eWeb and does not affect the shop for functionality described on the Allowing a Relationship Type to Shop for an Organization help topic.
For more information, view the following topics:
Related Topic Search: online organization management, shopping
Benefits flow down updates now use a virtual updating process that will instantly update the flow down benefit status of a customer by expanding the new Membership Flow child form located on the customer profile.

In addition to expanding the Membership Flow child form, benefits flow down status will be updated by a back end process that runs continuously. This process will scan each record and make benefits flow down updates accordingly. However, be aware that changes made by this process may take 24 hours to show up in netFORUM.
eWeb users will instantly have their benefits flow down status updated as soon as they log-in. This allows for benefits (such as member pricing) to be applied or removed immediately for customers.
Be aware that flow down is limited to 10 degrees of separation between the primary customer and those receiving flow down benefits.
Please review the following help topics for complete details:
Related Search Topics: benefit, membership
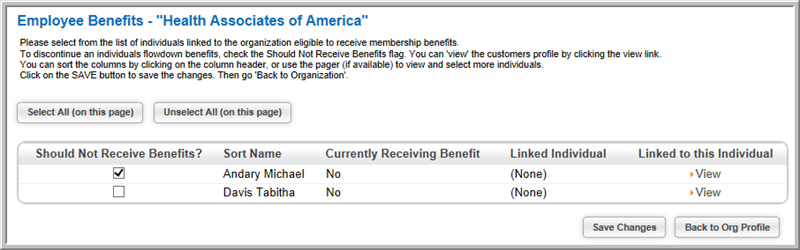
Users can now remove benefits flow down to individuals linked to an organization directly from the Organization Profile. The Manage Employee Benefits option in the Actions drop-down menu allows you to select all or some linked individuals that should not received member benefits.
Note: For organizations that manage linked organizations that have flow down (such as branches), similar functionality to manage those flow down benefits will be available in 2013.03.

It also allows you to view the individual's profile to verify whether the customer should receive benefits. Individuals set not to receive benefits flow down via this process will not receive benefits flow down from any organization.
For more information, view the following topic:
Related Topic Search: benefits flow down, member types
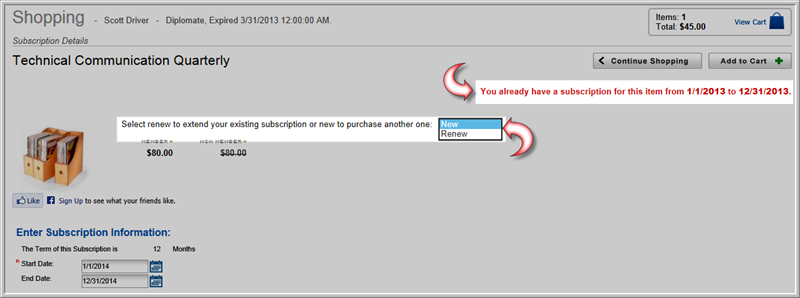
The SingleSubscriptionOnly system option allows you to specify whether customers can purchase multiple active subscriptions of a single subscription product, or if they may only have one active subscription of a single subscription product. When this system option is disabled, which is its default setting, customers will have the ability to purchase multiple active subscriptions for the same subscription product. When this system option is enabled, customers will only be able to renew active subscriptions for the same subscription product. This allows for better management of subscription effective and expiration dates.
Both settings provide warning messages and controls for users to inform them of these settings on iWeb and eWeb.
For more information, please view the following help topics:
Related Topic Search: subscriptions, shopping
LinkedIn individual user names must be recorded in the netFORUM Individual Profile only. Likewise, LinkedIn organization user names must be recorded in the netFORUM Organization Profile. If the LinkedIn user name is recorded in the incorrect Profile type, the resulting hyperlink will be nonfunctional. netFORUM automatically generates the appropriate URL for LinkedIn account names–because URLs for LinkedIn individual and company accounts differ slightly, they must be entered in the appropriate profile to work.
When entering a LinkedIn address on an Organization or Individual Profile, do not include the full LinkedIn URL. You need only enter the LinkedIn user name, or in the case of a LinkedIn company (organization), the company name separated by dashes. In the example below, the company name has been entered in the appropriate format.
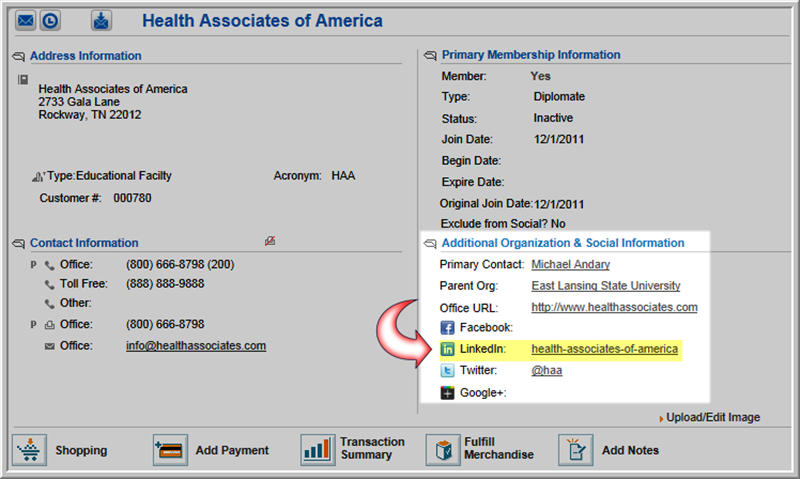
netFORUM automatically completes the rest of the URL when the hyperlinked user name is clicked.
For example, the LinkedIn user name for an individual named John Smith might be jsmith. This is the data that should go in the LinkedIn social networking field, and the URL will appear as <http://www.linkedin.com/in/jsmith>. The "in" in the URL indicates a LinkedIn individual profile. For an organization name, the LinkedIn URL will auto-complete as <http://www.linkedin.com/company/company-name>.
For additional information, view the following topics:
Related Topic Search: social account information
The following updates and new reports have been added to Build 2013.02: