netFORUM Pro Modules > E-Marketing > Templates > Sending a Test E-mail
More information

Hide/Disable Templates

Creating a Correspondence Template or Messaging Template

Creating a Correspondence or Messaging Template Using Microsoft Word

Adding an Unsubscribe Footer to eMarketing Templates and Messages

Uploading the Marketing Images

Sending a Test E-mail

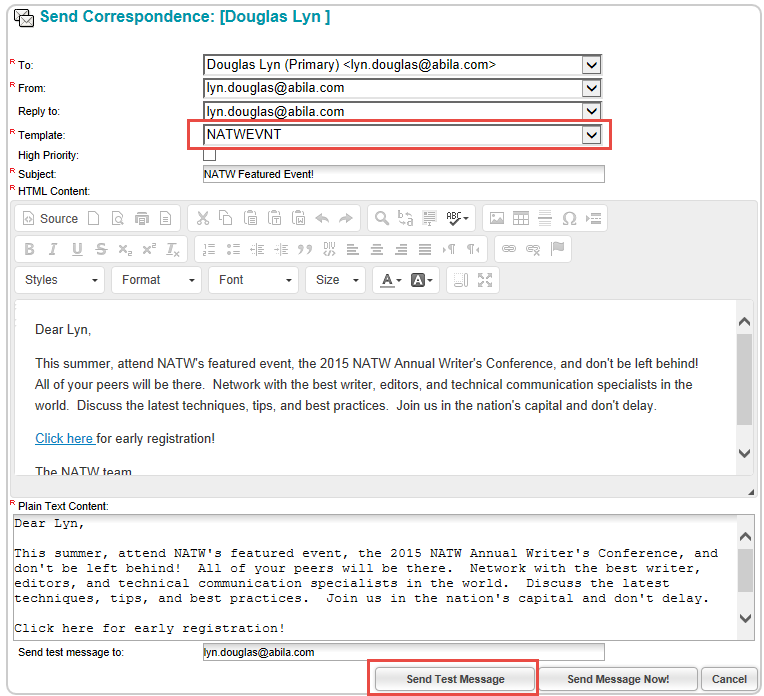
Before sending an eMarketing blast or new e-mail to customers, it is recommended to test your e-mail message to ensure that there are no errors and that the message works as it should.

There are three ways to send a test e-mail:

Create a Template with a Recipient Type of Individual

  1. Create the Message Template.
  2. Temporarily set the Recipient Type to Individual.
  3. Click Save.
  4. Navigate to your Individual Profile.
  5. Click the Send E-mail to Contact icon to open the Send Correspondence form.
  6. Select the template from the Template drop-down box.
  7. Click Send Test Message.

Create a Test Mailing List

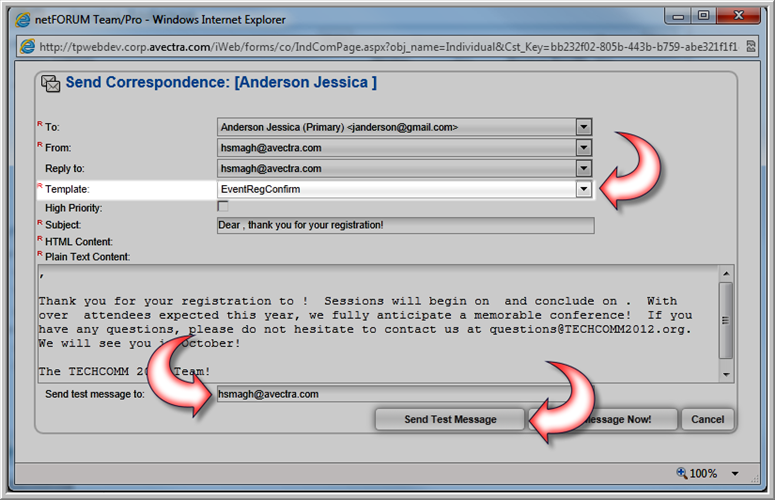
You may want to test how your template appears to several different people. This is best accomplished by setting up a test composed of several test e-mails.

  1. Create the Message Template.
  2. Temporarily set the Recipient Type to Mailing List.
  3. Click Save.
  4. Create a test Mailing List composed of your email address and internal staff email addresses.
  5. On the List - Mailing List Detail page, click the E-mail this List button to open the Send Correspondence form.
  6. Select the template from the Template drop-down box.
  7. Click Send Message(s) Now to send the e-mail to the mailing list.

Match Template Recipient Type and Query

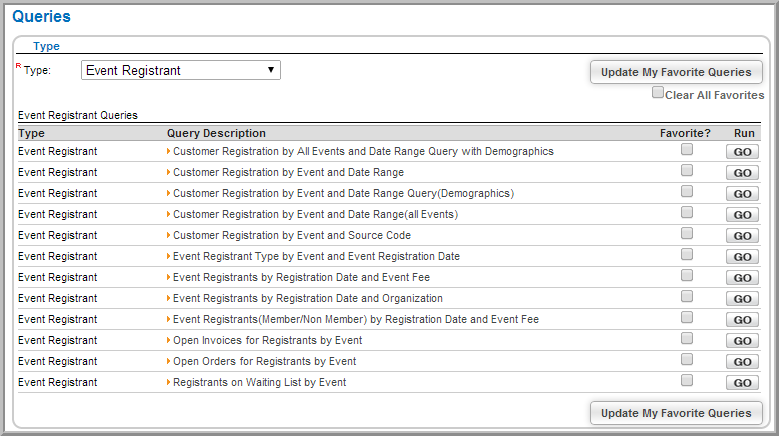
E-mails are often sent by using the E-mail this List button from a list generated by a Query.

Make sure that the Recipient Type of your template matches the query you plan to run:

ClosedView an example