Print and Email Checks and Vouchers
Use this form to print checks for the selected processing group, pay date, and payroll type. Prior to using this form, there must be at least one processing group's payroll calculated, with one or more checks generated.
If you have the Direct Depositmodule installed and active, you can only email vouchers - not checks. See Introducing the Direct Deposit Module.
Note: We recommend that you do not attempt to send more than 50 Processing Groups through the Print Check process at one time.
Note: During the printing process or after the email vouchers are sent, all payroll history files are updated, and the calculated payroll and regular/supplemental timesheets are deleted.
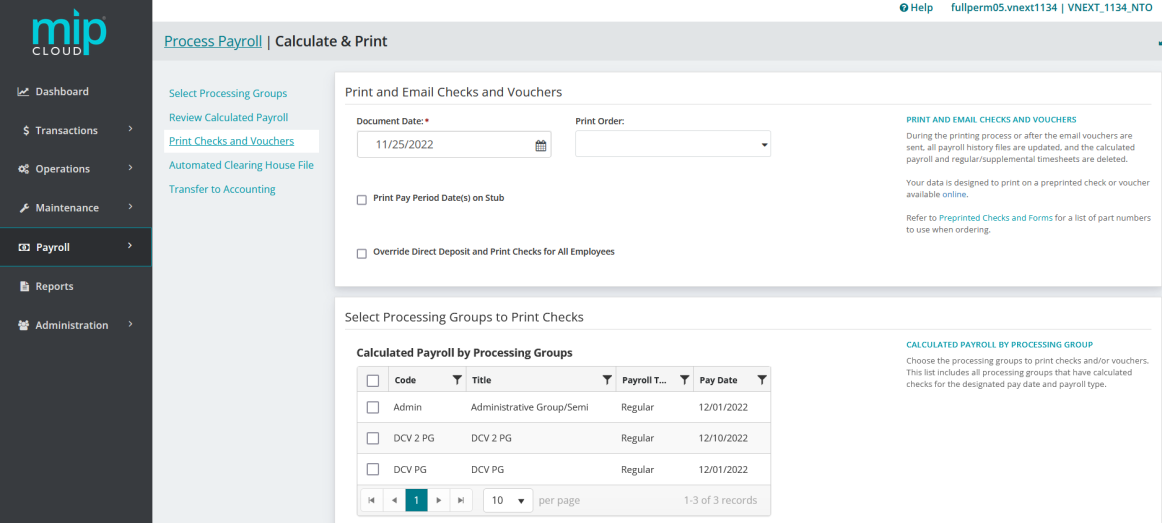
The Print and Email Checks and Vouchers landing page.
This form is split into two sections: Print and Email Checks and Vouchers, and Select Processing Groups to Print Checks. The system will first walk you through the printing process, then continue on to the email process.
Print and Email Checks and Vouchers
Document Date: Enter the date to be printed on the check. This date must have the same year as the calculation (for example, you cannot calculate payroll for 12/31/21 and print checks with a date in the year 2022; the check date would also have to be in 2021).
Print Order: Select the order to print the checks or vouchers, either by Employee Class, Employee ID, Employee Last Name, or Processing Group. They print in the following order based on the selection made:
| If you select... | The print order will be... |
| (No selection) | Processing Group ascending, then Employee ID ascending |
| Employee Class | Class ascending |
| Employee ID | Employee ID ascending |
| Employee Last Name | Last Name ascending |
| Processing Group | Processing Group ascending |
Print Pay Period Dates on Stub: Select this check box to print the pay period date range on the check stub or voucher.
Override Direct Deposit and Print Checks for All Employees: Select this check box to print checks for all employees. Checks will be printed for those employees that usually receive direct deposit. If this box is not checked and the employee is a Direct Deposit recipient, they will receive an email voucher.
Note: This feature is only available if the Direct Deposit module is installed (see Introducing the Direct Deposit Module).
Select Processing Groups to Print Checks
The table displays the processing group code, pay date, payroll type, and processing group title for all calculated payrolls. Select the processing group for which you want to print checks.
Note: Prior to using this form, there must be at least one processing group with calculated payroll, with one or more checks generated.
Once you've made your selections, click  . Then, enter a starting check number and select a check format. The Cash Account is automatically selected.
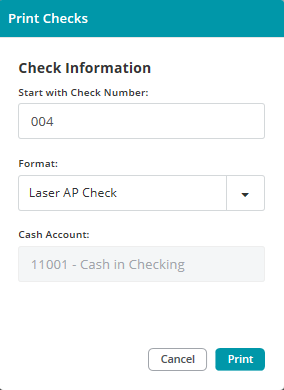
Start with Check Number: This check number is determined by the last check number used for this cash account. It can be modified directly in this field.
Format: Select the format type that matches the printer—continuous or laser.
Cash Account: The system displays the cash account for the check. (This was determined by your Offset Account Assignments in MIP.)
Cancel: Click this button to close the Print Checks page and return to the Print and Email Checks and Vouchers page. No checks will print.
Print: Click this button to begin the printing process.
Print Notification
The Application will notify you how many pieces of check stock are required, as well as the total amount for this print run.
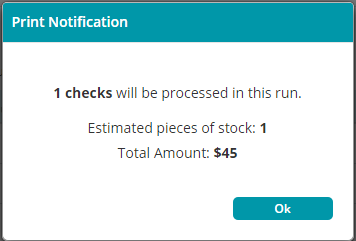
Click OK. The Application will process the request and begin generating a Print Checks preview for printing or download.

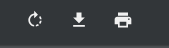
Print Checks Preview
The name of the print run and number of pages in the Print Checks Preview display at the top of the preview window.
Rotate Clockwise: Click to rotate the Print Checks Preview page clockwise.
Download: Click to save a copy of the Prints Checks Preview as a PDF for record keeping (audit) purposes. The default download location is PC > Downloads.
Print: Click to print the Print Checks Preview page.
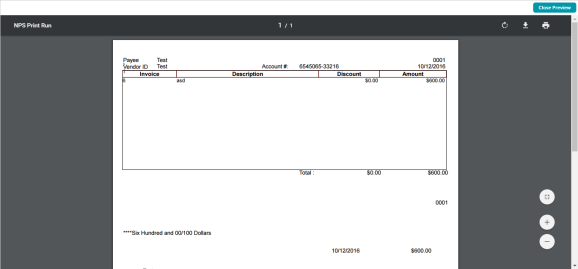
Close Preview: Click to close the Print Checks Preview window after printing checks and saving the file.
Confirm Printed Checks and Reprinting Checks
After closing the Preview, you will be asked if checks printed correctly.
- Click Yes - if checks printed successfully.
- Click No - to be prompted for reprint options. If you select No, you will need to select checks for reprinting, then click Reprint.
Email Checks and Vouchers
After you finish the "Print" process, the Email Preview screen will appear. Select a voucher number to preview the voucher.
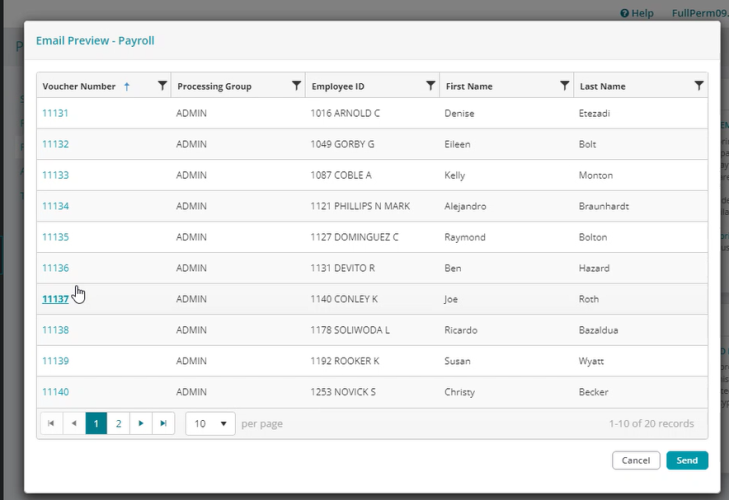
If all the documents look correct, click "Send". The emails will be sent with the voucher attached as a PDF.
After successfully emailing or printing vouchers, you can proceed toAutomated Clearing House File (ACH) if you need to create a direct deposit file to send to your bank.
Notes about Printing and Emailing Checks and Vouchers
To email checks or vouchers, there must be at least one employee in the processing group with an email address on file (see Employee Profile). If there is not, the system will not prompt you to email anything.
If you have the Direct Deposit module installed and active, you can only email vouchers - not checks. See Introducing the Direct Deposit Module.
When calculating Payroll with employees who have both Print and Email vouchers selected; if you print and then cancel out of the Email Preview form, the system will update the payroll history files, delete the calculated payroll and regular/supplemental timesheets, and create an ACH file, however the email vouchers will not be available to send from this form. To resend an individual check or voucher, go to that employee's check history on their employee profile (see Employee Payment History). You can resend their voucher from that page.
The system retrieves SUTA information according to paycheck date, not pay period or pay date. For example, if you calculate payroll on 3/31, and print checks on 4/1, the system retrieves the SUTA information from those paychecks only when you produce a second quarter SUTA report.
Be sure to set up your disbursing accounts (Cash Account and Accrual Account) in Setting Up the Payroll Module prior to using this form.
Labor hours and labor earnings are tracked and distributed by account code combinations if Earning Codes were set up with the "Track Labor Hours" checkbox selected (see Payroll Earning Codes).
After a payroll is printed, the distribution code assigned to the earning code cannot be changed.
Your data is designed to print on a preprinted check or voucher available online. Refer to Preprinted Checks and Forms for a list of part numbers to use when ordering.
When you are finished, proceed to Automated Clearing House File (ACH) to generate an ACH file for your bank to issue a direct deposit to your employees (if you have the Direct Deposit module installed). Otherwise, proceed to Transfer to Accounting.
Frequently asked questions about printing and emailing checks and vouchers
Note: Keep in mind that if you are printing checks or vouchers in the same session, you must first complete the check or voucher printing process, then the system will prompt you to send email vouchers.
There are several reasons why you may not be able to send an email.:
-
There are no employee emails on file in the processing group.
-
The employee does not have "email voucher" selected on their Employee Profile ("Job and Pay Rate" tab).
-
You only have customized Process Templates and the system changed your Email option to Print. If you do not set up a <Default> Process Template (Email Templates ) for Vouchers and later delete the customized process template being used on the Employee Profile ("Job and Pay Rate" tab), the system will change your Email option to Print for every employee that used that customized process template on the Employee Profile ("Job and Pay Rate" tab).
-
You do not have the Direct Deposit module installed.
-
You do not have SMTP set up. At this time, you cannot set up SMTP in MIP Cloud - you must first set it up in MIP Classic, then you can send emails with Cloud. See Setting Up SMTP and Email Functions .
Their email server may be marking your organization as spam. Ask your employee to add your organization's email address to their address book.