Using netFORUM Pro Data in Microsoft Word Mail Merge
After the Excel CSV file is exported from netFORUM Procontaining the attributes to include on event badges, set-up a Microsoft Word mail merge for generation, customization and printing.
Note: These instructions are based on Microsoft Word 2013.
To create a mail merge using an Excel CSV file exported from netFORUM:
- Open Microsoft Word and begin with a Blank Document.
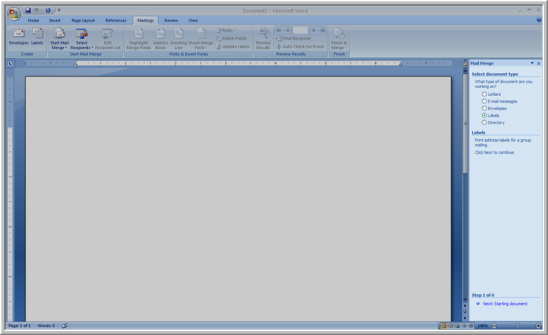
- Select Mailings > Start Mail Merge > Step by Step Mail Merge Wizard.
- Select Labels under Select document type and click Next: Starting Document.
- Select Change document layout and click Label optionsto set-up how the label will appear when printed.
- Click OK when label set-up is complete and then click Next: Select recipients.
- Select Use an existing list and click Browse to import the CSV file created in .
- Sort data by clicking column headings and select\deselect data by clicking check boxes, and click OK.
- Click Next: Arrange your labels to set-up the appearance of your labels and mail merge.
- Click More items… and insert the netFORUM attributes specified for the label.
- Arrange and format the fields how they should appear on the badge. For example, in the sample below, the badge name is bold.
- To complete an identical badge for each participant click Update all labels.
- Click Next: Preview your labels.
- Click Next: Complete the merge to finalize your mail merge using Print and Edit individual labels, as shown below.
The Mail Merge wizard dialogue box displays on the right.
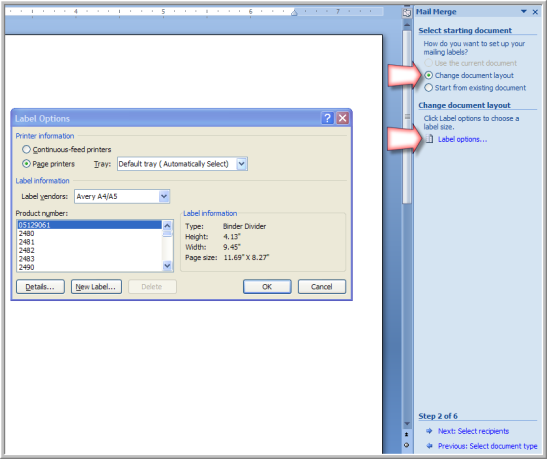
Select from a variety of vendors in the Label vendors drop-down field. For example, in the image above, Avery A4/A5 has been selected. When a vendor is selected, the label details display in the Label information section. Changing the Product number will modify the label. Click Details… to see a prototype of the selected label.
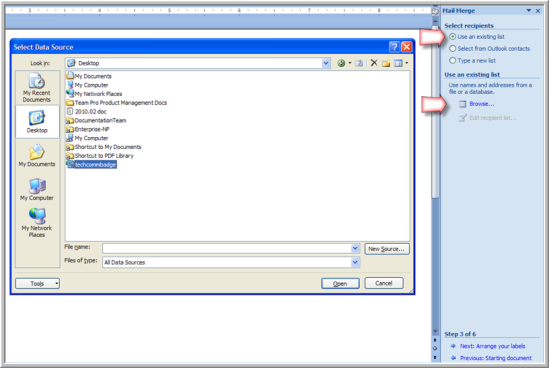
The Mail Merge Recipients window displays detailing the individuals and their attributes imported with the netFORUM Pro CSV file.
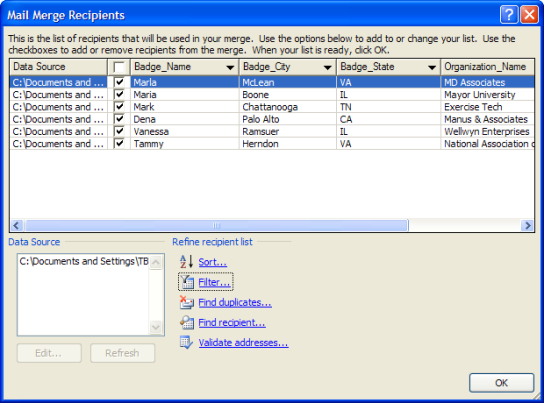
Note: Click Select a different list or Edit recipient list to change individuals and attributes of this list.
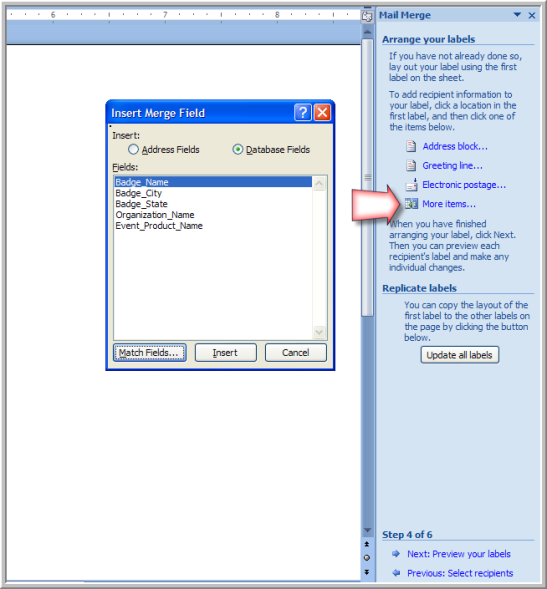

To customize a message to each badge recipient, use the Address block and Greeting line fields provided in this step of the wizard.
For additional detailed and personalized information, export more fields into the CSV file. Use More items to display fields on the badge and fields in a custom message, as shown below.
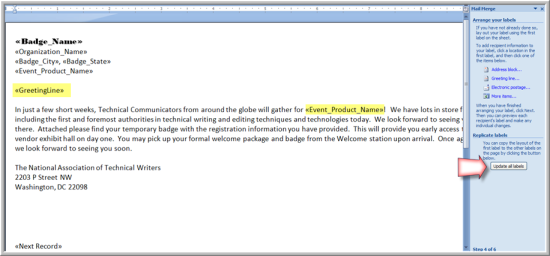
Click Update all labels to copy the layout to all the labels in the file.
All of the fields are replaced with actual data imported as part of the query from the CSV file, as shown below.
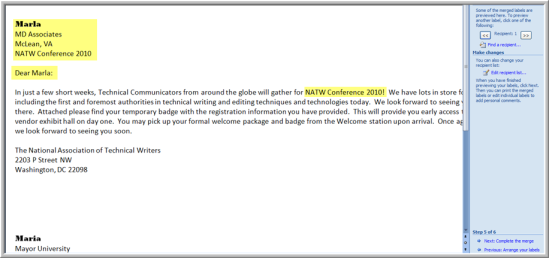
To the right, under the Mail Merge menu, use Find to find a specific recipient to view and Edit the recipient list before finalizing the mail merge.
Print and Edit
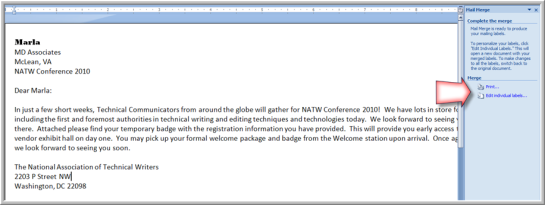
Select Print to print the badges. This does not save the mail merge since it is only merged to the printer.
Select Edit individual labels to save the merge to a Microsoft Word document for printing at a later time.
Note: The saved Word document will be different than the document shown in the Mail Merge wizard. The saved document will contain all the records imported from the CSV query and any customizations.
Tip: To generate both badges and custom messages, create two different formats using mail merge and the netFORUM Pro CSV file. First, use the CSV file to create the badges so that they print correctly on Avery stock with all needed netFORUM Pro records. Then, set-up a different initial format in the wizard other than labels, and use the same CSV file to create custom messages to each registrant with the additional fields.
