
Manual lockbox functionality allows you to enter payments from the bank deposit slip received by your financial institution for your bank lockbox into netFORUM’s General Ledger.
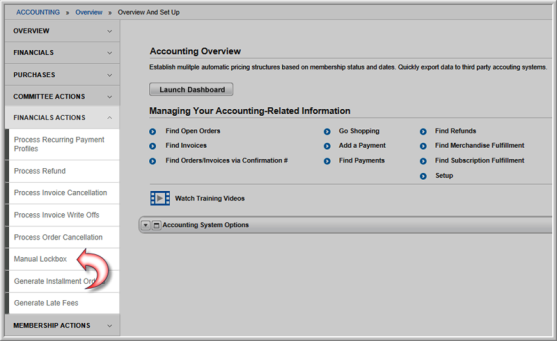
Access the Accounting module, Actions group item, and click the Manual Lockbox link, seen below.
The Process Bank Lockbox Report form appears.
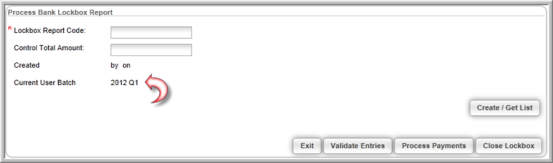
Note that the Current User Batch is already set for your lockbox. This is the default batch that is set on the CRM > Home page if you have manual batching enabled for your entity. Otherwise, the automatic batch is used and processed for entities that have automatic batching enabled.
Creating a Manual Lockbox
To create your netFORUM manual lockbox, complete the following steps:
- Enter a descriptive Lockbox Report Code. This is a required field. It should be similar to what is on your bank lockbox/deposit report such as an abbreviated name and date of the deposit slip.
- The Control Total Amount field can be used as a control field to double check that your bank report and netFORUM invoices are balanced if desired. It should be whatever value you want to use as the control and what also resides on your deposit such as total amount of deposits. This is not required.
- Click the Create/Get List button to begin entering lockbox data. Notice that row one appears on the Lockbox Report first, shown below. You enter data one row at a time and click the Add button to add each row once each field is complete. Also, notice that once you click the Create/Get List button, the Created by field is now filled by whoever has created the Lockbox Report and the date it was created.
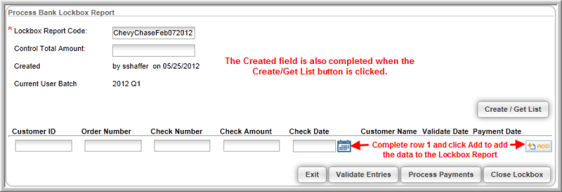
Complete Lockbox Report fields and enter row data as follows:
- Customer ID: The customer ID should be obtained from your bank lockbox report assuming that you have set-up your report with your bank to include this data. Otherwise, you may receive copies of the back-up with this information. If it is not included, you will have to use various netFORUM methods to obtain the customer IDs such as using a query to export the correct IDs, accessing individual profiles for IDs, dues renewal reporting for IDs, and so forth. Optimally, a business process should be arranged with your bank to make this functionality more efficient.
- Order Number: Enter the order number associated with the customer ID found on the bank statement for this payment. Additionally, each order may be found in the Accounting module under the order group item as well by searching on orders.
- Check Number/Amount/Date: Complete the remaining information from your bank lockbox report including check number, the amount, and date.
Note: A manual lockbox will not accept check dates that are in the future.
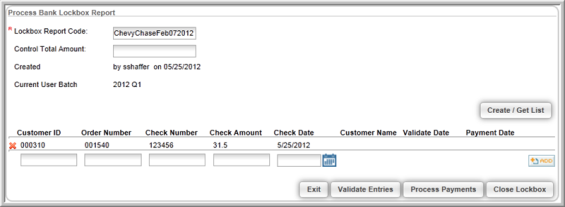
- Click the Add button next to the row to add it to the report after each field is complete. Notice that a new row appears beneath the row just added so that more payments may be added. Further, a Delete icon also appears so that if the row just added needs to be removed it can be.
Tip: Keep in mind that a row is not considered added to a report until you click the Add icon to the right of it and a row may only be deleted if the payment has not been processed. Further, all invoice/order reports have been updated to include customer and order IDs as well should you need to obtain this information from netFORUM.
Once you have completed an entry, you now have some additional options with your report. They are as follows:
- Validate Entries: Use the Validate Entries button to check the values you have entered in your row(s) against the open orders/invoices within netFORUM before you process your payments and close the lockbox. Once validated, the Customer Name and Validate Date fields will be completed if no errors are found.
- Exit: This button will exit and save your lockbox and allow you to edit it and add more rows at a later date. Use this option only if you intend to process more payments within the same lockbox and batch at a later date.
- Close Lockbox: This will save and close the lockbox and will not allow you to add or process any further deposits to the lockbox. Do not use this option if it is your intent to add future payments to your lockbox. Note, however, that this does not close the batch for these payments.
- Process Payments: This will process the payments you have entered in your lockbox. Once processed, the open order and/or invoice(s) in netFORUM are also closed.
Your final lockbox, before you are ready to process payments, will look similar to the image below.
![]()
Validating and Processing Manual Lockbox Payments
The Validate Entries button will check the values you have entered in your row(s) against the open orders/invoices within netFORUM before you process your payments and close them.
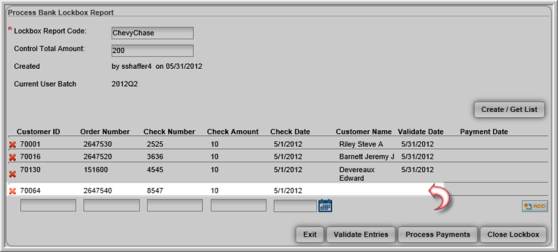
Notice in the image below, the Customer Name, Validate Date, and Payment Date fields have not been completed on the last row of entries. This is because that entry has not yet been validated.
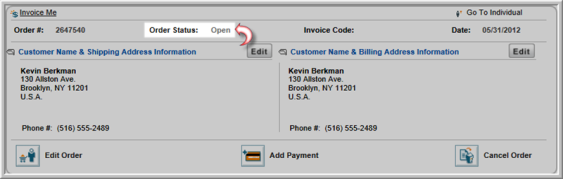
Once the Validate Entries button is clicked, the Customer Name and Validate Date field are completed for this row but not Payment Date because this lockbox has not been processed (by clicking the Process Payments button) and closed yet. This is further verified by checking the order itself associated with this customer and noting it is still open. When payments are entered and process through the Manual Lockbox Report the orders are automatically closed for you.
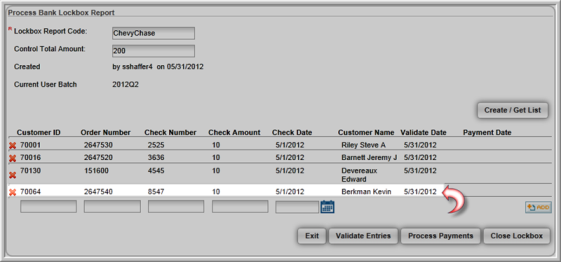
Once the Validate Entries button has been clicked, the Customer Name and Validate Date fields are completed for the last entry. You are now ready to process your payments by clicking the Process Payments button.
Once the Process Payments button is clicked, notice that the Payment Date is now completed on the Lockbox Report.
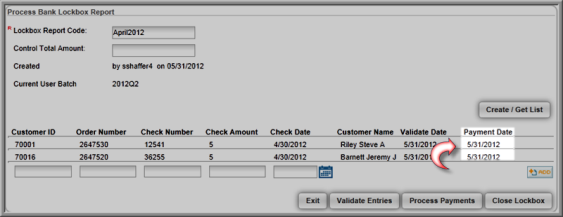
You may now click the Exit button if you intend add more payments later to this batch or click the Close Lockbox button if you intend to close this lockbox and batch entirely to keep batches of payments separate.
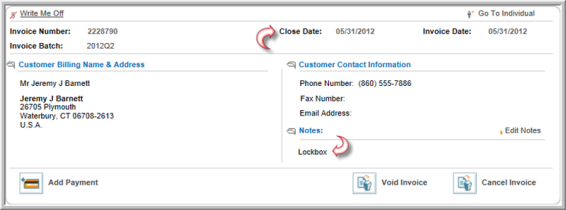
Notice that once a payment is processed in a lockbox, the open order/invoice is now closed as well. Also, in the case of the closed invoice below, it is noted that the payment was made from a lockbox as well.
The transaction(s) can also be seen on the batch profile as well.
![]()
Your final step will be to close the batch from the Batch group item link.
Finally, keep in mind that confirmation e-mails do not get sent from lockbox functionality.