
You can import data containing a relationship between individual and organization customers.
Prior to running the data import, you must confirm that the Excel spreadsheet you are importing has the following valid information:
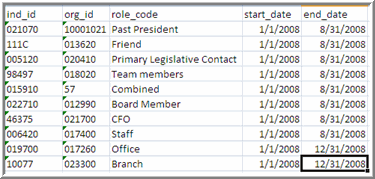
- Individual IDs
- Organization IDs
- Role Codes (Role Codes must be set up in the CRM module prior to the import.)
- Start Dates
- End Dates
- Also ensure that Sheet 1 in the spreadsheet has been renamed to Relationships
REQUIRED FORMAT FOR RELATIONSHIP SPREADSHEET BELOW:
Once you have confirmed the spreadsheet has the required information, you are ready to run the relationship data import.
To run the relationship data import:
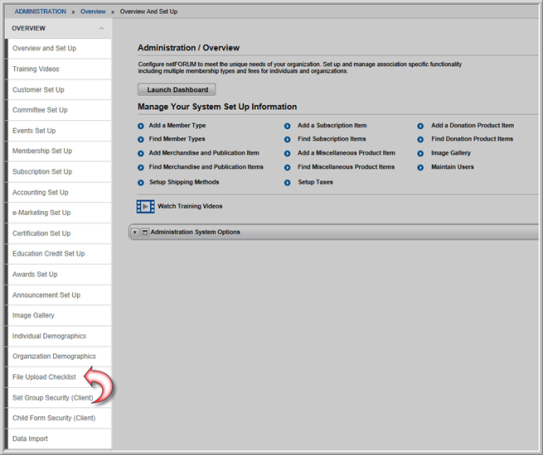
- Click the Administration hyperlink on the Module Menu to launch the Administration module.
- Click the Overview group item to see the list of available actions.
- Click the File Upload Checklist hyperlink.
- In the Relationships Import section, click the Upload Relationship Excel File link.
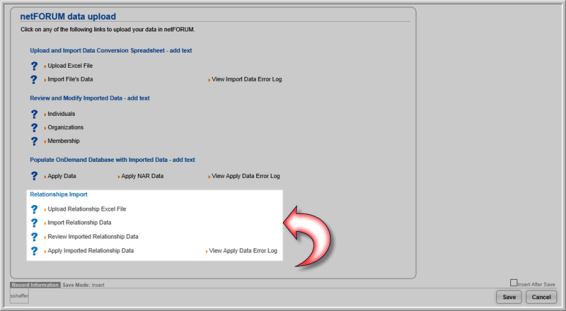
This will open the Relationship Data Upload pop-up window.
- Click the Browse button to locate the Excel spreadsheet on your hard drive or network drive.
- Click the Save button. You will be prompted to close the window after the upload completes.

- Select the Import Relationship Data link. This will open the Relationship Data Import pop-up window.
- Click the Validate the Spreadsheet's File Structurebutton. After the validation is completed, the Import Data to Work Tables button will become active.
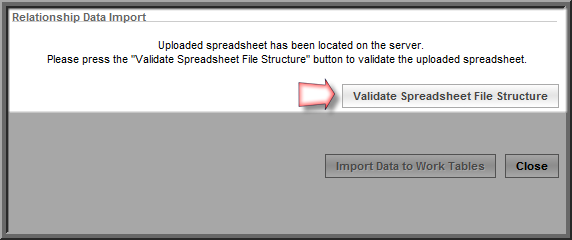
- Click the Import Data to Work Tables button. The Relationship Data Import pop-up window will update with statistics on the success of the data import.
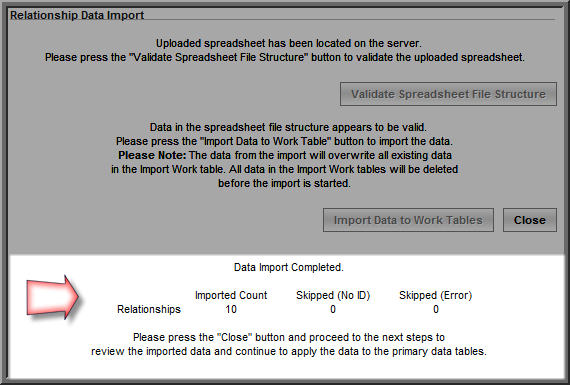
- After you have reviewed these statistics, click the Close button.
- Click the Apply Imported Relationship Data link. This will open the Apply Imported Relationship Data pop-up window.
- Click the Check Imported Data button. The imported data will be checked and you will be provided with information on how many relationship rows that will be processed. This will also activate the Apply Data button.
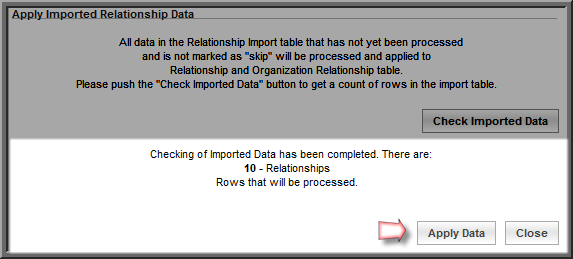
- Click the Apply Data button. You will receive statistics informing you of the actions that were completed.
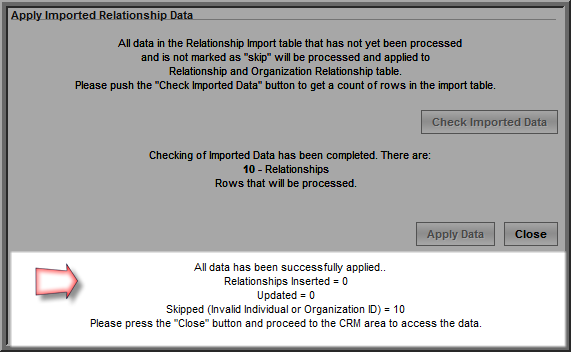
If the data application was successful, the information will be available in the CRM module. If the data application was not successful, the Apply Imported Relationship Data pop-up window will outline the reason(s) so that you can go back and make any corrections before trying again.
As you can see from the example above, there were issues with the Individual and Organization IDs for this upload. Those will need to be corrected before this process can be completed.