Adding Documents to an Affiliate
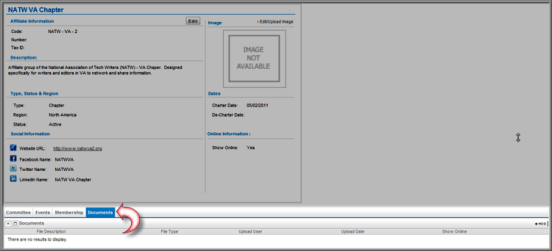
The Documents child form allows you to upload documents for the affiliate and displays all uploaded documents (for the affiliate.) These documents can be set to be seen in iWeb and/or eWeb.
To upload a document to an affiliate, complete the following steps:
- Navigate to the profile page of the affiliate who will be uploading the document.
- Click the Documents tab to view the Documents child form.
- Click the Add
 icon located on the Documents child form. This will open the Upload Document Information pop-up window.
 - Enter the description of this document in the Description field.
- If you would like this document to be available on the eWeb site, click the Show Online? checkbox.
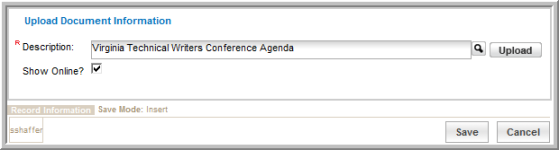
- Click the Upload button. This will open the Document Upload pop-up window where you can browse, and upload your document into netFORUM Pro.
- Click the Browse button and search your local or network drive(s) for the document you wish to upload.
- Double (left) click on the file name when you locate it on your local or network drive. This will populate its path in the Document File field.
- Enter a short description of the document in the Description field.
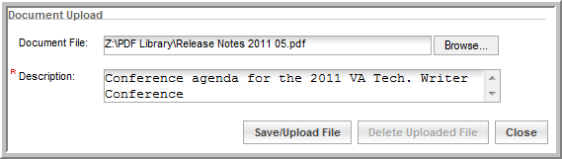
- Click the Save/Upload File button. The document will upload and the Document Upload pop-up window will close.
- Click the Save button on the Upload Document Information pop-up window. The Documents child form will refresh on the Affiliate profile page and display the newly uploaded document.

The Documents child form has three icons:
- Edit
 - click the edit icon to make changes to the uploaded document.
- Delete
 - click the delete icon to delete the uploaded document.
- Upload - click the upload icon to upload an updated document.
- To view the uploaded document in iWeb, click on its hyperlinked name.
If the Show Online checkbox was checked, the document will also be available on eWeb.
To view the document in eWeb, complete the following steps:
- Launch your eWeb site.
- Click on the Affiliate Overview link in the left navigation bar.
Tip: If you do not see the Affiliate Overview link, you must enable affiliates on your Web site by using the Web Site Wizard.
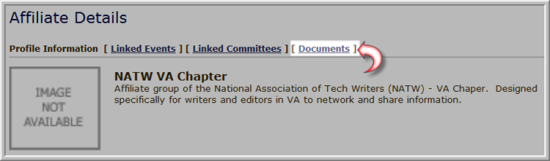
- Click the hyperlinked name of the affiliate to go to the Affiliate Details page (for that affiliate.)
- Click the Documents link located at the top of the Affiliate Details page.
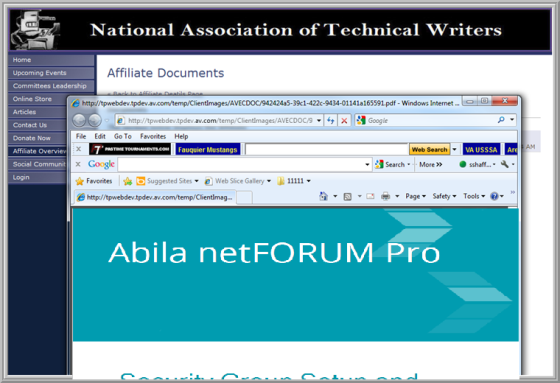
This will open the Affiliate Documents page. This page lists all of the documents that have been uploaded to the affiliate and have the Show Online checkbox checked.
Tip: If you do not see the document you expected to see, go back to the document in iWeb and make sure the Show Online checkbox is checked.
- Click the hyperlinked name of the document you wish to view.
This will open a pop-up window displaying the selected document.