e-Marketing Overview
The e-Marketing module gives you the ability to set up and send correspondence and newsletters to your members, prospective members, newsletter subscribers, volunteers, committee members, event registrants, customers, or other groups of people in a single process.

Before attempting to enter any e-Marketing information, set up drop-down lists for confirmation headers, mailing list types, and messaging & opt-out categories. Once this information has been entered, you may add:
- templates
- mailing lists
- prospect lists
- messaging jobs
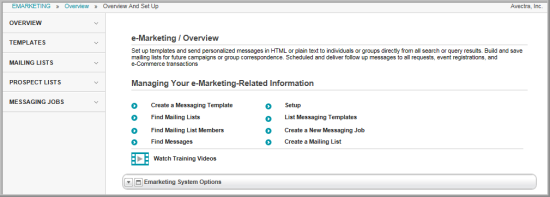
Note that, on the e-Marketing Overview page, the links in the Managing Your e-Marketing-Related Information section give you the ability to add a messaging template, add a new messaging job, add a mailing list, search for a mailing list, search for a mailing list member, search for a message, or search for a messaging template. On the group items bar, the Templates link lets you add or search for a template. The Mailing Lists link lets you add or search for a mailing list, search for mailing list member, or merge mailing lists. The Prospect Lists link lets you search for prospects or start the prospects list import wizard. The Messaging Jobs link lets you search for messaging jobs or start the messaging job setup wizard.
Navigating to the e-Marketing Overview Page
Hover over the Modules tab in the top navigation bar. In the fly out menu, click eMarketing. The e-Marketing Overview page will appear.
In the Managing Your e-Marketing-Related Information section, the Create links allows you to add a new messaging template, new messaging job, or new mailing list. The Find links give you the ability to search for a mailing list, mailing list member, message, or messaging template. The Setup link gives you the ability to add, edit, or delete options in the drop-down lists of the e-Marketing module.
Setting up Drop-Down List Information
As you work within the e-Marketing module, you will notice several drop-down lists that allow you to indicate information about an exhibit show or booth. For example, when creating a new mailing list, you have the option to select from several mailing list types via a drop-down list. On the e-Marketing / Overview page, it is necessary to populate the data in the e-Marketing module drop-down lists.
- Click the Setup link on the e-Marketing Overview page.
- Under Setup,
note the child form tab: E-Marketing.
Under the E-Marketing tab, use
the child forms to set up all aspects of the e-marketing process.
- Confirmation Header (E-Marketingtab, see Setting up Confirmation Headers)
- Mailing List Types (E-Marketing tab, see Setting up the Mailing List Type Drop-Down List)
- Messaging & Opt-out Categories (Booth tab, see Setting up the E-Mail Opt Out and Message Categories)
Using the Messaging Job Setup Wizard
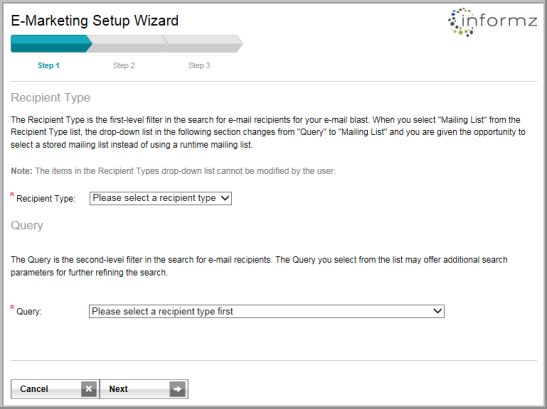
Using netFORUM's Messaging Job Setup Wizard you can create a template for the message (or newsletter), personalize the message, use a query to select the message recipients (or select an existing recipient list), purge from the recipient list the names of those who should not receive the message (based on opt-out preferences), set up a schedule for sending the message (immediate or in the future), send the message to multiple e-mail addresses in one ”blast,” and then track the e-mail responses.

Messaging Job Setup Wizard
The following online help topics should help you understand the individual steps for setting up and using the Messaging Job Setup Wizard.
Before You Begin
- Set up the eMarketing System Options
- Set up Message Categories
- Set up Mailing List Types
- Navigate to the Messaging Job Setup Wizard
Step 1: Define the E-Mail Recipient List
- Select the Recipient Type or Mailing List or Use a Query to Select Messaging Job Recipients
- Create an E-Mail Mailing List by Adding Individuals (One at a Time)
- Create an E-Mail Mailing List from Search Results
- Set up the E-mail Opt-Out and Message Category
- Navigate to the Mailing List Profile
- View the List of Mailing List Members
Step 2: Select the E-mail Template
Step 3: Customize the Template
- Customize an E-Mail Message Template
- Add a Template Header
- Remove a Template Header
- Insert Data Merge Fields into Your Correspondence
- Create a Link from the Template to Your Web Page
- Create a Link from the Template to an External Web Page
- Create a Link from the Template to Your Online Store
