Creating Custom Demographic Data Fields
You can create custom demographic data entry fields to record information such as special needs, meal preferences, education level, and so forth. The data fields can be check boxes, text boxes, drop-down lists, or even multi-select fields if you wish and you can decide where they will be accessible such as internal-only or through eWeb as well.
Note: A custom demographic field should only be created when a baseline demographic field is not available for use. For information on baseline demographic fields, view the Enabling Baseline Demographic Data Fields for Individuals and Enabling Baseline Demographic Data Fields for Organizations help topics.
To set up custom demographics you must first define the extra data you want to collect and which type of fields you need on the Demographics Setup form to best collect that data. For example, you can choose to have someone identify themselves as a Volunteer via a check box and also choose to show this check box both internally and on the Web site.
You may specify that the field should be searchable by selecting the Show in Find check boxes.
The examples used in this Help topic are based on Individual custom demographic set up but the concepts expressed are the same for all.
To create a custom demographic data fields for an individual:
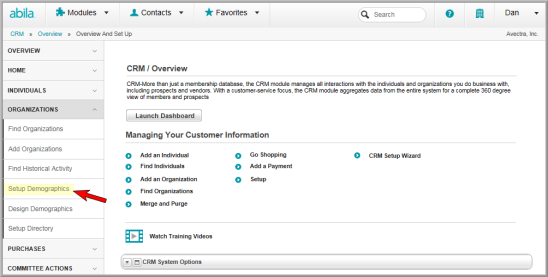
- Hover over the Modules tab in the top navigation bar. In the fly out menu, click CRM.
- On the CRM / Overview page, expand the Organizations group item and click Setup Demographics.
- To create a custom data entry field and caption,
decide what Type of Input
you want for the field. For example:
- CheckBox(Flag): Use this type of field for Yes or No answers. (If check box is selected, Yes. Otherwise, No.)
- DateTextBox(Date): Use this type of field for a date (in MM/DD/YYYY format).
- TextBox(Currency): Use this type of field for a dollar amount. For example, salary amounts (up to 21 characters).
- TextBox(Integer): Use this type of field for whole numbers (up to 8 characters).
- TextBox(String): Use this type of field for text up to 50 characters.
- TextBox(Text): Use this type of field for text, for example, Biography (up to 32,626 characters).
- TextBox(Text)/Multi/Single Select Use this type of field with the Add button to create a list where you can choose more than one option (Multi). Use semi-colons between the drop-down list items. You may also create a drop-down field to allow customers to choose only a single option. (Single)
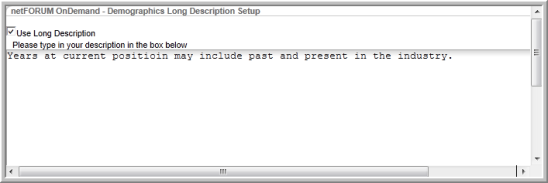
- TextBox(Text)/Long Description Use this type of field with the Long Description button to add a long description to the Demographic Information form.
Note: Certain types of demographics can be sorted in query and report results. Sortable demographic types include CheckBox (Flag), DateTextBox, TextBox (currency), TextBox (string), and TextBox (integer). Example fields for CheckBox and DateTextBox sortable demographics are pictured below For best results, limit sortable demographics to strings of 8 characters or fewer.
- Enter the Caption for the demographic data entry field label.
- Enter an Order number for the data entry field. (This is the order it will appear on the form relative to the other fields.)

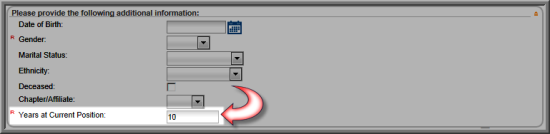
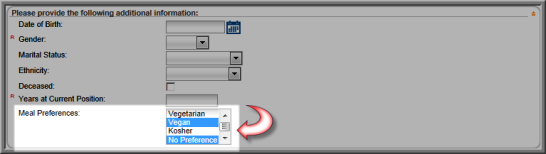
In the example above, a custom demographic called "Years at Current Position", an integer, is being defined. It will be collected/viewed both on iWeb and in eWeb with the Show Internally and Show Externally check boxes selected. It has been assigned to the Individual demographic category so that it may be viewed within an Individual building block should profiles be customized. Further, the Show in Find and Show in External Find check boxes have been selected as well. This means that it may be used as a search parameter as well, such as on iWeb, when a new Individual record is added as seen below. Notice that because the Required check box was selected, this integer field will be required before this record may be saved as well.
Creating a Custom Drop Down Field with Multiple Selections Available
The multi/single select custom demographic field is used to set up a drop-down field where the user may make, and save, several selections. Just as with all demographics, you may specify where this demographic is used (iWeb, eWeb, and so forth).
To set up a multi/single select list as a multi-select field:
- In the Multi/Single Select column, click the Add button next to the demographic field you want to add.
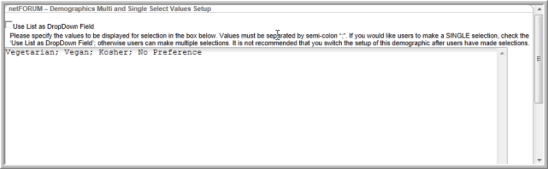
- In the Demographics Multi and Single Select Values Setup window, enter the drop-down list items separated by a semi-colon and then click OK. (Do not click the Use List DropDown Field check box at this time. It is used for a drop down where you may make only one selection at a time. This process is described below.)
- In the Demographics Setup window, click Save.
This selection will convert the multi-select form into a drop-down field where several selections may be made at a time. Use design demographics to arrange how you want your field to appear on iWeb and eWeb.
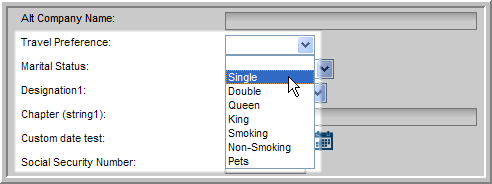
Creating a Custom Drop Down Field with a Single Selection Available
The multi/single select custom demographic field is also used to set up a drop-down field where the user may make only a single selection. Just as with all demographics, you may specify where this demographic is used (iWeb, eWeb, and so forth).
To set up a multi/single select list as a single-select field:
- In the Multi/Single Select column, click the Add button next to the demographic field you want to add.
- In the Demographics Multi and Single Select Values Setup window, make sure the Use List as DropDown Field check box is selected.
- In the Demographics Multi and Single Select Values Setup window, enter the drop-down list items separated by a semi-colon and then click OK.
- In the Demographics Setup window, click Save.
![]()
This selection will convert the multi-select form into a drop-down field where only one selection may be made at a time. Use design demographics to arrange how you want your field to appear on iWeb and eWeb.
Once you have set-up your form into a multi or single selection form, you should not switch between the two options or change your mind – create a new form instead. Data may not render correctly if you flip between the two options.
Creating a Long Description Custom Demographic Caption Field
To set up a Long Description caption:
- In the Long Description column, click the Add button.
- In the Demographics Long Description Setup window, enter the long caption. (To show this information on the Web site, you must select the Show Externally check box.)
- In the Demographics Long Description Setup window, click OK.
- On the Demographics Setup form, click Save.