Customizing a Profile
Note: Only users with administrator rights will have the ability to customize profiles.
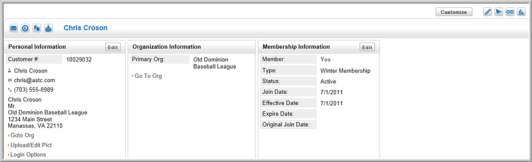
Profiles have two views; the classic view and the customized view. The classic view is the default netFORUM Pro profile view.

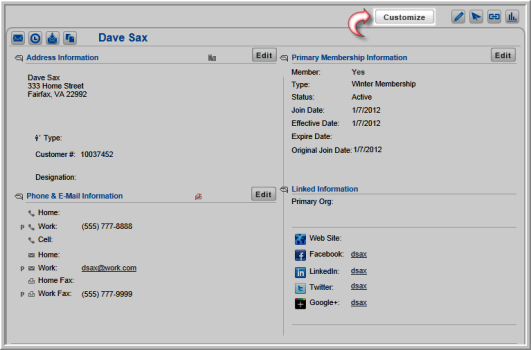
The customized view allows you to select and view only the information that is important to your organization.
Note: Only Individual and Organization Profiles can be customized at this time.
To view a profile in the customized view, complete the following steps:
Important: : Customizing a profile will cause all of the profiles of that type to be viewed in that form for all of your licensed users. For example, customizing an individual profile to only show personal information, organization information, and membership information will cause all individual profiles to only display personal information, organization information, and membership information.
-
Navigate to an individual or organization profile.
-
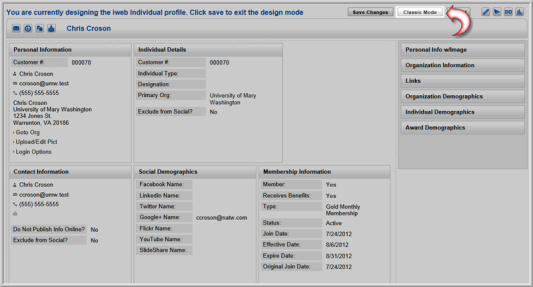
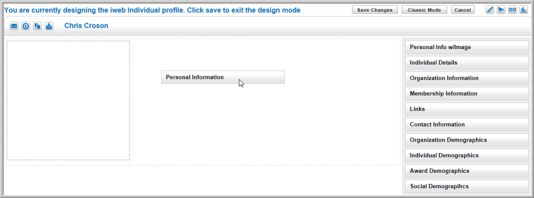
Click the Customize button located at the top of the profile page.
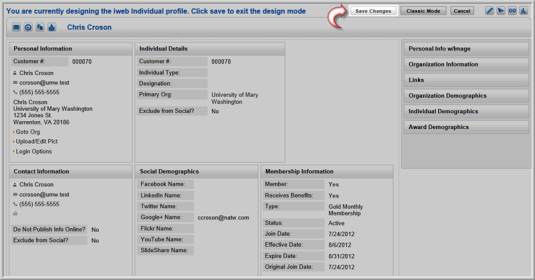
This will open the profile in the design view. The available blocks of information are listed along the right side of the page. This list includes the default blocks of information, which cannot be modified, as well as any custom categories from the demographic form that have been set up.
Tip: Clicking the Save Changes button at the top of the design form will save any changes you have made to the profile and exit the design mode. Clicking the Cancel button will exit the design mode without saving your changes.
The default blocks of information for individual and organization profiles are:
| Individual Profile | Organization Profile |
|
|
Note: If you have set up a custom category for demographics, but you have not assigned any demographic fields to it, it will not show up in the list of available blocks of information for customization of the profile. Further, all new entities by default have all categories assigned to blank categories.
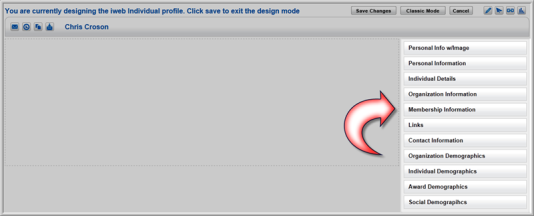
- Drag the first block of information you wish to be visible on the profile onto the canvas on the left side of the page.
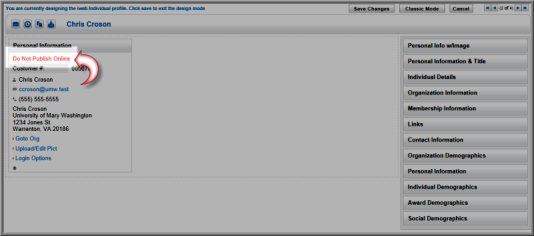
Note: In the image above you will see the default blocks of information listed on the right, followed by four sets of custom demographic categories that have been set up for this entity (Organization Demographics, Award Demographics, Individual Demographics, and Social Demographics.) Any demographics that are left in the General category will not be available for use in customization.
- Release your mouse button and the block of information will snap into the next available content block (shown as a dotted line in the image above.) The data included in the placed block of information will appear.
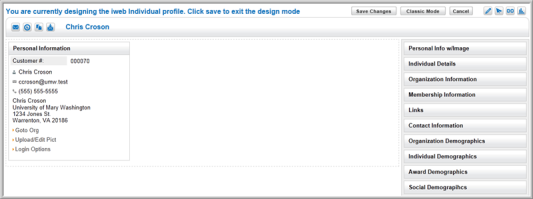
- Repeat steps 3 and 4 until all of the blocks of information you wish to have visible on the profile have been placed.
- You will notice that if the Do Not Publish Info Online checkbox is selected on the profile, it will also appear in the custom block as well in red text.
There is no limit to the number of blocks of information you can place on a profile. These blocks of information will stack side by side for a maximum width of three blocks. When the maximum width is placed, the next block of information will appear below the block on the top left of the profile.
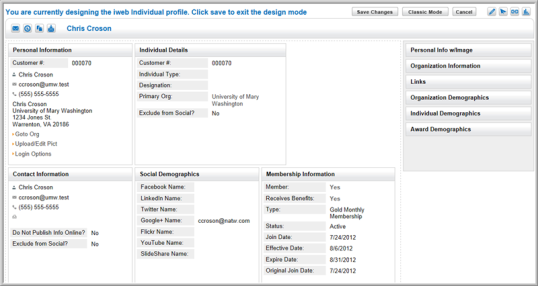
Note: Certain blocks of information are slightly wider than others. This will cause you to only be able to place two blocks side by side before they begin wrapping to the next row. For instance, the Individual Details block of information shown above is slightly wider than the Personal Information block which only allows two blocks to be placed on the first row of the profile.
- Click the Save Changes button located at the top of the page once you have all of the blocks of information you wish to view on the profile placed properly.
Once the changes have been saved, all of the profiles of the type you customized will have this same layout (for instance, in the example above, all individual profiles in this entity will have this same layout.)
Note: Blocks of information can be rearranged on the profile by dragging and dropping the category to a new position on the canvas.
Clicking the Classic Mode button, located at the top of the profile page, will revert all of the profiles of this type back to the standard profile layout.