
You are here: netFORUM Pro Modules > Administration > Access Groups in netFORUM Pro > Adding a User to an Access Group
Adding a User to an Access Group
Before a new employee can start using the system, an administrator must assign the employee to an access group. The access groups are used to determine user privileges, or the level of access users have within netFORUM Pro Pro. There are three access groups: Administrators, (standard) Users, and Express Users.
Only administrators can add an individual to an access group.
To add a user to an Access Group:
- Hover over the Modules tab in the top navigation bar. In the fly-out menu, click Administration. The Administration Overview page will appear.
- Expand the User Management group item.
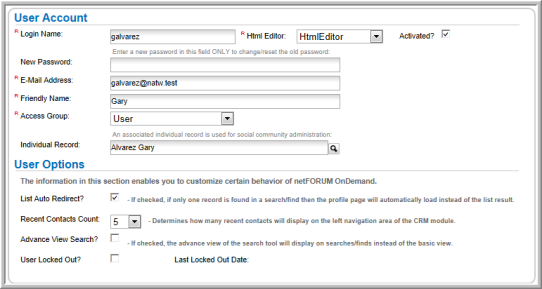
- Click Add User. The User Account information form will load.
- Enter the new user's Login Name (required).
- Select the default text editor for the user account using the HTML Editor drop-down field (required). The user may also change this at a later date on their Home page. View Enabling the Mac HTML Editor help topic.
- Activate the account by clicking the Activated? check box, or leave the check box blank to keep the account deactivated. This is also used in lieu of deleting an account when it is no longer needed. View Activating and Deactivating User Accounts.
- Enter the user's New Password.
- Enter the user's E-mail Address (required).
- Enter a Friendly Name (e.g., first name) for the user (required)
- Expand the Access Group drop-down field and select the appropriate access group (required). Access Groups control the level of rights the new user will have. View Access Groups in netFORUM Pro Pro for more information on each type.
- To link the new user to an existing user in the database, enter part of an individual's name in the Individual Record field or click the lookup magnifying glass icon to search.
- Specify other User Options, as appropriate. User options dictate how netFORUM Pro functionality will behave in certain areas. View Setting Up User Options for more information.
- Click the Save button.