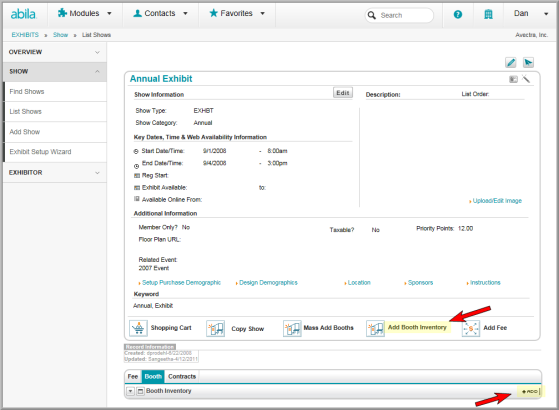
When you add Booth Inventory, you are adding booth numbers (with booth type and category) to an exhibit show.
To add Booth Inventory to an exhibit Show:
- Go to the Exhibit Show Profile.
- Select the Booth tab.
- On the Booth Inventory child form, click Add. (You can also click on the Add Booth Inventory icon.)

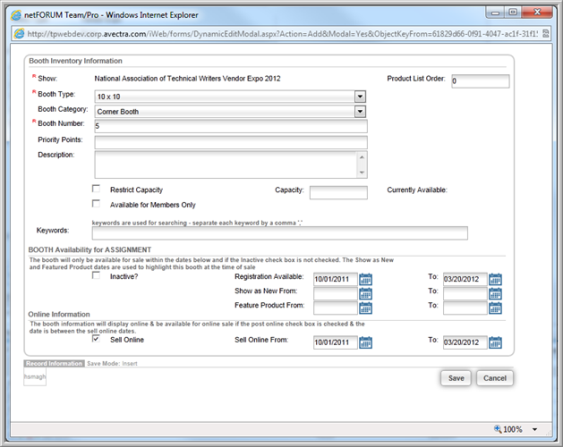
- Enter the Product List Order. The Product List Order determines the order in which the booths will display in the iWeb and eWeb Online Store. If you want your booths to be displayed in a particular order, you must add the correct Product List Order values to each booth to be sold.
Note: If no Product List Order is present, the booth that was created last (or has had the most recent update) will be present at the top of the list. In addition, if two booths have the same Product List Order, the most recently saved/updated booth will be at the top of the list.
- Select the Booth Type.
- Select the Booth Category.
- Enter the Booth Number.
- Enter Priority Points earned for the booth.
- To restrict the number of booths for sale, select the Restrict Capacity check box and enter the number of available booths in the Capacity field.
- To sell booths to members only, select the Available for Members Only check box.
- To allow people to add their name to a wait list if the booths sell out, select the Allow Waitlist check box.
- To add search words for the Web Site, enter Keywords.
- In the Registration Available fields, enter the dates that will determine when the Exhibit Show Contract will be available through the Shopping Cart.
- Select the Sell Online check box if you want the Exhibit Show Contract to be available through the Online Store.
- Enter the Sell Online Dates. (These dates determine when the Exhibit Show Contract will be available through the Online Store.)
- Click Save.

