You can upload speaker presentations (e.g., Microsoft Word documents) to your server.
Note: Upload size limit for each document is 2MB.
To upload a speaker's document:
- Go to the Speaker Profile.
- Select the Speaker Document tab.
- On the Documents
child form, click the Add
 button.
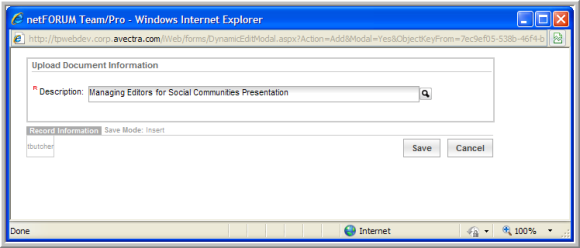
 - In the Upload Document
Information window, click the Upload
 button.

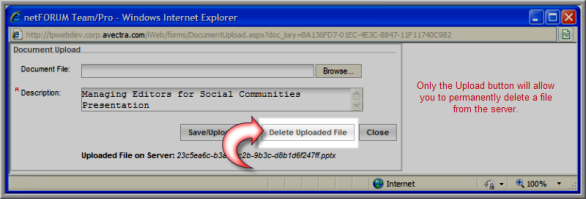
- In the Document Upload window, click the Browse button to search for the file that you want to upload.
- In the Choose File window, select the document and click Open.
- This populates the Document File field in the Document Upload window. Enter the document Description (required).

- Click the Save/Upload File button. This closes the Document Upload window and uploads the document to the server.
- The document description displays in the Description field of the Upload Document Information window.
- If you are satisfied with the upload, click Save.

- The document displays on the Speaker Profile, Documents child form (under the Speaker Document tab).

On the Documents child form:
- The Edit
 icon next to the document allows you to upload a new document, choose
a new document from the server to use in place of the current document,
or delete the document currently assigned to this speaker and child
form (but not entirely from the server which means it may always be
accessed at a later date).
 - The Delete
 icon allows you to delete the document from the Speaker
Profile, Documents
child form. Similar to the Edit
button, it does not delete the document from the server permanently
which means it may be accessed at a later date.
 - The Upload
 button allows you to upload a new document (similar to the Edit icon).
However, the Upload button also allows you to permanently
delete the document from the server. This means it will no longer
be accessible through the Look-up
  functionality until it is uploaded once more.

View Enabling Speaker Information Online for details on how customers view speaker sessions, biographies, and presentations on eWeb.
