
Group Registration is available for events that are specifically set up for group registration. (See Setting Up Group Registration.)
When an event is set up for group registration, there are three registration authorization scenarios to choose from:
Note: One of these options must be selected when the event is set up.
- Any individual linked to an organization can register a group of individuals (employees) linked to the organization.
- Only primary contacts can register a group of individuals linked to the organization
- Individuals with a specific relationship type to the organization can register a group of individuals linked to the organization.
Using the Group Registration Wizard to Register a Group for an Event
To register a group for an event:
- Go to the Event Profile.
- Click the Register
icon to register an Individual
and the Group Reg icon to
register a Group for an Organization. You can
also click the Actions
 icon to expand
the Actions menu
and select these same options.
icon to expand
the Actions menu
and select these same options.

- In the Organization Name field, enter part of the organization's name and click the Lookup button to insert the full name into the field. Once the customer is selected, click the Next button to continue with the Group Registration Wizard.

- In the Group Registration Wizard, select the appropriate Fee Type for the organization. You may also choose among early, regular, and late registration fees if available. Click the Next button when finished.
Note: If an individual tries to register for an event for which they are already registered, and the event does not allow duplicate registrations, the individual can't register. A message displays stating registration has already been made and the Next button will be unavailable.

- Select the check boxes next to the names of the individuals (linked to the organization) who will attend the event. Sort by clicking on column headers if necessary. Also note that if the organization has many employees, you may need to click a Page number to go to the next page of names.
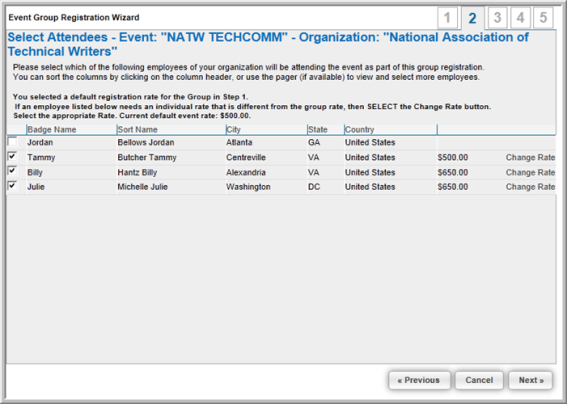
Note: Click Change Rate to change an individual registration rate from the default registration rate. A lists of rates, with the rate name, displays.
- Registration information automatically populates for the employees selected. However, if you have set-up event demographics, such as a meal preference, you will need to make those selections. Click the Next button to proceed.

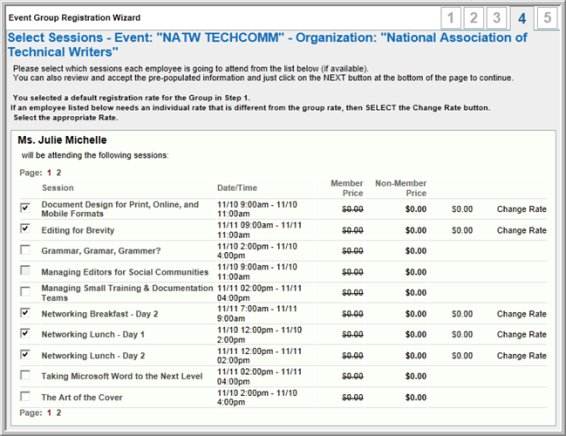
- Select each attendee's sessions that they will attend (if sessions have been set-up for this event). Note that conflicting sessions will be dimmed out. Further, some sessions may appear on subsequent pages if several sessions have been set-up for the event. Click the Next button to proceed.
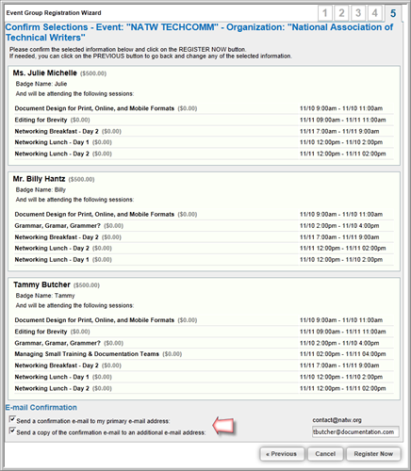
- Confirm the session selections and the badge information for each individual. You may also select to send a confirmation e-mail to the primary contact for the organization as well as to another individual by selecting the appropriate check boxes in the E-mail Confirmation section of the page. When you are done, click the Register Now button.
- In the Shopping Cart, you are able to make changes to the cart by clicking the Update Cart link, cancel the registration by clicking the Empty Cart icon, apply a Discount Code, apply a Source Code, or return to the Online Store by clicking the Continue Shopping button..
To complete the payment process for the registration, click the Proceed to Checkout. button.

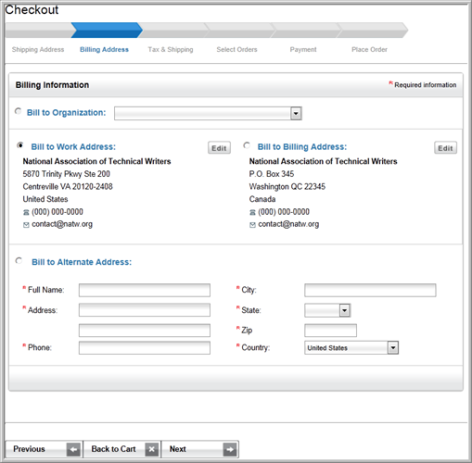
When you set up an event, you can choose to add Bill to Organization to the online payment options. This option allows a Primary Contact person to register individuals for an event and have the invoices recorded on the Organization Profile . If an event is not initially set up with the Bill to Organization option selected, this option will not be available during Online Registration.
This option is only available to the Primary Contacts for an organization. If the Bill to Organization option is not set up for an event, or if the individual is not the Primary Contact for an organization, the customer must register and pay for the event registration with their own credit card and "expense it," or they can select the Bill Me option and submit the bill to the organization.
- Enter the Billing Information and then click the Next button.
If the organization has any outstanding orders/invoices that have not been paid, they will be displayed on the Previous Orders/Invoices page.
- Click the checkbox next to the order(s)/invoice(s) you would like to include in this checkout process and click the Next button to proceed.

-
Select the Payment Method and then click the Next button.
Note: The Payment Method you choose will spawn additional fields specific to that payment method. You must complete all of the required fields for the selected payment method to continue.

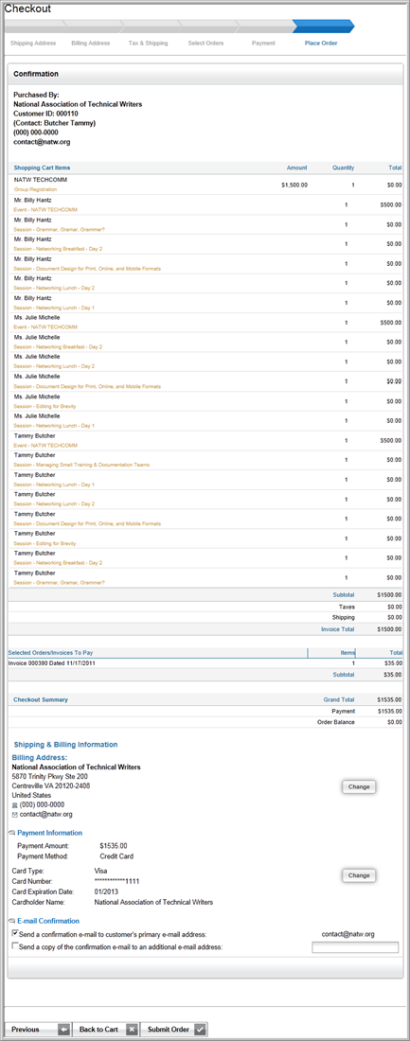
The Confirmation page lists each line item in the Shopping Cart. After the listing of the line items, any additional orders or invoices that you elected to pay will be listed followed by the total for this order.
You may change the Billing Address and/or Payment Information if needed by clicking on the appropriate Change button.
You may also elect to send an E-mail Confirmation to the primary contact for the organization and/or another e-mail address by clicking the appropriate check box(es). If you decide to send an additional e-mail, you must provide that e-mail address in the corresponding field.
-
When the information is correct, click the Submit Order button.
Note: If a confirmation template is linked to the event on the Event Profile, each registrant that is part of the group will receive a confirmation e-mail. The individual registering the group will receive the purchase confirmation if a primary e-mail address is indicated.
When registering a group using the Event Registration Wizard you will now see each individual that has been registered as part of that group is detailed on a separate line item on the Purchase Confirmation screen. Notice on the Checkout Summary below that the Registration Fee that is charged for each individual (and that contributes to the Invoice Total) is also detailed. The email received for a group registration will contain similar information for all group registrants.
After the order is submitted you will be taken to the Shopping Confirmation page that provides a shopping confirmation number. In addition, you can print your receipt by clicking the Printer Friendly Version button located at the bottom of the page. Once the purchase is complete, the group registration will appear on the Organization's Profile, Group Registrations child form.
Viewing the Individual Event Registrations for an Organization
To view the individual event registrations for an organization:
-
Select the Activities tab.
-
On the Group Registrations child form, click the GoTo
 arrow to go to the Group Registration
Profile.
arrow to go to the Group Registration
Profile.

-
To view the list of employees registered for the event, click the List Registrants icon to open the List - Event Registrant page.
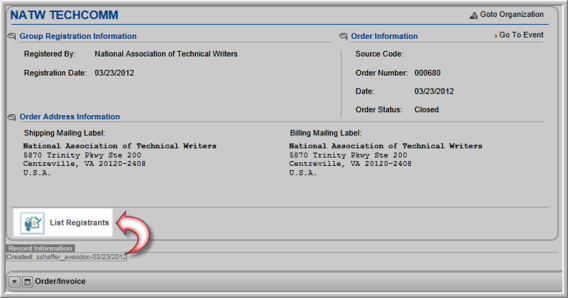
The List - Event Registrants page shows the individuals of this organization who are registered for the event. The list shows the badge name and other details.

Viewing All of the Group Registrations for an Event
To view all of the group registrations for an event:
-
Click on the Group Reg tab. The organizations with group registrations show on the Group Registrations child form.

You may also register a group for an event using individual registration fees. View the Registering a Group for an Event Using Individual Event Registration Fees help topic for full details on this feature.