
Setting up Subscriptions
Adding a Subscription
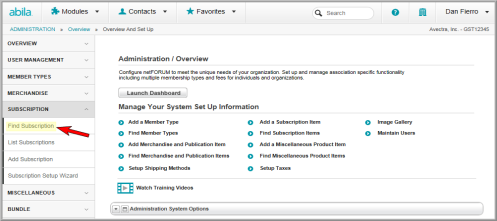
- Hover over the Modules tab in the top navigation bar. In the fly out menu, click Administration. The Administration Overview page will appear.
- Expand the Subscription group item and click Add Subscription.
This will open the Subscription Information pop-up window. This window is divided into four sections:
- Subscription
- Subscription Availability for Sale.
- Online Information.
- Subscription Issues.
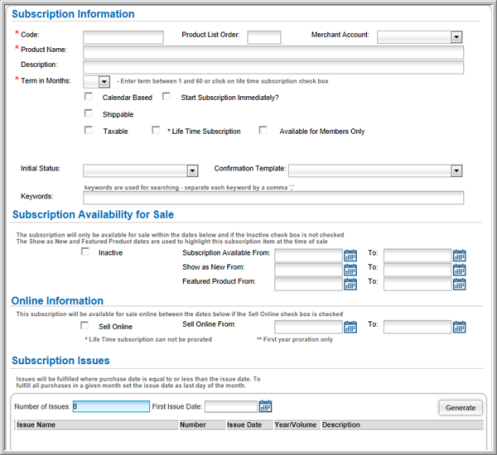
Each of these sections is discussed in detail below. To save the subscription profile, required fields must be completed and you must click the Save button at the bottom of the page.
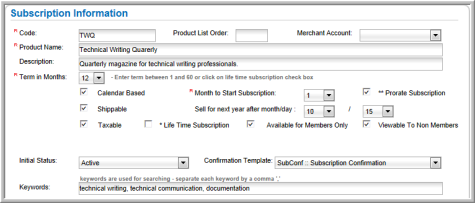
Adding Subscription Information
- Enter the subscription code in the Code field.
- To control the order in which the Subscription will appear relative to other products in the shopping cart, enter the order number in the Product List Order field.
- If you are using more than one Merchant Account, select which account the sale of this Subscription should divert the funds to upon purchase.
- Enter the name of the subscription in the Product Name field.
- Enter a short description of the subscription in the Description field.
- Expand the Term Months drop down menu and select the length of the subscription (1 to 60 months).
- Select the Calendar Based check box if this subscription is published on a calendar basis (weekly, monthly, annually.) Once this check box is clicked, several options specific to calendar based subscriptions become available.
- Enter the Month to Start Subscription (required).
- If the subscription can be prorated, click the Prorate Subscription check box.
- Enter the Sell for next year after month/day dates.
-
If the Calendar Based check box is NOT clicked, click the Start Subscription Immediately? check box to set up an anniversary based subscription (not available if you have Calendar Based selected). Similar to anniversary memberships, subscriptions with this check box clicked reflect a "true" anniversary expiration date as opposed to a calendar-based subscription. This means that subscriptions start immediately on the purchase date and the expire date then becomes one year minus one day. For example, if a purchase is made on 4/20/2012 the expiration date is 4/19/2013.
Important: In order to make the subscription effective for 365 days, starting on the day of the purchase and not on the first day of the following month after the purchase, the AnniversarySubscriberCalendarExpireDateFlag system option must be set to "1". To enable this system option, navigate to the Administration module, Overview page. For more information on enabling Administration module system options, view the help topic Administration System Options.
- Click the Shippable check box if this subscription will be delivered by mail.
- Click the Taxable check box if this subscription will have tax applied upon purchase.
- If there is no expiration date for this subscription, click the Life Time Subscription check box.
- Click the Available for Members Only check box if this subscription is only available to members of the association.
- Click the Viewable to Non Members check box if this subscription can be seen (but not purchased) by non-members in the shopping cart
- Expand the Initial Status drop-down menu to select the status for the subscription once it is purchased.
- Expand the Confirmation Template drop-down menu and select the confirmation template you wish to send to those who purchase this subscription. Only E-marketing templates with the recipient type of subscriber or subscription are displayed in this drop-down menu.
- Enter any Keywords that may help individuals find this subscription in the online store.
Adding Subscription Availability for Sale Information
- Click the Inactive check box if the subscription is no longer active and available.
- Use the calendar control to select the Subscription Available From / To dates.
- Use the calendar control to select the Show as New From / To dates.
- Use the calendar control to select the Featured Product From / To dates.
You can also manually enter dates in these fields using the MM/DD/YYYY format.

Adding Online Information
- Click the Sell Online check box to make this subscription available for sale in the Online Store.
- Use the calendar control to select the Sell Online From / To dates. These dates can also be entered manually using the MM/DD/YYYY format.

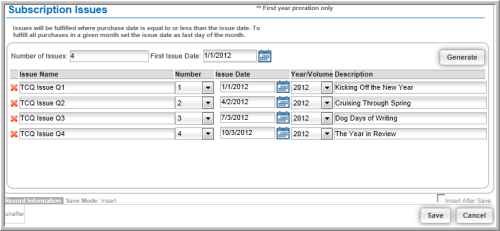
Generating Issues for the Subscription
- Enter the number of issues you expect to fulfill based on the subscription term in months in the Number of Issues field. For example, you could enter 12 Issues for a 12-month term or 4 Issues if it's a quarterly subscription.
- Enter the date the first issue should be fulfilled in the First Issue Date field. All subsequent fulfillment dates will be generated and based on this date.
- Click the Generate button. The number of issues specified in the Number of Issues field will be generated.

- Once issues have been generated, you may wish to update the Issue Name, Number, Issue Date, Year/Volume and Description fields in the grid into more meaningful data to better track each Issue as it is fulfilled.
- Click the Save button to save your new subscription.
- Add a price to the subscription before it will be available for sale.