
Setting Up Authorize.Net as a Payment Processing Option
Authorize.net Account Options
In addition to the option to use PayPal for payment processing, Abila offers a third option: Authorize.net. Account options for Authorize.net include:
- $99 Setup
- $17.95/month
- .10/transaction
- $9.95/month
- .25/transaction
- 2.19% Qualified Rate($25 Monthly Minimum)
netFORUM Pro clients must have an active Authorize.net account to use this integration. To inquire about an Authorize.Net account, refer to the Authorize.net website.
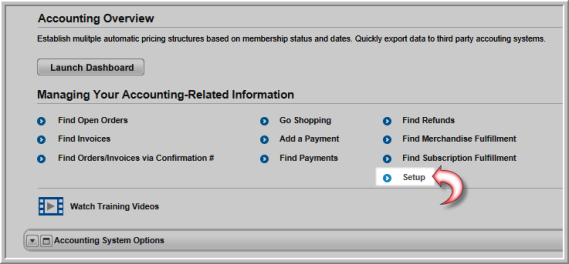
To modify your Payment Processing Setup:
- Click the Accounting hyperlink on the Module Menu to launch the Accounting module.
- On the Accounting Overview page, click Setup.
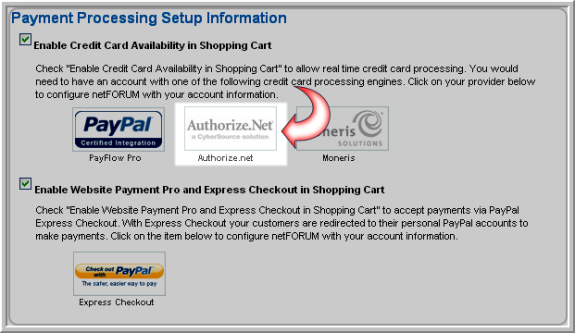
- Click the expand
 button to expand the Payment Processing Setup child form.

- Click the edit
 icon next to the Payment Processing Setup for your association. This will open the Payment Processing Setup Information window.
 - To set up Authorize.net as a payment processing option, click the Authorize.net icon.
- This will launch the Authorize.net information window. This window displays only the fields necessary to enable the Authorize.net payment processor option. Enter an API Login (x_login) name. (You can obtain this login name from your Authorize.net account.)
- Enter a Transaction Key. (You can find this on your Authorize.net account.)
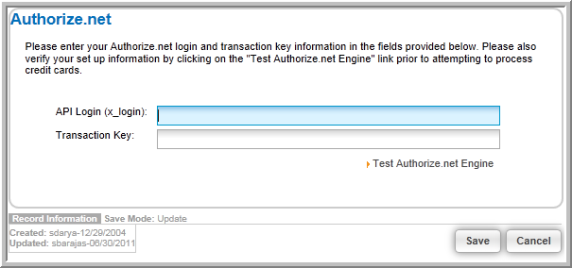
- Click Save
- Once the data has been saved, please note that you should verify your set-up information before attempting to process credit cards by clicking the Test Authorize.net Engine link in the Authorize.net window. You should receive a number 2 error message indicating that the transaction has been declined, as displayed in the image below.
This test cannot be performed until you have first completed and Saved your information. (Your password field will appear blank when you re-enter set up to run this test. This is normal.)
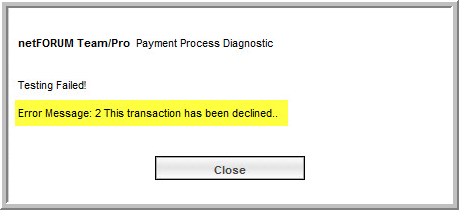
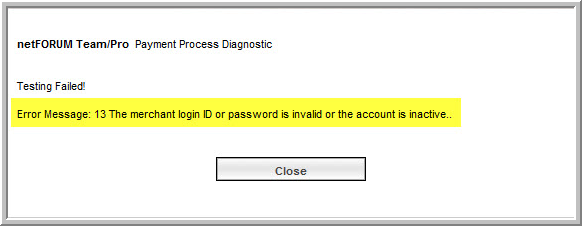
Please note that, although the error message in the screen shot above indicates that your API Login and transaction key were successful, other error messages do indicate an error. For example, error message number 13 in the image below indicates that the login ID or password entered is invalid, or that the Authorize.net account is inactive. For a list of more Authorize.net error messages, please see the Response Reason Codes and Response Reason Text page on the Authorize.net Web site.
Tip: Enable Website Payment Pro so that customers can also use their personal PayPal account to check out. See Setting Up Payment Processing Options for information.