The
Note: The Event Setup Wizard is designed to help simplify adding the event however, not all attributes of the event will be available in the wizard. For example, you will still need to use the Event Profile to add tracks, rooms/locations, and registration demographics.
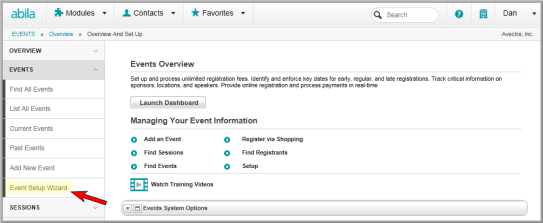
The Event Setup Wizard is found on the Events Overview page under the Events Group Item.
Complete the following steps to add a new event using the Event Setup Wizard:
- Click the Event Setup Wizard link.
-
Complete the fields for Step 1. It includes most of the required information for the event including the event title, event type, and start and end dates. Registration dates are also entered in this step. Step 1 is seen in the image below.
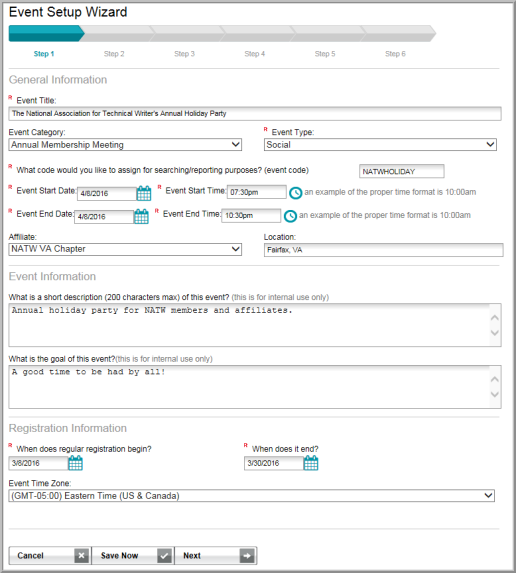
- Once you have completed the fields in Step 1, click the Next button to continue to Step 2 of the setup wizard.
Note: Note, at any point during the setup process you may click the Save Now button to save your event. This will allow you to return to the wizard (from the Event Profile) and complete your event setup at a later time from the point that you saved.
-
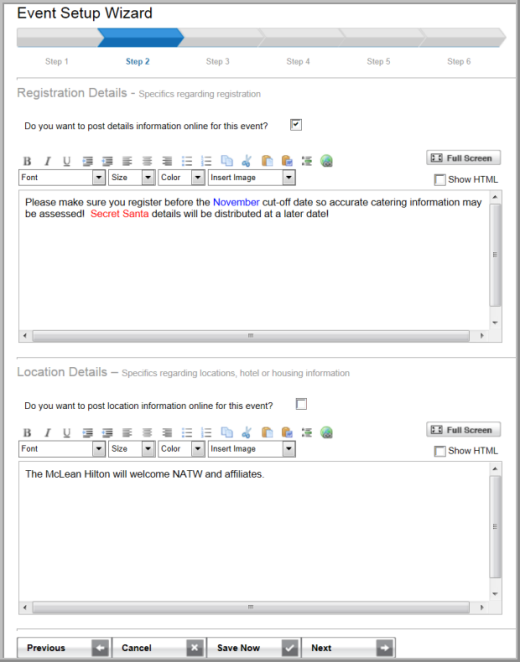
Step 2 enables you to complete online details and descriptions for your event. Information that you enter here will appear on the Upcoming Events page of your Web site including locations, speakers, and sponsor information. Notice that the Do you want to post information online for this event? checkbox is available for all fields as well as WYSWYG controls you are used to. Once you have entered all information for Step 2, click the Next button to continue. The image below shows a partial view of Step 2.
-
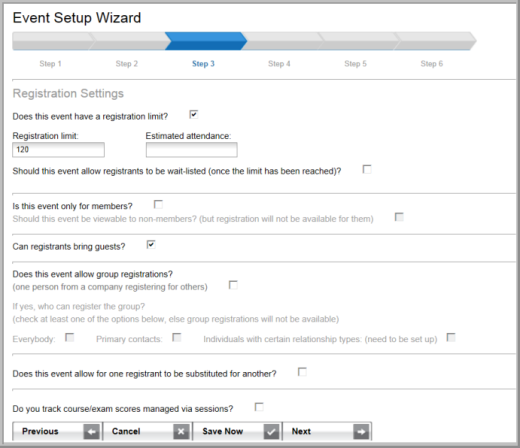
Step 3 contains the registration setting attributes you must specify for registration for your event such as capacity, guest and group registration, and score tracking. This is seen in the image below. Once you have decided on registration settings for your event, click the Next button to continue.
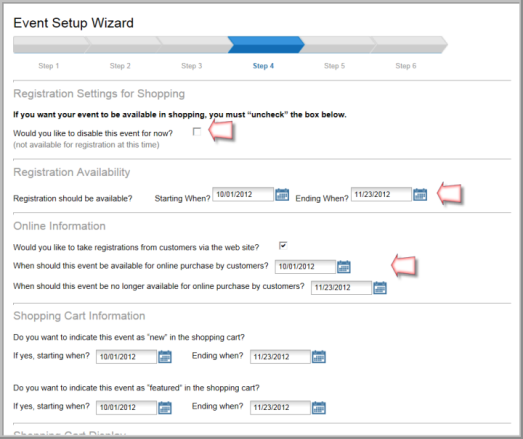
- Step 4, a partial image seen below, allows you to specify how and when you want your event to appear on eWeb in the Online Store.
- By default, the event will be available in the Online Store. To remove it from the Online Store, you must check the Would you like to disable this event for now? (not available for registration at this time) checkbox. You may also specify the dates for the event to display as a new or featured product by entering dates in the appropriate If yes, starting when? and Ending when? fields.
- You can also, as usual, specify how long it will appear in the Online Store by entering the desired dates in the When should this event be available for purchase by customers? and When should this event be no longer available for online purchase by customers? fields.
- The next step in adding your event is adding the fees to the event, if applicable.
- If the event is a free event and the Is this event Free? checkbox was selected on the previous step, this step will be skipped. Checking this box will allow you to bypass the fee setup screen and complete your event creation process.
- If the event is not free and fees will need to be added, do not check the Is this event Free? checkbox. This is the default setting.
Note: When adding the charge codes for your fees you must remember to include Early Registration, Regular Registration, and Late Registration fees for both Members and Non-Members.
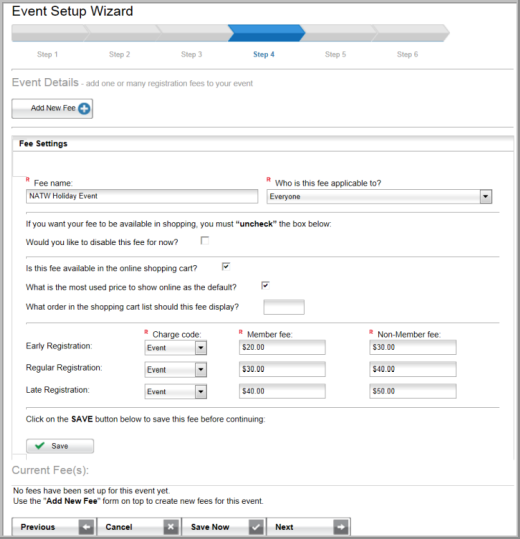
- After adding all of the charge codes for this fee to the Registration fees form, click the Save button (located in the center of the screen.) You will be taken to a confirmation screen showing your newly added fee.
-
If you wish to add additional fees, click the Add New Fee link located at the top of Registration fees screen. Remember, to click the Save button (located in the center of the screen) each time you add a new fee.
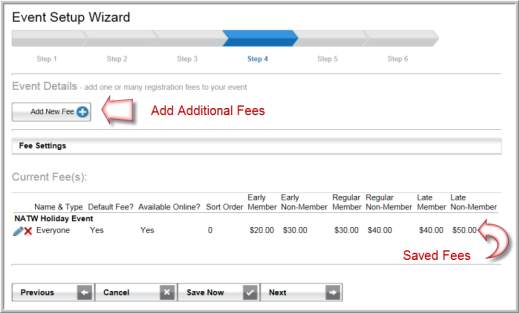
- After you have completed adding your fees to the new event, click the Next button. Step 5: Event Sessions is where you can add or remove sessions from your event.
You will notice that this page contains space for each day of your event. The dates used here are the dates you entered when you specified the dates of your event during Step 1 of the event creation process.
- Click the Add New Session button next to the date you wish to schedule the session. This will open a session editing screen that allows you to input the basic information for this session.
- Enter the title of the session in the Session Title field. (Required)
- Enter the type of session in the Session Type field. (Required)
-
Select the event track this session is in from the Session Track drop-down menu.
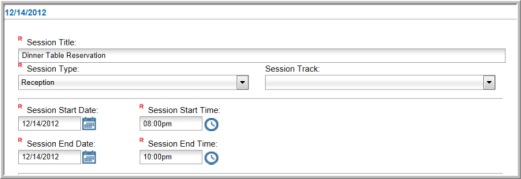
-
The Session Start Date field will be pre-populated based on the date you selected from the initial Step 5 screen. You are not required to make a change to this field, however this field is required to have a date displayed. (Required)
Changing this date will move it to a date different from the one you selected earlier in this process.
- Enter the start time for the session in the Session Start Time field. (Required)
- Enter the end date for the session in the Session End Date field. This field is also pre-populated based on the date you selected earlier in this process. You are not required to change this date, however a date must be displayed in this field. (Required)
- Enter the end time of the session in the Session End Time field. (Required)
- If you would like to disable this session from being visible in Shopping, you must check the Would you like to disable this session for now? checkbox. If you would like it to be available, leave this box unchecked. (Optional)
- Enter the order you would like this session to display in a list of sessions in the What order in the shopping cart list should this session display? field. (Optional)
- If you would like to be able to take registrations from eWeb, check the Would you like to take registrations from customers via the web site? checkbox. (Optional)
- Set the date this session should be available for online purchase by entering a date in the When should this session be available for online purchase by customers? field. (Optional)
- Set the date when this session should no longer be available for online purchase by entering a date in the When should this session be no longer available for online purchase by customers? field. (Optional)
-
Click the Save button. Your Event Sessions page in the Event Setup Wizard will refresh and you will see your new session added on the date you chose.
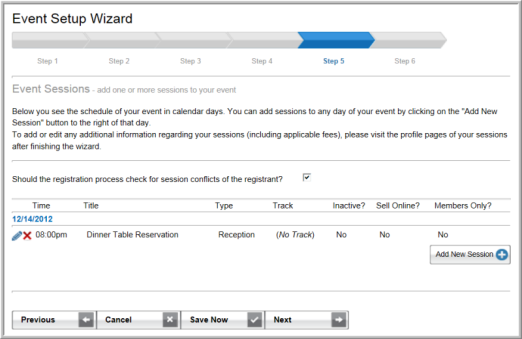
To continue adding sessions to your schedule, click the Add New Session button next to the date to which you wish to add the session. Note, you are able to add more than one session per day.
You must click the Save Now button to save the session(s) you just added. If you only click the Save button and close the Event Setup Wizard, your session(s) will not be saved.
When you click the Save Now button, you will be taken to the Event Profile page. Here you can expand the Sessions child form to view the sessions you have added to this event.
- Click the Next button to continue. This will take you to the confirmation screen informing you that your event has been set up successfully and giving you information on how to locate your event within netFORUM.
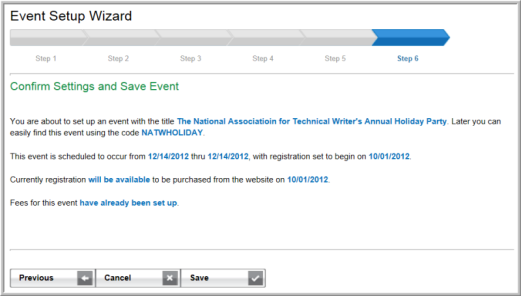
-
Click the Save button. You will be taken to a final confirmation screen that provides an easy link to the full Event Profile page for this event.
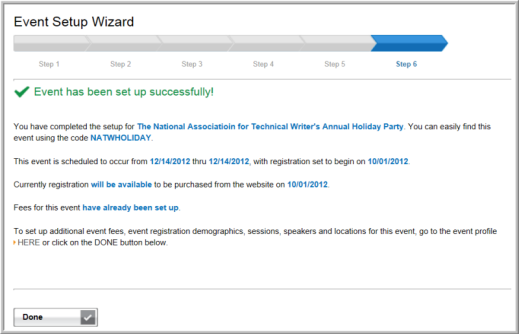
- Click the Done button. You will be taken to the full Event Profile page for this event.
Price attributes and distribution must set up on the Event Profile, Registration Fees child form.
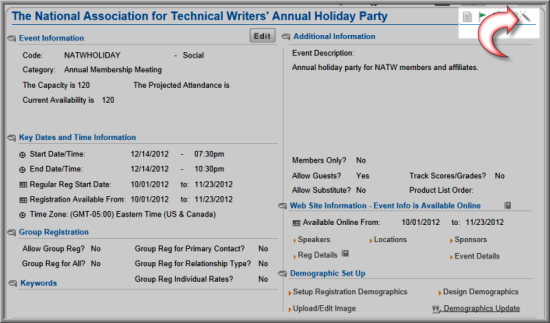
If you would like to return to the Event Setup Wizard for your event, click the Event Wizard ![]() button located in the upper right corner of the Event Profile.
button located in the upper right corner of the Event Profile.